
Start your gaming PC setup with the screen connected to the graphics card, then finish Windows updates and check the display settings. Try one game before adding performance tweaks, recording tools or a large game library.
These steps are for an assembled desktop with Windows installed. If yours still needs parts fitted or an operating system, follow the gaming PC assembly steps first. Return once you can reach the Windows desktop.
Connect the screen, keyboard and network
Put the tower where air can flow in and out, with the space its manual calls for. Remove the outside packaging, then follow the seller's instructions for any shipping material inside the case before turning it on.
If your PC has a separate graphics card, connect the screen to the graphics card's display outputs. These sit on the card's bracket at the back of the case. The motherboard's video sockets sit with its other rear connections.
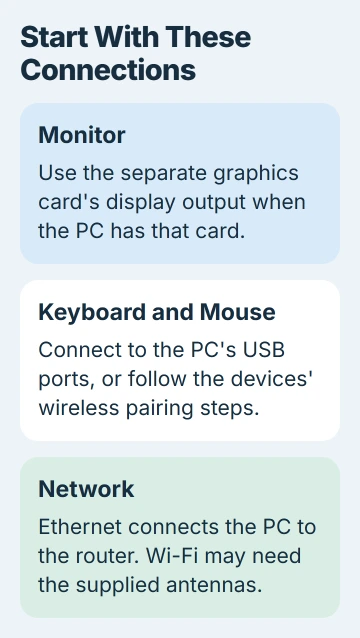
The positions vary with the case and card, so check your PC's setup diagram to find the right sockets. Select the matching input on the monitor and connect power to both the tower and screen.
Connect your keyboard and mouse. Use Ethernet to connect to the router, or join your home Wi-Fi during Windows setup. Attach the antennas supplied for the PC's Wi-Fi adapter first if it needs them.
If the screen stays blank, check its input and where the video cable is plugged in before changing parts. Using an unavailable motherboard output can leave your working graphics card with no screen attached.
Finish Windows setup and let updates complete
Follow the Windows setup screens to choose your region, keyboard and account. Choose the keyboard layout that fits the keys you're using. The wrong layout can make passwords hard to enter even when the keyboard works.
Once the desktop opens, go to Settings > Windows Update > Check for updates. Install the updates and restart when asked. Open the page again afterward to check whether more updates are waiting.
Microsoft's Windows update instructions explain that route. Let updates finish before judging game performance or download speeds; they may still be using your connection and storage.
Open Settings > System > Activation and check the activation status. If a prebuilt was sold with Windows but isn't activated, contact the seller with the purchase details rather than buying another license immediately.
Install the graphics driver for your exact card and Windows version through Windows Update or the card maker's software. If other drivers are missing on a prebuilt PC, follow the support instructions for your model.
I'd get the desktop working properly before installing tuning tools. It's easier to check sound, networking and the screen before a dozen extra programs start with Windows.
Set the monitor's resolution and refresh rate
Open Settings > System > Display. If more than one screen appears, choose your gaming screen, then select its recommended display resolution. Resolution is the number of pixels used to draw the picture.
Open Advanced display and check Choose a refresh rate. Pick a rate supported at the resolution you intend to use. Refresh rate, measured in hertz, is how often the screen can update each second.
The refresh-rate controls show what your screen and connection support. Even a high-refresh monitor may not have its highest rate selected.
Some rates have an asterisk. Choosing one also changes the resolution, so check the picture size before accepting it. The higher refresh rate could leave the image less sharp.
If a rate you expect is missing, check the monitor manual, graphics output and cable requirements together. When choosing a screen, the gaming monitor guide explains why the connection matters too.
Check small text and scroll around before opening a game. Once the desktop looks comfortable, you'll have a display mode you can compare with the game's own settings.
For a Surface instead of a tower, check its gaming limits by processor, especially on Snapdragon configurations.
Choose the sound output before connecting voice chat
Click the taskbar's sound controls and choose where you want sound to play. A monitor with speakers, a USB headset and speakers plugged into the tower can each appear as a separate device.
On Windows 11, open Settings > System > Sound to see the output and input lists. Play some audio, then use the microphone's test option to check that the selected microphone picks up your voice.
A headset plugged into a controller or USB adapter can appear under that adapter's name. If sound works in Windows but not in a game, check the game's output choice before reconnecting everything.
For voice chat, select that same microphone in the chat app. The app may remember a different input from Windows. Hearing sound from your speakers doesn't mean the right microphone is selected.
Keep speaker volume low enough to hear the test clearly while setting up a microphone. If the output is still absent, use the Windows sound checks before changing game audio settings.
Install one game and check its own settings
Install the game through the official store or launcher where you own it. Sign in to that account, choose the installation drive and let downloads and updates finish before you start playing.
In The Division 2, add the Ubisoft friend before sending a group invite so account friendship is already accepted.
When Solo Leveling stays at login, check the browser permission and its return to the PC client before changing graphics options.
Check Settings > System > Storage if space is tight. A game's download size can differ from the space it needs to install or update. Check the installer's current space requirement for that game.
For the Japanese edition of Umamusume, use its official Windows installation route and check regional availability first.
Start with the game's recommended or automatic graphics preset. Check its monitor, resolution, sound output and input device. Play a section you can repeat before changing several options at once.
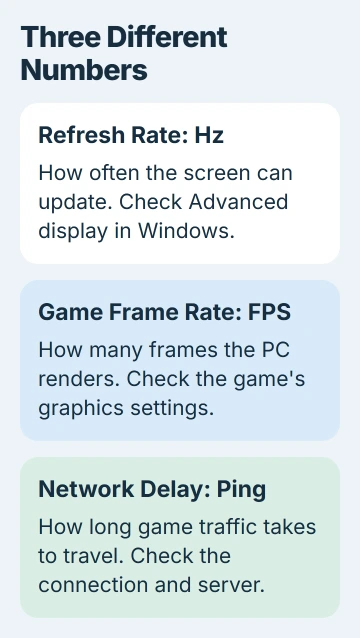
The screen's refresh rate and the game's frames per second are different numbers. A 144 Hz screen can update frequently, but it doesn't make your PC draw 144 new frames each second in every game.
For an online game, delayed responses and uneven motion can also involve the network. The game connection guide helps separate network delay from graphics performance.
Add optional features after the first session works
For compatible windowed or borderless games, open Settings > System > Display > Graphics and look for Optimizations for windowed games. Restart the game after changing that option.
The windowed-game setting applies to compatible games using DirectX versions 10 or 11. DirectX is graphics technology used by games; the switch isn't a universal speed boost.
For a game running on the wrong graphics processor, open its entry in Graphics settings. On a PC with multiple GPUs, or graphics processors, check the performance preference, choose the one you want and save. Relaunch the game afterward.
Add tools for recording, streaming and customizing connected devices when you need them. If a problem starts after adding a tool, try the same game without it before changing unrelated settings.
If the PC crashes, overheats or loses video during ordinary play, contact the builder or hardware maker. Include the game, display mode and exact problem. Get support for repeated crashes before trying more aggressive tuning.
The Short Version
Use the separate graphics card's output for the screen, finish Windows updates and check the display mode and sound. Install one game, review its options and play before adding optional utilities or performance changes.
Checked November 5, 2026.

Isaac Smith is the founder and editor of PC Glance, a website that covers computers, laptops, and technology. He is a tech enthusiast and a computer geek who loves to share his insights and help his readers make smart choices when buying tech gadgets or laptops. He is always curious and updated about the latest tech trends.