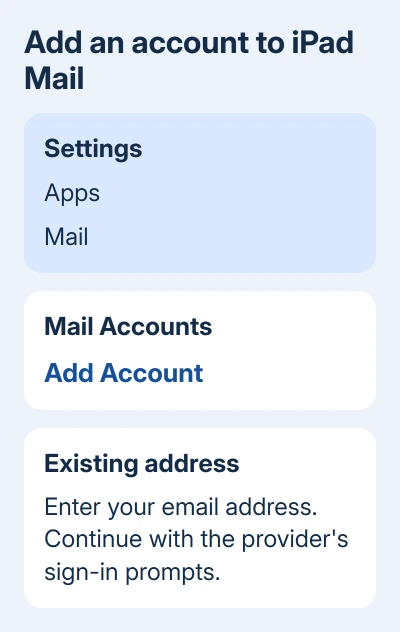
Add an existing address to iPad Mail through Settings > Apps > Mail > Mail Accounts > Add Account. Sign in with that address when prompted. A smaller provider may need incoming and outgoing server details.
This connects an account you already have. It doesn't create a new Gmail, Outlook or other email address, and signing the iPad into an Apple Account doesn't automatically add every other mailbox you use.
In this guide
Have the account details ready before starting
Use the full email address and its current password. For a mailbox issued by work or school, have your normal sign-in approval method available too. Your provider can ask for a security code or approval while the iPad adds the account.
Apple says its email setup process separates automatic setup from manual setup. Start with the provider's sign-in option when it's offered rather than guessing server names for a common service.
A company email address doesn't always reveal which service runs it. An address ending in your company's name could use Microsoft Exchange, Google or another provider. Ask IT which account type to choose if that isn't clear.
For a mailbox from an internet provider or website host, get its current Mail setup instructions before you start. You may need the account username, incoming server, outgoing server and the security settings the provider specifies.
I'd use the automatic route first whenever Mail recognizes the provider. It takes you through the service's sign-in process, with no server addresses to mistype.
Add a common provider through Settings
- Open Settings, then choose Apps > Mail.
- Tap Mail Accounts, followed by Add Account.
- Enter your email address and tap Next. If needed, use choose from a list to select the service.
- Follow the provider's prompts, enter the password and complete any requested verification.
- If Mail shows Next, tap it and wait for verification. Finish with Save when offered.
The account should then appear in Mail Accounts. Open its settings and check that Mail is enabled if the account offers switches for several kinds of data.
On older iPadOS versions before the Apps settings category, look under Settings > Mail > Accounts > Add Account. The missing Apps category is a version difference, not a reason to reset the iPad.
Depending on the account, setup can offer contacts, calendars or other data as well as email. Select the services you actually want on this iPad. Mail can work without making this address your source for every other app.
For an iPad managed by your workplace or school, follow its enrollment instructions. If IT requires its own app or account profile, you may need to add that mailbox through those instead.
Enter server details only when automatic setup fails
From Add Account, enter the address and continue. Choose Add Other Account > Mail Account when the provider isn't listed. Fill in your name, email address, password and an account description, then tap Next.
Mail tries to locate the settings. If it succeeds, finish with Done. If it can't locate them, continue to the manual server form rather than repeatedly submitting the same details.
Choose IMAP or POP according to the provider's instructions. IMAP keeps a mailbox synchronized across your devices; POP handles downloading differently. Ask the provider when its instructions don't specify which to choose.
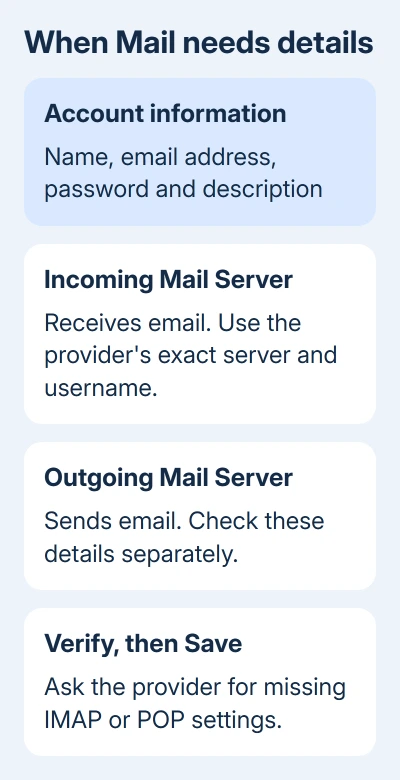
Fill in Incoming Mail Server and Outgoing Mail Server, then tap Next. The incoming service receives messages; the outgoing service sends them. Both must match the settings for this particular account.
Use the exact server names and username supplied by the provider. Don't assume the outgoing server is the same as the incoming server, or that the username is only the part before the at sign.
If verification succeeds, tap Save. If Mail asks you to edit the settings, compare each field with the provider's current instructions. Changing random port numbers can add another problem without fixing the original one.
Open the inbox and check both directions
Open Mail and show its mailbox sidebar if it's hidden. Find the account you just added and open its inbox. Existing server messages should appear as Mail downloads the mailbox.
Write a brief email to a second address you can open, then reply to it. Receiving existing messages doesn't tell you whether Mail can sign in to send them. Sending the email checks that, and the reply checks whether new messages arrive.
When several accounts are present, confirm which address appears in the draft's From field before sending. Receiving multiple mailboxes in one app doesn't mean every new message should be sent from the same one.
An empty inbox isn't always a failed account. Check the selected mailbox and whether that address actually has messages on the server. Mail can't show a message that exists only inside a different computer's local archive.
For an account that works when opened but doesn't update in the background, use the iPad Mail fetch checks. That's a receiving schedule issue rather than a reason to add duplicate copies of the account.
Deal with a password or verification error
For a rejected password, check the address and password through the provider's sign-in service. Complete any security approval there. If that login works, check whether the provider allows you to sign in this way in Mail.
Certain providers ask for an app-specific password during manual setup. Use one only when that provider's instructions request it. Keep the account's security protections enabled while checking its supported sign-in method.
For a work account, ask IT whether Apple Mail is allowed and whether device approval is pending. Give them the full error message and the account type selected during setup, without sending your password.
If this is an Outlook.com mailbox already added but repeatedly asking to sign in, the Outlook password-loop guide covers that recurring sign-in problem.
Get the missing settings from the right support team
If Mail can't verify or save the manual setup, give your email provider the errors for both servers. Ask which Apple Mail settings and sign-in method you should use.
If the provider confirms those details and the account works elsewhere, contact Apple Support through Mail support. Include the iPadOS version and whether the failure happens during sign-in, verification, sending or receiving.
The Short Version
Add the existing address in Mail Accounts and use automatic sign-in when available. Get manual server details from the provider. After setup, check the right inbox and send a message with a reply before relying on the account.
Checked November 11, 2026.