A useful invoice format in Excel keeps the customer details, work description, quantities, prices, and amount due in separate cells.
Use formulas in the amount column, then keep a blank master copy so the next invoice doesn't overwrite the last customer's record.
Start with a simple worksheet rather than a complicated design. The steps here build an example with working totals in the Windows or Mac desktop edition of Excel.
The sample amounts are just for checking the formulas; replace them with your own prices.
In this guide
Lay out the invoice before adding decoration
Open a blank workbook. Use columns A to D for Description, Quantity, Unit price, and Amount. Leave enough room in column A to describe the work without squeezing the numbers beside it.
Use the top rows for your business name and contact details. Add clearly labeled fields for the customer, invoice number, invoice date, due date, and payment instructions. Keep the labels separate from the cells you'll change each time.
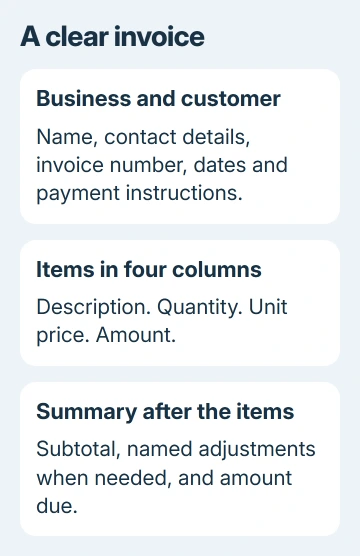
For this example, place the four item headings in row 9, then enter items in rows 10 through 19. That gives you space for ten entries and room for the summary after the final item.
The row numbers matter because the example formulas refer to them. If you put your first item somewhere else, adjust the formula references to match your actual worksheet instead of copying them unchanged.
Keep an invoice number as text if it includes a prefix or leading zeros. A label such as INV-001 is easier to distinguish from a calculation than an unlabeled number in an empty corner.
I'd keep the first version plain until the arithmetic and print preview are right. A tidy heading can't make up for a total that leaves out the last item.
Enter each item and calculate its amount
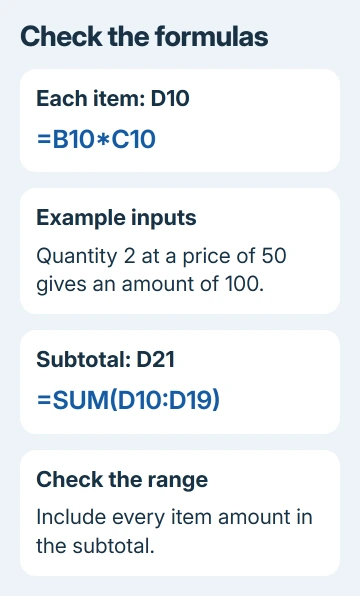
Enter a description in A10, the quantity in B10, and its price per unit in C10. In D10, type =B10*C10 and press Enter. The asterisk multiplies the numbers in those two cells.
Microsoft's multiplication instructions explain this use of cell references.
When you change the quantity or price, the total changes too, because the formula reads those cells instead of using a fixed number.
Check it with a small example: quantity 2 at a unit price of 50 should produce 100. Use a known result before entering the whole invoice so you can catch a wrong cell reference before filling in the rest.
Copy D10, select D11:D19, and paste. Each copied formula should use the quantity and price from its own row. Click D11 and check that the formula bar shows =B11*C11, rather than still pointing at row 10.
Enter your remaining items in the matching rows. A time-based service can use hours as its quantity and an hourly rate as its unit price; make the description clear enough that the customer understands the units.
Unused amount formulas can display zero. That's normal for this simple layout.
For a shorter invoice, remove unused item rows before you finish and check the summary formula afterward, rather than leaving a long block of empty work descriptions.
Avoid typing a final amount over a formula just because the displayed number looks wrong. Correct the quantity, price, or cell reference first so the sheet still calculates when you reuse it.
Add a subtotal that covers every item
Type Subtotal in C21 and enter =SUM(D10:D19) in D21. SUM adds the numeric values in that range. The colon tells Excel to include all the cells between those two references, including D10 through D19.
The SUM function guide also covers ranges and text entries. A quantity stored as text can be skipped by SUM.
Enter quantities and prices as numbers, then choose how Excel displays them.
Test the subtotal with a second item. If your first line is 100 and the second is 25, the subtotal should be 125. A correct first-line multiplication doesn't check whether the summary includes the second line.
If your invoice needs a discount, tax, delivery charge, or deposit, give each adjustment its own labeled row. Don't hide an extra charge inside a quantity or silently subtract a payment from one item's price.
Use the amounts and calculation rules that apply to your business. This example doesn't choose a tax rate or decide which charges apply. Show how those adjustments change the subtotal so your customer can understand the final Amount due.
When you add more item rows, inspect the SUM range again. Click the subtotal cell and compare the highlighted range with the last chargeable item before sending the invoice.
Format dates, prices, and long descriptions
Select the unit-price and amount cells, then use the Home tab's number-format controls to choose Currency or Accounting. Check the currency symbol instead of assuming the computer's default is the currency you charge.
Keep quantities separate from those money formats. A quantity of 1.5 hours shouldn't acquire a currency symbol just because you selected the whole item block at once.
Format the invoice and due-date cells as dates. Choose a display that your customer will read correctly, especially when month and day could be confused.
The Excel date-format steps cover custom desktop formats.
Select the descriptions and choose Home > Wrap Text when a line needs more room. Adjust the row size so all the words show. The wrapping guide covers text that remains hidden after wrapping.
Use a little bold text for the column headings and amount due. Leave space between the address area and the item list so the reader can find the invoice number without searching through the charges.
Save the master and inspect the customer copy
Save the working file as an Excel workbook with a clear master name. Before filling in another customer's details, make a separately named copy. Keep the completed invoice with its own invoice number in the filename.
Open File > Print in desktop Excel and inspect the preview. Check that the description, prices, and amount due appear together, and that no right-hand amount column has moved onto an extra page.
If the sheet doesn't fit, adjust its column widths or page layout and inspect the preview again. Read the smallest text before shrinking the whole worksheet, since your customer still needs to read the payment details on a one-page invoice.
When a total stays wrong, give your bookkeeper or spreadsheet support the formula and a harmless sample of the inputs. Remove real customer details from any sample you share. Ask them to check the cell references and total range.
The Short Version
Separate descriptions, quantities, prices, and amounts. Multiply each line with a cell-reference formula, add the complete amount range with SUM, and check the print preview. Keep a blank master and save every completed invoice separately.
Checked November 11, 2026.