A folder shared through Give access to > Specific people in Windows 11 can be opened from another PC. Connect both PCs to your trusted home network, enable file sharing, and choose an account that can open the folder.
Keep password-protected access for this setup. The computer holding the folder must stay on and connected; mapping its folder as a drive doesn't copy the files onto the second PC.
In this guide
Prepare the computer that will hold the folder
Choose which computer will store the files. That's the host in these steps. The other computer will connect to it. Both can use Wi-Fi, Ethernet, or a mix, as long as the router lets them connect to each other.
A guest Wi-Fi network can prevent devices from reaching each other. Connect both computers to the main trusted network before changing sharing permissions. Local sharing doesn't require forwarding a router port to the internet.
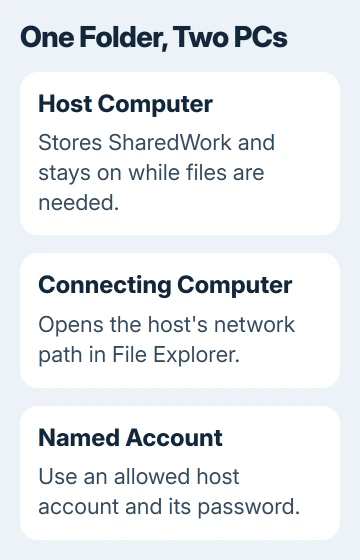
On the host, open Settings > System > About and note Device name. We'll use OFFICEPC as an example. Replace that with the actual device name whenever you enter a network path.
Pick a new folder such as C:\SharedWork, and place one harmless test document inside it. I'd start with a small folder so it's easy to check exactly what the second computer can see and change.
Avoid sharing the whole system drive or your entire user folder. A separate folder lets you share just the files you want available over the network.
Set the trusted network to Private
On each computer, open Settings > Network & internet. For Wi-Fi, open the connected network's properties. For a wired connection, open Ethernet. Set Network profile type to Private for this trusted network.
Private tells Windows this connection can be used for device discovery and sharing. Changing the profile doesn't share your documents by itself. You still choose the folder and who can open it.
Open Settings > Network & internet > Advanced network settings > Advanced sharing settings. Under Private networks, switch Network discovery on, then enable File and printer sharing.
Leave Password protected sharing on under All networks for the account-based connection here. The other PC signs in with the username and password of an account you've allowed on the host, rather than connecting as a guest.
If the exact Settings layout differs on your Windows release, search Settings for Manage advanced sharing settings. It leads to the same discovery and sharing controls.
Microsoft describes the File Explorer commands in its Windows network sharing instructions. Its troubleshooting section also describes password-free sharing, but you don't need that when connecting with an account and password.
Share the folder with a named account
Make sure the intended account exists on the host and has a password. A local account used just for sharing can keep this separate from your everyday sign-in. The Windows account creation steps explain that setup.
The account you select belongs to the computer storing the folder. Typing another computer's name into the sharing box doesn't create an account or give its owner access automatically.
- Right-click C:\SharedWork in File Explorer and choose Show more options.
- Choose Give access to > Specific people.
- Select the intended account from the list, then choose Add if needed.
- Set its permission to Read for viewing and copying, or Read/Write if it must create and change files.
- Choose Share, note the resulting network path, and finish the dialog.
For a folder named SharedWork on OFFICEPC, the path will look like \\OFFICEPC\SharedWork. Use the path Windows shows, especially if the share name differs from the folder's local name.
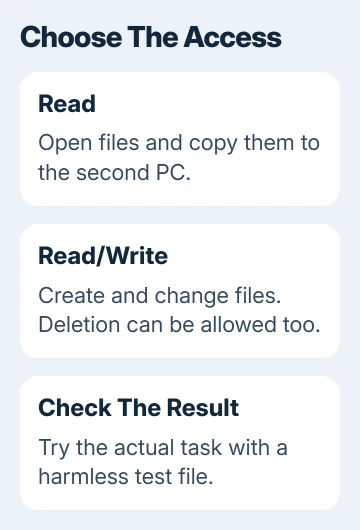
Choose the permission for the job. A person who only needs to collect a document can use Read; a shared working folder needs permission to save changes. Read/Write can also permit deletion. Back up important work somewhere separate.
For this setup, skip the all-users option if the intended account isn't listed. Check that the host has that account, then select it and confirm the permission shown in the dialog.
Open the share from the second computer
On the second PC, press Windows key + E. Select the address bar in File Explorer, enter \\OFFICEPC\SharedWork with your real names, and press Enter.
Enter the path in File Explorer's address field, not its search field. A network path starts with two backslashes, followed by the host name and shared folder name. A local path such as C:\SharedWork refers to the second PC's own drive.
If Windows asks for credentials, choose More choices > Use a different account when needed. For a local account on the host, enter OFFICEPC\ShareUser, replacing both example names, and that account's password.
Use the host account's password, not the second PC's Windows Hello PIN. A PIN used to unlock a particular computer isn't the network password for a different machine.
Open the test document. If you granted Read/Write, create a small test file through the share, then look for it on the host. That checks whether you can save changes as well as see what's in the folder.
Keep the folder available as a network drive
Once direct access works, select This PC in File Explorer. Open More, the three-dot menu, and choose Map network drive. Select an unused drive letter and enter the working network path in Folder.
Select Reconnect at sign-in if you want Windows to reconnect automatically. Use Connect using different credentials if the share needs the host account instead of your current sign-in. Choose Finish and complete any credential prompt.
The drive should appear under This PC. Open it and check the test file again. If it fails only after the host sleeps or turns off, wake or start that PC. Saving the drive mapping doesn't keep the host online.
Correct access problems or remove sharing
If the network path won't open, confirm the host is awake and still connected. A share absent from the Network view may still open by its direct path, so test the path before rebuilding the folder.
For Access denied, check the username used to connect and whether that account has the permissions you selected. A Read-only account can see the folder but can't save files.
For a share that previously worked, the existing shared-folder troubleshooting covers connection failures. Keep the exact error text, especially when a policy blocks guest access or requires signing.
To stop sharing, right-click the host folder and choose Show more options > Give access to > Remove access. Test its old path from the second PC. If sharing keeps failing on a managed network, ask IT to check permissions and network policy.
The Short Version
Use a Private trusted network, enable discovery and file sharing, share one folder with a named host account, and connect using its network path. Test the needed read or write access before mapping a drive.
Checked November 13, 2026.