A laptop webcam test starts in the Windows Camera app: open Start, search for Camera, and check whether a live picture appears. Move your hand in front of the lens so you know you're seeing current video, not a frozen frame.
That checks the camera without starting a meeting or uploading a picture to a test website. Then check the camera selected inside your meeting app, because a working Windows preview doesn't set the device for every app.
In this guide
Open Camera and check the physical lens
Slide open the privacy shutter if your laptop has one. Some notebooks also have a camera key or switch, identified by a camera symbol. Follow your model's manual for that control rather than pressing unrelated function keys.
Open Start, type Camera, and select the Camera app. Accept the camera-access request when prompted. Sit in front of the screen and move slightly so you can confirm that the picture is updating.
Microsoft says the Camera app can take photos and record video on Windows 10 or 11. A browser-based webcam test isn't required for this first check.
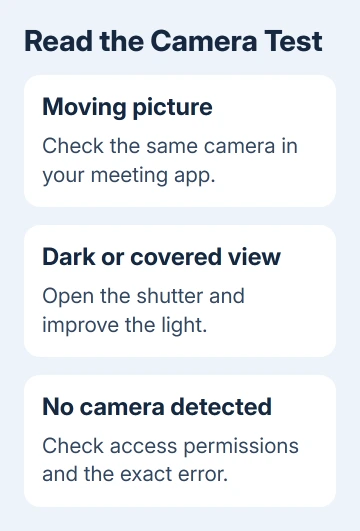
Keep the first check simple: can the camera produce a moving image? A dim picture, an incorrect camera angle, and a device-not-found error are different results and need different next steps.
If the preview works, leave driver changes alone for now. Next, check the selected camera and your meeting app. The remaining problem may be that app's permission or camera choice.
Select the camera you actually intend to use
When more than one camera is available, the Camera app can show a Change camera button. Use it to switch between cameras, then check which lens produces the picture you want.
A laptop might have its built-in webcam plus a USB webcam, a dock camera, or a linked phone camera. The first picture you see isn't necessarily coming from the lens at the top of the laptop screen.
Cover the intended lens briefly with a finger, then uncover it. If the view darkens and returns with your finger, that lens is supplying the picture. Other cameras can stay connected.
For a USB webcam, connect it directly to the laptop for this first check if you can. If Windows can use that camera but not the built-in one, keep the results separate when deciding what needs repair.
On Windows 11, open Settings > Bluetooth & devices > Cameras to see connected cameras. Select a camera to open its preview and available image settings.
That Settings page was introduced in Windows 11. On Windows 10, use the Camera app and your call app's camera selector instead of looking for a Cameras page that version doesn't have.
Make a short recording and play it back
A live preview shows the picture coming from the camera. A short recording lets you check the saved video, including movement and, when enabled, microphone sound, before your call.
- In Camera, choose Video mode.
- Start recording and speak a short sentence while moving normally.
- Stop after a few seconds.
- Open the recent capture thumbnail and play the clip.
Look for a steady picture, understandable movement, and the framing you want. If the preview seemed fine but the saved clip freezes, tell support that only the recording has the problem.
Microphone access is separate from camera access. A silent recording doesn't by itself show that the webcam picture failed. Check the selected microphone and its permission before blaming the camera hardware.
I'd use a short local recording before an important interview. It catches simple framing and sound problems while you still have time to move the laptop or choose a different microphone.
Delete the clip afterward if you don't need it. The point of the test is to see the result yourself, not to send a sample recording to a meeting or a stranger's website.
Check permissions when Camera won't show a picture
On Windows 11, open Settings > Privacy & security > Camera. On Windows 10, open Settings > Privacy > Camera. Check that camera access and access for the Camera app are allowed.
Desktop apps have a separate camera-access control on that page. A meeting program can need that permission even after the built-in Camera app starts working.
If access is managed by an organization, have your administrator review its camera policy. A work or school restriction isn't something to solve by installing an unrelated driver package.
Close other programs that may be using the camera, then open Camera again. Try this when the app says the device is busy, especially if your system or apps can't share the camera's live video.
For a continuing Windows-wide error, use the camera repair checks. Note its error code, plus any change after opening the shutter, allowing access, or selecting another camera.
Check the meeting preview separately
Close Camera after the local test. Open your meeting app's audio and video settings, select the same camera, and inspect its preview before entering the call.
If Camera shows a good picture but the meeting preview is blank, check the meeting app's camera selection or permission. It doesn't mean the lens suddenly stopped working between the two checks.
For Teams, the Teams camera checks cover that app's device choice and access. For a browser meeting, also check the site's camera permission in the browser.
If the image is too dark on Windows 11, return to the selected camera under Settings > Bluetooth & devices > Cameras. Available controls can include brightness and contrast, but they depend on the camera.
Use the Windows camera settings guide for those controls. Change one setting while watching the preview instead of looking for a brightness slider that your hardware doesn't provide.
Give support the result that failed
If Windows and your meeting app can't find the built-in camera, send the laptop maker the model's full name and installed Windows version. Ask them to check camera detection, its privacy control, and the correct driver for that model.
If Camera and the saved recording work but one meeting app doesn't, give that app's support team the camera name and its preview result. These results help support fix the app without replacing hardware that already produces video.
The Short Version
Open Camera, confirm live movement, select the intended lens, and record a short clip. Check permissions when the preview fails. Finally, select the tested lens in your call app and inspect that preview before joining.
Checked November 16, 2026.
 If you have any business, I can build it online