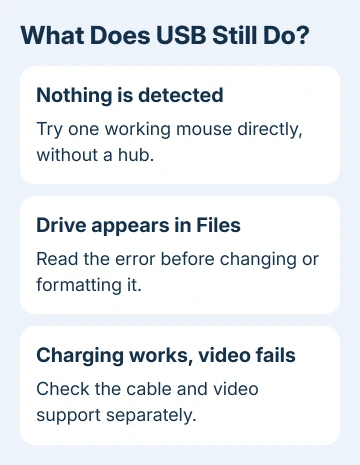
A Chromebook USB port that won't detect an accessory often needs a direct connection, a different cable, or a hardware reset. Start by removing the hub and connecting a known-working USB mouse directly to the Chromebook.
If your drive appears in Files, check its files or storage format. If nothing is detected, check the connection. Charging and USB-C video are separate checks too: a cable that charges isn't necessarily suitable for data or a monitor.
In this guide
1. Connect one accessory directly to the Chromebook
Disconnect the dock, hub, and other USB accessories. Plug a basic wired mouse or keyboard into the port and check whether it works. For USB-C, use an accessory or adapter you know can carry data.
Try that same accessory in another port, if your Chromebook has one. Then try it on another computer. Keep the accessory and cable the same during each comparison so the result actually tells you which connection fails.
If the direct connection works, check the hub cable and power supply. Add each accessory back separately. A dock carrying several devices has more possible failure points than a mouse connected straight to the laptop.
If several working accessories fail only in one physical port, inspect that port for visible damage or debris. Stop using a loose, bent, or damaged socket. Don't force a connector that won't seat normally.
If both ports work with the mouse but a drive doesn't appear, continue with the Files checks. That result points toward the storage device, its cable, or compatibility rather than every USB port on the Chromebook failing.
2. Read the drive's message in Files
Open the Launcher and choose Files. Look in the left sidebar for the drive's name. Expand its entry if necessary and select the volume. ChromeOS doesn't give the drive a letter the way Windows does.
An Unknown file type message means ChromeOS can't open that kind of file in the current setup. The port has already done enough to make the file visible. Try an app that supports the file rather than resetting the USB hardware.
If the message says the device isn't supported, check its storage format and your ChromeOS version. The supported external-device list includes FAT16, FAT32, exFAT, and NTFS among its filesystems, the formats that organize files on a drive.
Some formats have restrictions. Journaled HFS+ is read-only, for example. Being able to read a drive without writing to it doesn't always mean the port is faulty. Check its format before changing the Chromebook.
If the message says the device wasn't recognized or a partition couldn't be mounted, connect it to another computer and copy the files first. Formatting erases the storage device, so don't accept that prompt while it holds your only copy.
After the files are safe, use the drive's format option in Files if reformatting is appropriate. If the drive isn't visible or readable on any computer, focus on recovering your files or replacing the drive rather than resetting ChromeOS.
3. Replace the cable for the job you're doing
For a phone connection, use a USB cable that supports data transfer, unlock the phone, and check its USB notification for a file-transfer option. Charging alone doesn't show that a cable can transfer files.
For an external drive, try its original cable or another suitable data cable. Larger drives and some hubs need their own power connection. Check the accessory's instructions to see whether the Chromebook can power it.
A USB-C monitor needs video support from the Chromebook, cable, and display. If ChromeOS says the cable may not support displays, replace it with a video-capable cable. A USB-C connector can fit perfectly without supporting video.
The USB port guide helps identify the connector and connection types. Keep a monitor problem separate from a mouse or flash drive problem, because detecting a mouse doesn't confirm that video works too.
I'd borrow a cable that supports the connection first, before spending money on a dock or resetting ChromeOS. A cable swap is particularly useful when charging works but the intended data or display connection never starts.
4. Restart ChromeOS and install its available update
Save your work, eject any mounted storage from Files, and shut down the Chromebook. Disconnect the USB accessories, turn the Chromebook on again, and reconnect the single device you're checking.
If a normal restart restores it, try a second connection after unplugging and reconnecting safely. Note whether it fails only after sleep, only through a dock, or whenever a particular accessory is attached.
Open Settings > About ChromeOS > Check for updates. Install the available update and accept the restart prompt, then try the direct connection again. Device support and system fixes can depend on the installed ChromeOS release.
For a Chromebook supplied by school or work, ask its administrator about storage restrictions. Those rules can block a drive while allowing a USB mouse. Resetting your device won't change those rules.
If the Files app remains the only problem while the mouse works normally, keep following the drive's error message. An operating system update can't make a physically damaged storage device reliable.
5. Reset hardware with the matching model controls
Back up important files from Downloads first. A hardware reset can remove some Downloads files, though it isn't a factory reset. Google recommends a hardware reset after simpler fixes fail.
For most Chromebook laptops, turn the Chromebook off. Keep Refresh held while tapping Power. Release Refresh once startup begins. The Refresh key is the circular symbol on the keyboard's top row.
On a ChromeOS tablet, hold Volume Up + Power for at least 10 seconds, then release both. Don't try to apply a laptop keyboard combination to a tablet without that keyboard.
Older models and Chromebox or Chromebase systems use a different procedure, such as disconnecting power or a dedicated reset control. Read the reset entry for your particular Chromebook before opening the device or removing a battery.
Reconnect one known-working accessory after the restart. If it still fails, compare another port before arranging a repair. For a wider keyboard problem as well, the Chromebook keyboard checks address built-in keys separately.

Arrange repair when working accessories still aren't detected
Contact the Chromebook manufacturer with the exact model, ChromeOS version, and the ports that fail. Explain whether direct connection works, whether a mouse is detected, and whether another computer detects that accessory.
A single visibly damaged port needs hardware attention. If every port fails after the matching reset, ask the manufacturer which hardware checks or warranty service you need. Keep your files backed up before sending the machine for service.
The Short Version
Remove the hub, compare a working accessory and cable, and read any Files error. Restart and update ChromeOS before the model-specific hardware reset. Back up a drive before formatting it and Downloads before a hardware reset.
Checked November 16, 2026.
 If you have any business, I can build it online