The exact ASUS laptop model appears in System Information under System Model. Search Start for that tool and copy the full model shown there. VivoBook or Zenbook names a family; driver and BIOS downloads need the complete model code.
If Windows won't open, check the laptop's label or its BIOS information instead. Keep separate notes for the model, serial number, and BIOS version. Those three values describe different things, even when they appear together on one screen.
In this guide
Read System Model on a Windows computer
Open Start, type System Information, and open the matching Windows tool. Select System Summary in the left pane if it isn't already selected. Find System Manufacturer and System Model in the right pane.
Read the entire System Model value, including letters after the main number. ASUS's model identification instructions show why a full code matters: closely named variants can have separate support selections.
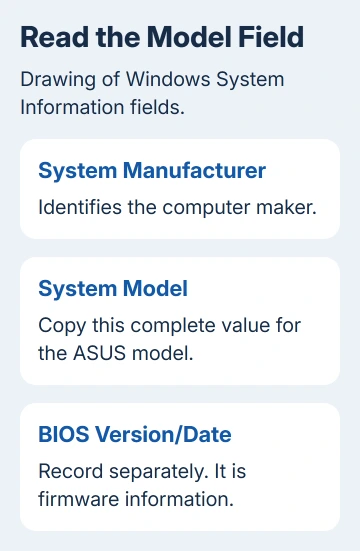
This tool is included with Windows 11 and with Windows 10. Their Start menus differ, but System Information uses the same System Model field. You don't need an extra hardware-identification app.
Copy the full code carefully; a trailing letter can separate related models. If the field is blank or generic, make a note of that and use another method before selecting a download.
Use Dxdiag to check the model and BIOS fields
Search Start for Dxdiag and open it. The DirectX Diagnostic Tool opens. Accept its check prompt if one appears, then stay on the System tab to read the computer information.
Find System Model for the laptop's model code. The separate BIOS field reports firmware information. Don't copy the BIOS number into a support site's model search simply because it is displayed near the model.
Compare this value with your System Information note. If the codes match, you can give support that full model code. If either differs from the laptop's label, write down both full codes instead of dropping letters to make them match.
For more general specifications, the PC specifications guide covers the processor, memory, and Windows details. Those are useful alongside the model, but a processor name alone doesn't identify the ASUS laptop.
On recent Windows systems, Settings > System > About can also show a model with the device name. The Windows device information page describes that view. Use System Information when you need the clearly labeled model field.
Keep MyASUS firmware information separate
Search Start for MyASUS and open it if installed. Open System info in the app and look in the Firmware section for the BIOS version. This is useful when support asks which firmware is currently installed.
The BIOS version isn't the product model, and a request to identify the laptop isn't a reason to update its firmware. Record the version next to the model code so the two values stay separate in your notes.
If MyASUS isn't installed, continue with System Information or Dxdiag. Installing an extra app isn't necessary just to answer the model question. A missing MyASUS shortcut also doesn't mean the laptop lacks identification data.
I'd use the built-in Windows tool first when Windows works. It's quick, labels the model clearly, and saves you opening BIOS for information Windows already shows.
Check the model in BIOS when Windows won't start
Shut the laptop down completely. Hold F2, press the power button while keeping F2 held, and release it when the BIOS setup screen appears. Use those buttons on the laptop itself; there is no command to type into Windows.
Use this screen only to read the information. Don't change boot settings, reset defaults, or start a firmware update to identify the model. The screen you see can be a modern UEFI interface, an older interface, or MyASUS in UEFI.
On the UEFI interface described in the support instructions, press F7 for Advanced Mode, select Advanced, and open ASUS EZ Flash 3 Utility. Read Model and Version. No update file needs to be selected.
On the legacy interface, use the keyboard to select Advanced > ASUS EZ Flash 3 Utility. The model is labeled Platform, with firmware in Version. The labels differ, but you're still reading the model and BIOS version.
On MyASUS in UEFI, look at UEFI Version. The combined value can contain the model followed by the BIOS revision. For example, the vendor's example X1505ZA.201 identifies model X1505ZA and BIOS version 201.
Write down the fields, then leave setup using its exit option without saving changes. If the notebook won't display BIOS at all, the ASUS black-screen checks cover a startup or display failure, rather than model identification.
Compare the physical label before choosing parts or firmware
With the laptop shut down, inspect the label on its underside or the original packaging. Look for the model wording and copy the complete code. Use the label without removing the bottom cover just to find a name.
The serial number identifies an individual unit. The model identifies the design or version of the laptop. A retailer's stock code or a broad family name can add another label, so keep a photo or note of the full wording to show support.
Give a parts seller or repair center the full model code and part details. A family name alone doesn't tell the seller which parts fit. Send serial numbers privately through the official support channel, rather than posting them publicly.
If firmware and the physical label disagree, ask ASUS support to confirm the product before choosing a BIOS file. Mention a past motherboard replacement or an unexpected model value when describing that mismatch.
The Short Version
Use System Information > System Model first, or confirm it with Dxdiag. If Windows won't load, read the BIOS fields or underside label. Record the complete model code. Make separate entries for the serial number and installed BIOS revision.
Checked November 16, 2026.