Remove Windows.old through Settings > System > Storage > Temporary files. First, save old files you need and decide whether to keep the option to go back. Then select the previous installation and choose Remove files.
Deleting it removes the files Windows needs to take you back to the previous version. Use the storage controls with an administrator account. The cleanup choice can disappear once Windows has removed the old installation itself.
In this guide
Decide whether to keep the rollback files
Windows temporarily keeps a copy of the earlier installation that it can restore after an upgrade. A large Windows.old folder isn't automatically a fault. Keep it if you still need that copy.
Check the things you depend on before cleaning it up: sign in, open your important apps, print a document and check your usual devices. If the upgrade has broken something essential, decide about returning to the previous version first.
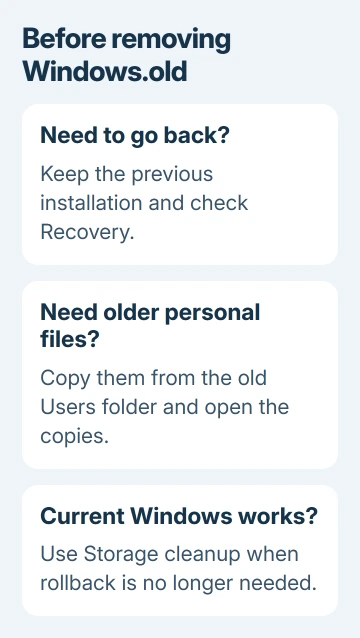
Open Settings > System > Recovery and look for Go back if you're considering that return. For most upgrades, the option is available for 10 days. The option also needs the files from the previous installation to stay in place.
Microsoft's previous-version removal instructions warn that this deletion can't be undone. Once those files are removed, Go back can't restore that installation.
For a drive that needs more space after this cleanup, use the Windows disk-space choices. Removing the old installation frees that space, but other files can still fill the drive.
Save any personal files left in the old installation
Open File Explorer > This PC, then open the Windows drive, normally C:. If Windows.old is present, look inside its Users folder for the old account's folders. Check places such as Desktop, Documents and Pictures.
Copy any personal files you still need into a normal folder in the current installation or onto a backup drive. Verify several copied files open normally before deleting the old copies.
This matters especially when an installation left files under an older account. Even if the account names match, check that all your old folders made it into the new installation.
Check your personal files here. Copying the old Program Files directory into the new installation won't reinstall its apps. Use the programs' normal installers when needed.
If your files are already present and backed up, continue with cleanup. Moving the entire old Windows folder elsewhere isn't required for this cleanup. That would create another large copy to manage.
I'd make the personal-file check before selecting any cleanup categories. That gives you time to decide what to keep before opening a dialog that also lists ordinary temporary files.
Remove the previous installation through Temporary files
Open Start > Settings > System > Storage. Under the Windows drive information, choose Temporary files and let Windows calculate the categories. Wait for that list instead of selecting unrelated files while it is still loading.
Find the entry for the previous Windows version or installation. Depending on the screen, its label can be Previous version of Windows or Previous Windows installation(s). Select that category.

Review the other checkboxes before continuing. Downloads and Recycle Bin, when offered, refer to different files. Leave those boxes unchecked if you're only clearing the previous Windows installation.
Choose Remove files and confirm the removal if prompted. Allow the operation to finish. The listed size is Windows' estimate of that category, so use the finished storage report to check the space actually reclaimed.
Return to Storage afterward. Check the Windows drive in File Explorer to confirm Windows.old was removed. Use the cleanup controls to finish the job instead of trying to delete the folder manually and getting Access denied.
Use Cleanup recommendations if that is the offered route
Windows 11 also has Settings > System > Storage > Cleanup recommendations. Open it if the previous-installation entry is offered there instead of in the Temporary files list you're viewing.
Select Previous Windows installation(s) and choose Clean up, which displays the amount of space selected for removal. Review the choice and let the cleanup finish before checking free space again.
Both routes remove the same files, so you don't need to repeat a successful cleanup on the other screen. Removing it once leaves no additional rollback files for a second cleanup to reclaim.
The Disk Cleanup and Storage Sense controls have other uses for ongoing space management. Keep those decisions separate from removing the previous Windows version, especially where Downloads or cloud files are involved.
Windows 10's different Storage Sense layout uses Change how we free up space automatically, then Delete previous version of Windows and Clean now. Don't search for that older screen on a different Windows 11 layout.
When Windows.old or its cleanup entry is missing
Windows normally removes the previous installation automatically after the rollback period. If Windows.old and the previous-version category are both gone, there may be nothing left to delete for this task.
If the folder is present but the setting isn't, check that you're viewing the Windows system drive and using an administrator account. Record any cleanup error instead of changing folder ownership or running a forced deletion command.
For another system-file view, search Start for Disk Cleanup. Pick the Windows drive, choose Clean up system files, then select that drive again. Review any previous-installation category before removal.
If removal still fails, send Microsoft support your Windows version, the Windows.old location and the exact Storage or Disk Cleanup error. Ask why the supported controls can't remove the previous installation.
The Short Version
Check rollback needs and copy old personal files first. Remove the previous installation through Temporary files or Cleanup recommendations. Review the other categories, then check the space reclaimed.
Checked November 16, 2026.