Windows blocks letter changes on boot and active paging volumes. For a data drive such as D:, move its paging file to C: and restart to release the letter. Leave the running Windows volume's letter alone.
The message Assigning or removing drive letters on the current boot or pagefile volume is not allowed means Windows is protecting a volume it uses. Don't force it with DiskPart. Check what Windows uses the volume for first.
In this guide
1. Read the selected volume's role in Disk Management
Open Disk Management from Start's right-click menu. Find the drive by its letter, size and label. Read that volume's status text; The letter D: alone doesn't mean it's an ordinary data drive.
Look for Boot, System or Page File. Boot identifies the running Windows installation in this dialog. System identifies the partition holding startup files. Page File means Windows is using that volume for paging.
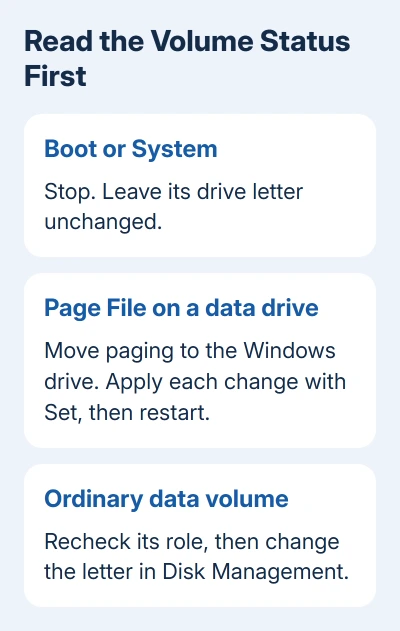
A paging file is disk space Windows uses to support memory and, in some setups, crash dumps. It can exist on a second drive even when Windows itself is installed on C:. That makes a data drive's letter unavailable for removal.
Microsoft's DiskPart remove reference lists protected volume types. Running the same command as administrator doesn't remove the restriction.
If the selected volume is the Windows boot or system volume, stop. Don't format it, delete its partition or change registry drive-letter mappings to make this one operation succeed. Windows may stop booting after those changes.
EFI System and Recovery partitions serve startup and recovery functions; don't rearrange them just to tidy the drive list. If one has gained a visible letter unexpectedly, have support confirm what it is before you try removing its letter.
2. Check whether the data drive hosts the paging file
For a drive marked Page File but not Boot or System, press Windows + R, type sysdm.cpl, and press Enter. Open Advanced, then click Settings in the Performance section.
In Performance Options, open Advanced and click Change under Virtual memory. Windows 10 and 11 use this same older dialog. Neither needs a registry edit to reach these controls.
Read the Paging file size for each drive list. Find the letter you were trying to remove. Note whether it has a custom size or says System managed. Record the current settings before editing them.
If the drive says None, compare its Disk Management status again. A previous change may need a restart, or Windows may be protecting the volume for another reason. Only change paging settings if they explain why the letter is blocked.
The temporary paging-file guide covers replacement page files and rejected layouts. Wait until paging works correctly before changing drive letters.
Check that the Windows drive has room for a system-managed paging file. There isn't one fixed size for every PC. Keep it system-managed rather than copying a megabyte value from another machine.
3. Put a system-managed paging file on the Windows drive
Save your work before changing virtual memory.
In Virtual Memory, clear Automatically manage paging file size for all drives to choose settings per drive.
Select C: if that is your running Windows drive. Choose System managed size, then click Set. That button matters: selecting a radio button without applying it to the selected drive can leave the list unchanged.
Next select the data drive whose letter is blocked, such as D:. Choose No paging file and click Set. Check the list again: the Windows drive should be system-managed and the target data drive should have no paging file assigned.
This moves paging off the data drive while keeping a paging file available on the Windows drive. Keep paging available on the Windows drive; don't turn it off everywhere or delete pagefile.sys yourself.
Click OK through the dialogs and restart through Start > Power > Restart. Use Restart even if you've already closed the settings window. The active paging file stays in use until Windows completes the required restart.
One owner in the drive-letter thread confirmed that moving paging from D: to C: and restarting fixed it.
4. Recheck the status before removing the letter
After Windows starts, reopen Disk Management. Check the same volume's status. It should no longer show Page File if Windows applied the move, and it must not be the current Boot or System volume.
If Page File remains, reopen Virtual Memory. Check that each drive's change was saved with Set. Solve a temporary paging-file warning or another paging error before trying to remove the letter.
When the target is an ordinary data volume, right-click it and open Change Drive Letter and Paths. Select the letter, then choose Remove if your goal is to hide that drive from normal letter-based browsing.
For another letter, choose Change and select an available one. Check apps, shortcuts and backup jobs using the old path before accepting. They can stop working even though your files stay on the drive.
For a blocked partition shrink, use the unmovable-file checks. Changing a drive letter doesn't remove every limit on partition operations.
I'd use Disk Management for this last check because you can see what Windows uses the volume for while choosing the action. You don't need to format the disk or rerun DiskPart commands to test whether the paging-file move worked.
If the role remains unclear, open Get Help from Start or contact the PC maker. Send a Disk Management screenshot, the exact error and each drive's paging settings. Ask them to identify the protected volume before changing its letter.
The Short Version
Leave boot and system volume letters unchanged. For a data drive holding the paging file, set a system-managed file on the Windows drive, remove the data drive's paging assignment, restart and recheck its status before changing the letter.
Checked November 17, 2026.
 If you have any business, I can build it online