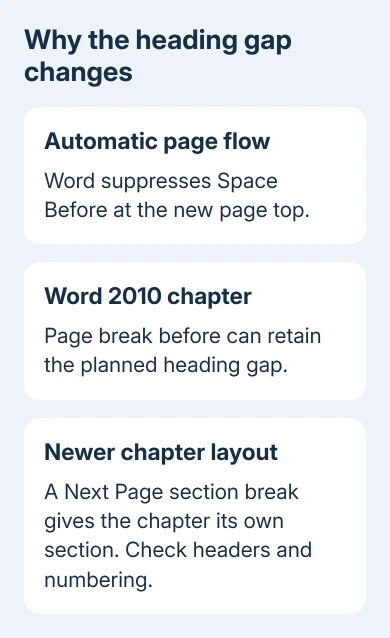
Word suppresses Space Before when an automatic page break moves a heading to a new page. Increasing the number won't fix it. Use a planned break for chapter spacing, or adjust the top margin for a consistent gap between header and text.
Word 2010 and newer versions don't always handle breaks you insert in the same way. Check how the page starts before changing the heading style throughout the document.
In this guide
1. Check which kind of page break moved the heading
Turn on Home > Show/Hide to reveal paragraph marks and manual breaks. On Windows, Ctrl + Shift + 8 toggles those marks. These marks show whether someone inserted a break or the text simply ran onto the next page.
An automatic page break has no separate Page Break marker to delete. Word moved the heading because the preceding page filled up, or because paragraph settings kept it with following text.
Click inside the heading and open the Paragraph dialog from the Home tab's Paragraph group. Check Spacing > Before on Indents and Spacing, then Page break before on Line and Page Breaks.
If the heading has the right spacing value and moved there through an automatic page break, Word is hiding the gap as expected. Re-entering the same number or removing and reapplying the style won't change the break type.
For a heading that begins midway through a page, its Before value should produce the normal paragraph gap. Compare that example with the heading at the page top to see whether the missing gap only affects the top of a page.
The paragraph spacing controls distinguish paragraph spacing from line spacing. Changing the distance between lines inside the heading isn't the same as adding space before the whole heading.
2. Use Page break before for chapter starts in Word 2010
For an individual chapter heading in Word 2010, click in the heading, open Paragraph > Line and Page Breaks, and select Page break before. Confirm the Before amount on the other tab and click OK.
That setting makes the heading start on a new page. An owner confirmed that Page break before retained the gap after their other break attempts failed.
Don't apply it to every small heading just to restore spacing. It forces each affected heading onto a new page, which can leave large unused areas when the sections are only a few paragraphs long.
If all major chapters should start this way, modify their heading style instead of formatting each one separately. Right-click that style in Home > Styles, choose Modify > Format > Paragraph, and set Page break before there.
Use the style intended for chapter starts. Changing a shared Heading 3 style, for example, changes every paragraph using it. Check several chapters before keeping the style change.
In Word 2010's older layout options, Suppress Space Before after a hard page or column break relates to manually inserted breaks. It doesn't affect automatic breaks. The extra-line-spacing option controls something different.
If the gap is still missing, check the version and document format before following more Word 2010 advice. Later participants reported that the same forced-break approach didn't give the desired result in Word 2013 and 2016.
3. Give newer chapter layouts their own section
For a chapter that needs a separate page with retained top spacing, use a Next Page section break before the heading. In current Windows Word, put the cursor immediately before it and choose Layout > Breaks > Next Page under Section Breaks.
Word 2010 uses the Page Layout tab for that command. Word for Mac also has section-break controls under Layout > Breaks in current editions; the Windows-only keyboard shortcuts in this page aren't needed for that route.
A section break creates a new document section, which can have its own page settings. Check headers, footers and page numbering afterward, especially in a document with different chapter headers or restarted numbering.
Avoid leaving an extra manual page break immediately beside the new section break. With formatting marks visible, inspect the boundary so two separate breaks don't create an unintended empty page.
The Word page-copying checks explain why page contents and pagination need attention when moving text. Use the new section to control your chapter layout, and remove any accidental break left beside it.
I'd use sections for actual chapters, not every heading that happens to land at the top. A chapter boundary remains meaningful as the text grows; an ordinary heading can move on the next edit.
4. Increase the top margin for a consistent page gap
If the problem is that every page's text sits too close to its header, change the top margin rather than forcing individual headings downward. The original asker fixed their layout by moving the text start lower on every page.
In Word 2010, choose Page Layout > Margins > Custom Margins. In current Windows Word, use Layout > Margins > Custom Margins. Increase Top, check Apply to, and confirm the change.
Select the whole document when all pages need the same clearance, or the relevant section when that part of the document needs different margins. Review ordinary text pages as well as heading pages after changing it.
This changes where the main text starts on the page. It doesn't restore Space Before after automatic page breaks, and it won't give only one heading a special gap. Choose this approach for pages that need matching top margins.
5. Remove paragraph settings that drag extra text forward
When a heading jumps a whole page and leaves a large gap, inspect the paragraphs following it. Open Paragraph > Line and Page Breaks and check Keep with next and Keep lines together.
Keeping a heading with its first paragraph is useful. But Keep with next on several body paragraphs can pull the whole group forward. Clear keep settings from body paragraphs that don't need them, then check the heading's position.
For a gap that refuses Backspace, check Word's undeletable white space to distinguish spacing from empty paragraphs.
Don't add repeated blank paragraphs to fight page flow. They move when text changes and complicate later edits. Check the table-of-contents steps if the document's heading styles also feed an automatic contents list.
If a publisher's template still won't give you the spacing you need, send its owner a sample with your Word version, file format and break type. Ask whether it requires chapter sections or fixed margins.
There isn't a single Before-spacing checkbox that restores the gap after every automatic page break.
The Short Version
Natural page flow suppresses Space Before. Use planned breaks for chapters, with sections where needed. Adjust the top margin for header clearance. Check keep settings when too much text moves together.
Checked November 17, 2026.