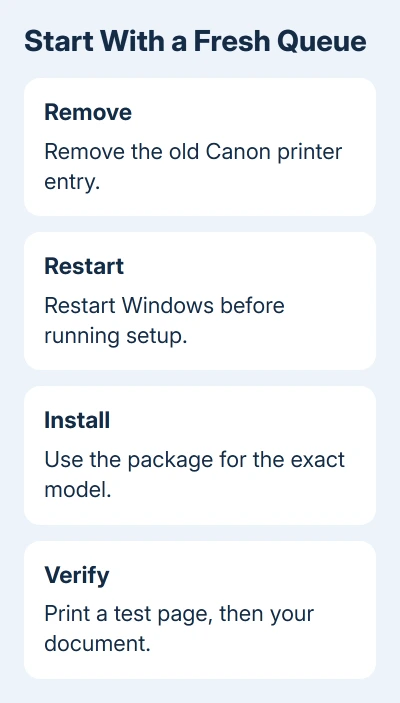
A Canon MG2520 that stopped printing after moving to Windows 11 may need its Canon driver reinstalled. Remove the existing printer entry, restart the PC, then install the Windows 11 package listed for the MG2520.
That sequence worked for an owner after several failed reinstalls. If setup can't detect the printer, check USB during installation. If a Windows test page prints but a browser page doesn't, check the browser's printer selection.
In this guide
1. Remove the old printer entry before starting setup
Finish or cancel any pending print jobs first. Open Settings > Bluetooth & devices > Printers & scanners. Select the Canon MG2520 or its MG2500 series entry, then choose Remove.
Restart Windows after removing the entry, as the successful procedure required. Closing and reopening Settings isn't the same step. Keep other printers in place; you're repairing the affected Canon entry.
Removing the printer from Settings and uninstalling its software are different actions. If the Canon installer reports an existing package or asks you to remove it, follow its instructions before continuing with the replacement.
For full driver removal, open Settings > Apps > Installed apps and find Canon MG2500 series MP Drivers. Use its uninstall option to remove the package. Leave unrelated Canon software alone unless setup requires a change.
Save work in other applications before restarting. Once Windows returns, start the driver setup without opening several print applications. That way, print jobs left in an old queue won't get mixed into the new installation.
2. Get the Windows package for the MG2520
Open the MG2520 support page and check the operating-system selection. Choose Windows 11 rather than assuming the page has identified your computer correctly.
Look for the model's printer driver and scan utility. The successful 2023 instructions named Print Driver and Scan Utility Installer Ver.1.02 (Windows). Use the version now offered on the model page; don't hunt for 1.02.
Use the page for your exact model. A similar model number doesn't mean its driver will work. A package may use the broader MG2500 series name, but the support page should identify it as suitable for your MG2520.
If the page won't load, try Canon's regional support site for the country where the printer was sold, or ask support for the current MG2520 Windows 11 installer. Avoid advertisements for general driver-updating programs.
The MP Drivers package includes printing and scanning components. An XPS printer driver is a separate option, not a replacement for completing the normal MP Drivers installation. Start with the package the model page recommends.
3. Run setup and connect the printer when prompted
Turn the printer off before starting the downloaded installer, then open the setup file. Approve Windows' permission request only after checking that it is the Canon installer you intended to run.
Follow setup's connection prompts. Use direct USB while checking detection; a hub or dock adds another connection that could fail. Connect or turn on the printer when the installer requests it.
When setup completes, choose Complete or Finish. Restart again if the installer requests it. Then return to Settings > Bluetooth & devices > Printers & scanners and check whether the Canon entry is present.
If needed, use Add device and let Windows look for the now-installed printer. The successful owner had first removed the old entry and restarted, then installed Canon's package before checking for the printer again.
I'd finish this sequence once before starting again. Removing and reinstalling the printer several times without changing the package or connection can leave you back at the same failure without telling you which stage went wrong.
For broader Windows detection problems, the printer connection troubleshooting steps cover adding the device and checking its status.
4. Deal with a setup screen that can't detect the printer
If setup stops at Printer Connection, reseat the USB cable at the printer and PC. Make sure the printer has power and has no paper or ink warning that prevents a printout.
The model's installation guidance gives a connection retry: turn the printer off, unplug and reconnect its USB cable at both ends, then turn it on again. Watch the installer for detection before moving to another repair.
If detection fails, cancel through setup's controls, restart, then run it again with other apps closed. After an installer crash, restart rather than launching a second copy over the failed one.
Try another USB cable or PC port that you know works, if available. If the same printer is detected through another cable, keep that cable in place while finishing setup. Replacing software won't fix a physically broken cable.
If scanning is the only remaining failure after printing works, use the Windows scanner checks. A working print queue and a working scan application are separate results.
5. Print a test page, then the document that originally failed
Select the Canon in Printers & scanners and open Printer properties. Select Print Test Page there. If the page prints, Windows can send a basic print job through that queue.
Next open the browser or application that originally failed. Use its print command and select the Canon queue by name. A browser's destination can still be Save as PDF or a different printer even after the Canon installation succeeds.
For an Offline message, check the offline printer repair steps rather than reinstalling immediately. Note what happens to the job: does it remain queued, disappear without printing, or trigger a printer error?
Contact Canon with the model, Windows version, package name, connection type and failed setup stage. Ask which driver package to use and how to check for a USB connection or printer hardware problem.
The Short Version
Remove Canon's old queue, restart and install the current model package. Follow setup's USB prompts, then send a test page from Windows. Retry your original document afterward. Report the exact message if detection still fails.
Checked November 17, 2026.
 If you have any business, I can build it online