Cite pictures in PowerPoint with a readable credit beside the image and a references entry when required. Use Insert > Text Box for the credit. Keep the creator, source, and reuse terms with each picture as you build the deck.
Your course or organization decides the exact citation format. A short image credit and an academic reference serve different purposes, so check the required style before copying the same caption across every slide.
In this guide
Collect the source details before formatting the slide
Return to the page that supplies the picture, not just the search-results thumbnail. Save the creator's credited name, the work's title if it has one, its source URL, and the license or permission that lets you use it.
Save any date and other publication details your required citation style asks for. Keeping these together now is easier than tracing a downloaded file named image01 after you've built the presentation.
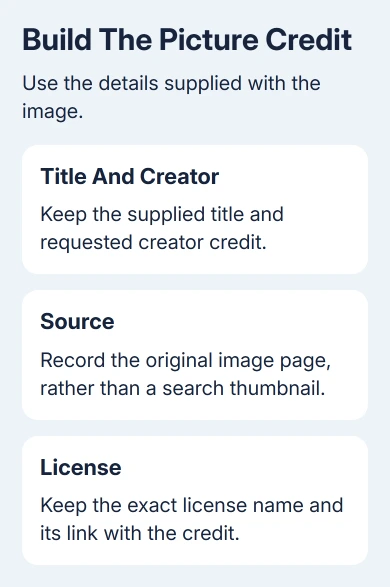
For Creative Commons material, TASL means Title, Author, Source, and License. Include a supplied title; don't invent one when the work has none.
Use the creator credit given in the license information. Sometimes that differs from the account that uploaded the image. Copy the attribution details from the original source rather than guessing from a username.
If the picture came from your own camera, label it as your own when your assignment calls for image credits. You don't need to invent an outside creator or source page for a photograph you made yourself.
I'd keep a small source list while adding pictures. One entry per slide makes it much easier to correct a credit when a picture is replaced or moved later.
When the built-in gallery refuses to supply a picture, check the stock-image service error before replacing your chosen source.
Add a readable credit beside the image
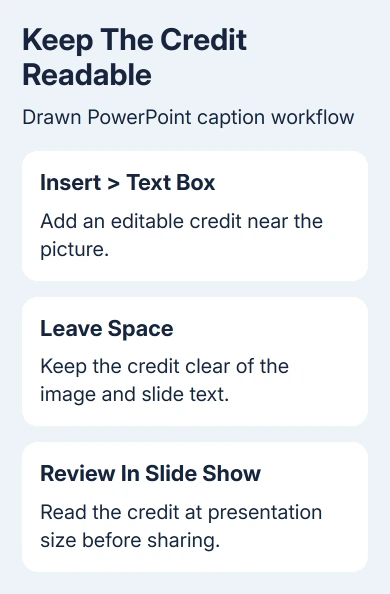
Select the slide in PowerPoint's Normal view. On Windows, choose Insert > Text Box, drag to make room near the picture, and type the credit. Use the space beside or under the image without covering useful details.
On Mac, Insert > Text Box lets you add the same kind of separate caption. Some ribbon layouts also offer Text Box through the Home tab's Insert group. The text box belongs on the slide, rather than only in presenter notes.
Microsoft's text-box instructions describe placing a caption near a picture. This keeps the credit editable, so you can correct its source without replacing the image.
For a CC-licensed image, use the supplied title, requested creator credit, source, and license. Include a copyright notice when the source supplies one with its credit information.
For a CC BY 4.0 image, a short credit can follow this pattern: Title by Creator, CC BY 4.0, from Original Source. Replace those placeholders with the actual details and link the title and license to the source page and license page.
Don't label a CC BY-SA image as CC BY, or leave out the license version when the source gives one. Similar names can have different conditions. Use the license that belongs to that particular image.
The PowerPoint text-box guide explains selecting, moving, and sizing a caption separately from the picture. Give a long credit more room before shrinking it until the audience can't read it.
Keep source and license links attached to the right words
A source URL helps readers locate the work. A license link explains its reuse terms. Those are separate destinations, and linking both to the same search-results page loses useful information.
Use the original source URL when available. If you found the image in a collection, open that picture's own entry and check the creator and license there. A collection can contain pictures with different permissions.
In desktop PowerPoint, select the part of the credit that needs a link, then use Insert > Link to add its destination. Link the work's title or source wording to the image's source page and the license name to the stated license page.
Test each link after adding it. Open the destination and confirm that it identifies the intended work or terms. A valid website address can still lead to the wrong picture in a large gallery.
If the presentation will be printed, follow the assignment's rules for written URLs or reference entries. A clickable link is useful in a digital deck, but its destination isn't visible from the words alone on paper.
Add the academic reference your assignment requires
Open the course's citation instructions and check how they handle images in presentations. Use the required style and edition for the full entry, including any figure label or citation they ask you to put on the slide.
Create a references slide when required and match each image to its source entry. Citing an article that discusses a picture doesn't always give the picture's own source; check who created the image you used.
For several pictures on one slide, make the connection clear. Place each credit close to its picture or use labels that match the entries. Avoid a loose list of sources that leaves readers guessing which one belongs to which image.
Keep image credits when copying slides between presentations. A copied slide can bring its picture across while leaving the full reference behind in the original deck.
There isn't one universal APA, MLA, or Chicago caption that fits every picture. If the source lacks information your assignment expects, ask the instructor how to handle that missing detail rather than supplying a guessed date or title.
Check reuse terms and the version you'll share
A citation identifies a source; it doesn't replace permission or the image's license conditions. Read those conditions for the use you intend, including whether the deck will be published or used commercially.
For CC-licensed works, describe your changes when that image's license requires it, such as an edited or adapted image. Check the exact license because pictures with a CC label don't all have the same reuse terms.
Run the slide show and read the credit at presentation size. Check that the picture hasn't covered part of it and that the text doesn't disappear against the background. Review the references slide at the same size.
If you're exporting a PDF, inspect the exported copy too. Confirm that the visible credit stayed with its picture and that readers can still use the source details in the format you're handing in.
For unclear permission, ask the source owner or choose an image with clear reuse terms. For citation-style questions, send your instructor the source entry and your draft credit.
The Short Version
Collect the creator, supplied title, source, and license. Add a readable credit in a text box and the full reference your assignment requires. Check the final slide and exported copy.
Checked November 12, 2026.
 If you have any business, I can build it online