
Mini Mic Pro connects through its USB receiver, so don't pair the clip-on microphones in your Chromebook's Bluetooth settings. Plug in the USB-C receiver, turn on a microphone, then check whether ChromeOS lists it as an audio input.
The maker gives setup steps for Mac and Windows, but doesn't promise Chromebook support. Select and test the receiver if it appears under Input in ChromeOS. If it's missing, check compatibility before buying adapters.
Plug in the receiver and check the microphone light
Take the small USB-C receiver from the kit. This is the part that plugs into your computer; the clip-on microphone sends its audio to that receiver. A charging cable connected to the microphone isn't the same connection.
Plug the receiver directly into an available USB-C port. Remove the Lightning adapter if it's attached. Lightning is for compatible older Apple devices, so it doesn't provide a connection for your Chromebook.
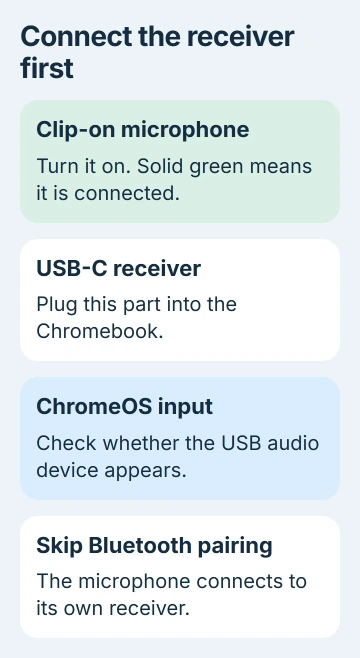
Mini Mic Pro's setup instructions say to hold the microphone's power button until its light turns solid green. The kit connects through its own receiver, without a Bluetooth pairing step or driver download.
For the kit in that guide, solid green means connected and flashing green means muted. Press the button once to unmute. Flashing colors mean it hasn't connected to the receiver yet.
Follow the instructions supplied with your exact kit if its controls differ. The Mini Mic name can appear on different listings, so match the receiver, model and manual before relying on a light pattern.
Only the microphones need charging. The receiver's side charging port is for passing power to a phone while recording; it isn't the port you use to charge a microphone.
Choose the receiver under ChromeOS Input
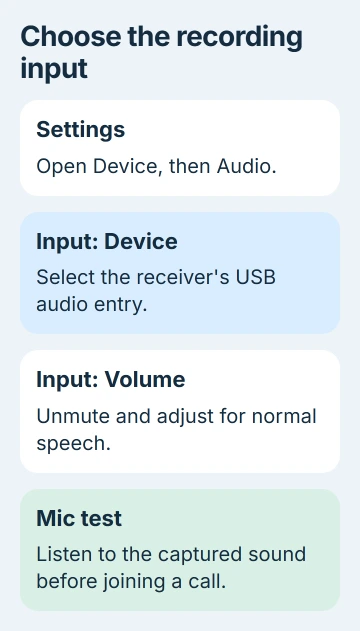
Click the clock in ChromeOS, then open Settings. Choose Device > Audio and look under Input for the receiver's USB audio entry.
Look for USB Audio 1.0, the receiver name in the computer setup guide. If ChromeOS gives yours a different label, use the entry that appears when you plug it in.
The ChromeOS audio controls let you choose input devices and adjust microphone volume. Select the receiver, unmute Input and raise its level enough for normal speech.
Keep Output on your Chromebook's speakers or the headphones you want to use. Input chooses what records your voice; Output chooses where you hear playback. Choosing a microphone doesn't mean you have to send playback to its receiver.
If the name is unclear, compare the list with the receiver unplugged, then plug it back in. The entry that returns is the one to check. This avoids selecting the built-in microphone just because its name looks familiar.
If you're comparing it with the built-in mic, the Dell Chromebook microphone locations help you tell where the laptop picks up sound, apart from the clip-on mic near your collar.
Test the selected input before starting a call
Use Mic test on the Audio page when it's available. Speak into the clip-on microphone at a normal distance and listen to the recording. Check that switching Input to the built-in microphone changes what the test hears.
Keep the clip-on mic away from the laptop for that comparison. Otherwise both microphones may hear you clearly, making it hard to tell which one is active. Don't shout to make an incorrectly selected input seem to work.
I'd finish this short test before joining a meeting. It checks the receiver and your ChromeOS input choice without needing someone else to tell you whether the call sounds right.
A solid green light shows that the mic is connected to its receiver. It doesn't tell you which input ChromeOS or your meeting app selected. If the light is green but the test is silent, check those input choices next.
If you can hear the test through headphones but not the speakers, check Output separately. The Chromebook sound checks cover playback problems that can hide an otherwise successful microphone test.
Allow the microphone in Chrome and select it in the app
For browser recording or calls, open Chrome > Settings > Privacy and security > Site settings > Microphone. Choose the receiver in the microphone list and review whether the site is allowed to use it.
The browser microphone controls let you choose a default input and allow or block each site separately. A blocked site can stay silent even when the ChromeOS microphone test works.
Allow access for the service you want to use, then reopen the call or recording page. In that app's own audio settings, select the receiver if it offers an input list. An app can keep using a microphone you chose earlier.
If the app uses the system default, select the receiver in ChromeOS first, then restart the app or rejoin the call. Check its mute button too. A receiver selected in Settings doesn't unmute a meeting automatically.
Finish the setup in the browser's settings and the app you already use. A separate microphone-testing website doesn't need access to your voice.
When the receiver never appears
Disconnect the receiver from your hub or dock, then plug it into a compatible port on the laptop. For a USB-A-only Chromebook, ask the maker about supported data adapters first. An adapter can fit without supporting the audio connection.
Check that the microphone has power and isn't muted, then reconnect the receiver. Restart the Chromebook after saving your work and inspect Input again. Repeated Bluetooth pairing won't make a missing USB receiver appear.
If the receiver appears and records on a supported Mac or Windows computer but never appears on your Chromebook, send that result to Mini Mic Pro support. Include the Chromebook model, ChromeOS version and receiver model.
On a managed school Chromebook, ask the administrator whether rules block external audio devices or microphone access. Check those rules with them; a policy restriction isn't a reason to reset the Chromebook.
If the receiver fails to appear on any supported computer, contact the seller or manufacturer about the receiver. Avoid spending more on adapters until support confirms the combination can work with your Chromebook.
The Short Version
Connect the USB-C receiver, power on the mic, and choose its entry under Device > Audio > Input. Test it, then check browser permissions and the app's input. Compatibility depends on ChromeOS detecting the receiver.
Checked November 5, 2026.

Isaac Smith is the founder and editor of PC Glance, a website that covers computers, laptops, and technology. He is a tech enthusiast and a computer geek who loves to share his insights and help his readers make smart choices when buying tech gadgets or laptops. He is always curious and updated about the latest tech trends.