
A locked Android phone can be reset with its hardware buttons, but you'll lose local files and apps. You'll still need an account that was on the phone before the reset, so confirm you can use that account first.
The steps here cover Pixel phones; a Galaxy or Motorola needs its own recovery instructions. A factory reset removes the forgotten screen lock, but it doesn't remove the ownership check during setup.
1. Decide whether erasing is the right next step
A forgotten PIN, a frozen touchscreen and a SIM lock need different fixes. Restarting can help a frozen screen, but it won't replace a forgotten PIN. A PUK is a SIM unlock code, so erasing Android won't fix a PUK request.
Google says that a phone you can't unlock needs to be erased before you can set a new screen lock. Its locked Android instructions offer remote erasure or the phone's buttons.
If you recently changed your Galaxy's lock, check the previous-PIN recovery option first. It can save you from erasing the phone if your software supports it. Other Android phones don't all have this option.
If you know the code and can still open Settings, use the ordinary Android factory reset. The buttons let you reset the phone when you can't reach that screen.
Don't erase until you're ready to lose anything that wasn't backed up. Recovery mode, the phone's reset menu, can't make a fresh backup of photos, Downloads or app files before removing them.
2. Check the old account from another device
Try signing in to the phone's existing Google account on another device you can use. Check both the email address and password. Creating a new account won't get you past the old phone's ownership check.
If that sign-in fails, use Google Account recovery before continuing. Use a familiar phone or computer and answer the questions on screen.
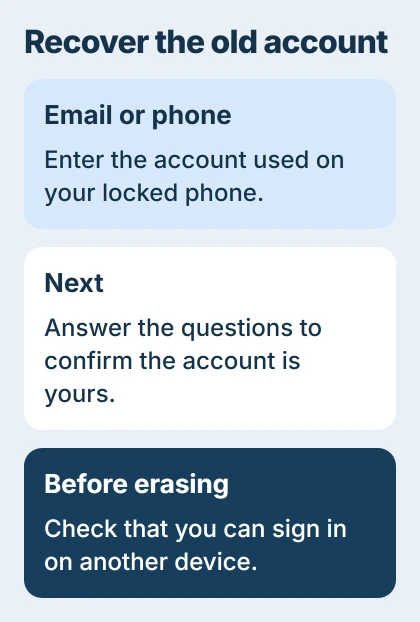
The reset preparation calls for a 24-hour wait after changing your Google password. Allow for that wait before wiping the phone.
Check your Google services and backup records for saved copies. A photo you can see in your account on another device has a saved copy. The reset won't save a photo that exists only on the locked phone.
Restoring a backup can also ask for the screen lock you used when it was made. Signing in to your account and opening a backup are separate checks, so keep any older PIN you remember handy during setup.
I'd sort out account access first. Otherwise, you could erase the phone and still be unable to use it when setup asks you to verify the account.
3. Prepare the phone and choose its button sequence
Charge the phone to at least 70%, as the reset preparation specifies. Have Wi-Fi available for setup afterward. Erasing may take as long as an hour; leave the phone alone while it runs.
Find your model on its box, receipt or the device information in your account. Android phones don't all use the same buttons to open recovery mode. Even Pixels have different steps by model.
For a Samsung, follow your model's recovery or remote-erase steps. Some models need different buttons or connections. Another phone's button sequence may just restart yours over and over.
For a work or school phone, ask the administrator to handle the reset. Setup may need to connect the phone to the organization's management system again, as well as ask for your personal account details.
4. Reset a Pixel through Fastboot and Recovery
For a Pixel 6 or later, turn the phone off. Hold Volume Down and Power together until the Fastboot screen appears, allowing up to 30 seconds. Release the buttons once that screen is visible.
The current Pixel button instructions specify Volume Up and Power for earlier devices. Use the combination for your model; the newer one doesn't apply to every Pixel.
If the phone restarts because the buttons stayed pressed too long, shut it down and try again. Reaching Fastboot only opens the startup menu; it hasn't erased anything yet.
Use a volume button to highlight Recovery Mode, then press Power to select it. On the No command screen, hold Power, press Volume Up, then quickly release both. That opens Android Recovery.
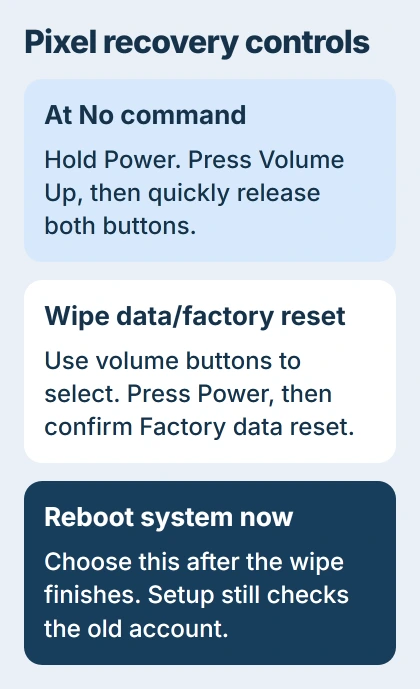
In Recovery, use the volume buttons to select Wipe data/factory reset, then press Power. Choose Factory data reset to confirm. The phone removes your personal data after that confirmation.
Wait for the completion message, then select Reboot system now. The phone should return to the screen you saw when first setting it up. Tap Start and follow the network and account prompts.
If a volume or Power button doesn't work, stop using this method. Ask the manufacturer about repair or another way to erase the phone. Pressing harder won't help you select the menu options reliably.
5. Finish setup with the account already on the phone
Connect to the internet and follow the ownership prompt. Depending on your device and how you reset it, setup may ask for the old screen lock or let you use the Google Account that was on the phone before the reset.
The device-protection rules let you use an account previously added and synced on the phone as a user, not a guest. Erasing the phone again won't remove that requirement.
Choose an available backup when setup offers to restore one, then set a new screen lock. Check your important files and apps afterward. Reinstalling an app doesn't always bring back the data it stored on the phone.
For a secondhand phone tied to the previous owner's account, ask the seller to clear the ownership check through the supported process. If they can't, arrange a return. Resetting the screen lock doesn't transfer ownership.
If Recovery won't open, the erase fails or you can't recover the account, contact the phone manufacturer. Give them the model, purchase details and the screen where you're stuck so they can decide what to try next.
The Short Version
Check access to the old account and backups before erasing. Follow your model's recovery controls, then finish setup with the required account. A factory reset removes the old screen lock and local data.
Checked November 5, 2026.

Isaac Smith is the founder and editor of PC Glance, a website that covers computers, laptops, and technology. He is a tech enthusiast and a computer geek who loves to share his insights and help his readers make smart choices when buying tech gadgets or laptops. He is always curious and updated about the latest tech trends.