
Convert a CSV to Excel by opening or importing it, then saving as Excel Workbook (.xlsx). Opening the CSV doesn't convert its format. Save As creates the workbook that keeps formatting, formulas and extra sheets.
For an ordinary list, opening the file directly is enough. For account numbers, leading zeros or dates that Excel might reinterpret, import it first so you can control how those columns are read.
Open a simple CSV, then save an Excel copy
Start Excel and choose File > Open > Browse on Windows. Select the CSV file. If it isn't listed, change the file filter to include text files or all files. On Mac, choose File > Open and select it.
Check the headings and a few records before saving. Each field should have its own column and each record its own row. A CSV with commas separating names, dates and amounts should become a recognizable table of those fields.
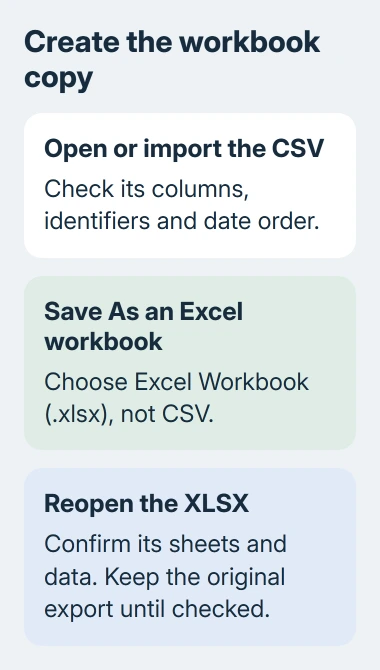
On Windows, choose File > Save As > Browse. Pick a folder, enter a name, and set Save as type to Excel Workbook (*.xlsx). Click Save. If your version offers Save a Copy, use that route to create the new file.
On Mac, choose File > Save As and select Excel Workbook (.xlsx) in File Format. Choose the destination and save. Check the selected format, even if your version's save window looks different.
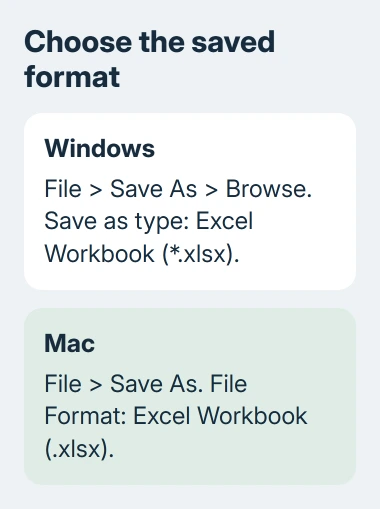
Keep the original CSV until you've checked the new workbook. You can return to that untouched export if Excel read a date, identifier or non-English name incorrectly.
The folder should now contain two separate files, such as orders.csv and orders.xlsx. Microsoft's file-format saving instructions describe choosing the format in the save dialog rather than changing the filename alone.
Import a file when the contents need more control
I'd use import for customer IDs, tracking numbers and anything with zeros at the beginning. These are labels even when they're all digits. Letting Excel treat them as numbers can change information you need to keep.
In current desktop Excel for Windows, start with a blank workbook. Open Data > From Text/CSV, select the file, and choose Import. Some ribbon layouts place this under Get Data > From File > From Text/CSV.
Inspect the preview. Choose the correct Delimiter, the character that separates fields, and check that the headings split into the expected columns. Don't select Load while the whole record still appears in one column.
Choose Transform Data when a column needs a different data type. In Power Query, the import editor, set identifier columns to Text before loading.
If an automatic Changed Type step has already converted them, remove or correct that step first.
Check the preview against the untouched CSV. An identifier like 00124 should still have its starting zeros. Then choose Close & Load to put the result into the workbook and save it as .xlsx.
For all the detail on identifiers longer than Excel can safely store as numbers, use the long-number import checks. Formatting a number after its digits have changed can't recover the original identifier.
Microsoft 365 for Mac offers Power Query through Data > Get Data (Power Query). Choose Text/CSV in the data-source selection and follow the import options shown in your version.
Older Mac editions have different import features, so don't expect every Windows ribbon command there.
Other Mac layouts use Data > Get & Transform Data > Get Data > From File > From Text/CSV. Without those controls in an older edition, open a simple CSV directly; use a supported importer for IDs that could lose digits or starting zeros.
Check separators, characters and dates before finishing
A semicolon-separated export can still have a .csv filename. The filename doesn't tell Excel which separator the source actually used. Read the first record in a text editor when the preview doesn't make sense.
If every record stays in column A, select the delimiter that matches the file during import. The CSV one-column repairs cover a file opening incorrectly on a computer with a different regional separator.
Check names containing accented characters as well as plain English headings. If they appear as broken characters, return to the import preview and choose the matching File Origin or encoding, the way characters are stored in the file.
An export saved as UTF-8 needs to be read that way.
Dates deserve their own comparison. A value such as 03/04/2026 can mean March 4 or April 3. Compare a record whose date is known, and use the import controls appropriate to the source's date order rather than the computer's default guess.
One correct row isn't enough if the export contains several kinds of record. Check the start, a middle record and the end. Confirm that quoted text containing a comma hasn't pushed later fields into the wrong columns.
If the raw CSV is already incomplete, saving it as a workbook won't restore missing records. Ask the exporting app or service for a fresh export and compare the record count it reports with the imported table.
Keep workbook features by continuing in the XLSX copy
After conversion, do your formatting and calculations in the .xlsx file. A CSV is a text export of worksheet data, so it isn't the place to keep several sheets, charts or the workbook's full formatting.
For example, a second sheet summarizing your imported orders belongs in the workbook. Saving the active sheet back to CSV produces a text export of that sheet, rather than a second full copy of the multi-sheet workbook.
The conversion also can't invent formulas from previously exported results. If the CSV contains 250 where the original workbook calculated a total, Excel receives that value. Those digits don't contain the original formula.
Data imported through Power Query may stay connected to its source. Refreshing that query reads the source again. Treat refresh as another import and check what changed, especially if you edited the loaded table manually.
For several CSV files, decide whether they belong on separate sheets or in one combined table before importing them. Saving the first workbook doesn't automatically bring the other files into it.
Choose each source you want to add and give the sheets clear names.
Reopen the workbook and confirm the conversion
Close the new workbook and reopen the .xlsx copy you saved. Confirm its name, the sheet tabs, column headings, identifiers and dates. This also catches accidentally continuing in the original CSV after creating a separate file.
If Excel warns that the extension and format don't match, go back to the real CSV and use Save As again. Changing report.csv to report.xlsx in a file manager changes the name, not the underlying format.
When conversion still fails, give the source app's support team the delimiter, encoding, expected record count and an example with private data removed. Ask which import format you need for its export.
For an Excel saving failure, report the exact Save As error to Microsoft Support.
The Short Version
Open a simple CSV or import one that needs control over columns and data types. Save a separate Excel Workbook (.xlsx), then reopen the saved copy to inspect its contents.
Keep the source CSV until the workbook's identifiers, dates and records are correct.
Checked November 8, 2026.

Isaac Smith is the founder and editor of PC Glance, a website that covers computers, laptops, and technology. He is a tech enthusiast and a computer geek who loves to share his insights and help his readers make smart choices when buying tech gadgets or laptops. He is always curious and updated about the latest tech trends.