
Broken Chromebook screens need a physical repair when the glass or display panel is damaged. A reset won't mend either part. If the Chromebook still runs, connect an external monitor and copy local files before arranging repair.
Flickering without a crack needs different checks. Check which problem you have before ordering a screen, since the lid, hinges or display cable can also be damaged.
1. Separate physical damage from a display glitch
Switch your Chromebook off and look at the screen without pressing on it. A visible crack, shattered area or damage after an impact needs a repair check. Leave a lid that's coming apart alone instead of repeatedly opening it.
Dark patches, lines or missing areas still need checking even if the glass looks intact. Those symptoms alone won't tell you which part to replace. Note any earlier drop and whether the picture changes as the lid moves.
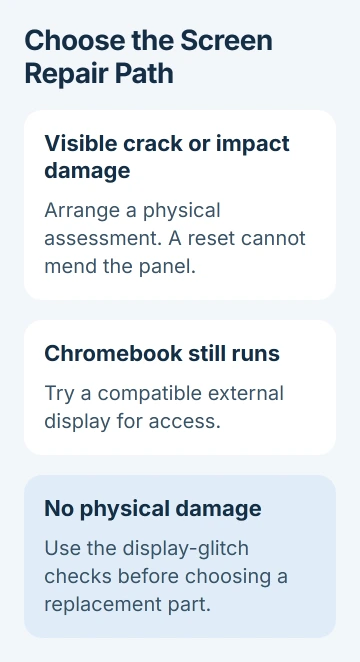
For an intact screen that flickers or draws incorrectly, use the Chromebook display checks. That guide handles software, external connections and resets for glitches rather than physical breakage.
If there are no signs of power, start with the Chromebook startup checks. A replacement panel won't fix a power fault, and a dark screen alone doesn't confirm that the computer has started.
If the base is swollen, unusually hot or visibly damaged, stop using it and arrange service. Use an external monitor as a temporary option only if the Chromebook is safe to turn on.
2. Get temporary access with another display
Connect a monitor or TV using your Chromebook's video port and a compatible cable or adapter. Select that port's input on the monitor or TV, then start the Chromebook with its lid open.
Google's steps for connecting a monitor cover HDMI, DisplayPort and compatible adapters. Check that your model's USB-C port supports video before buying an adapter.
If you can still read enough of the built-in screen, open Settings > Device > Displays and select Mirror Built-in Display. That option appears once you've connected an external monitor.
If a window opens on the damaged screen, press Search + Alt + M, or Launcher + Alt + M, to move it to the other screen. That can bring Settings or Files into view on your working monitor.
You can also hold the Decrease brightness key to show the picture only on the external monitor. Connect the monitor first and use the key instead of closing the lid, which could leave you without access during the check.
If neither screen gives you a usable picture, tell the repairer. The cable, adapter, input setting or startup could be involved, so this result alone won't tell you that the built-in panel is the only faulty part.
3. Copy Downloads and other local files
Once the external screen works, open the Launcher and find Files. Check My files > Downloads and any other local folders you use. Signing in to your Google Account doesn't back up those local files for you.
Select the files, press Ctrl + C, open a folder in Google Drive > My Drive or on a connected external drive, and press Ctrl + V. Wait for the copy or upload to finish before disconnecting anything.
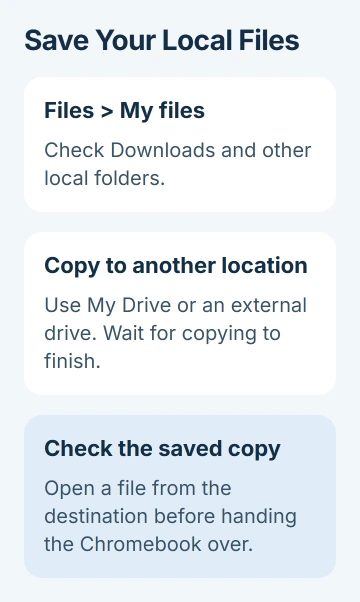
Open a copied file from the new location to check it. If you used Drive, let it finish uploading first; a filename can appear in Files before the upload is done.
The Files instructions explain local folders and Google Drive. A document in Drive and a downloaded copy of it are stored in different places.
Don't Powerwash your Chromebook for a cracked-screen repair unless the service process requires it and your backup is ready. That factory reset erases local data, including Downloads, but won't repair physical damage.
If you can't unlock the Chromebook on either screen, tell the repairer you haven't backed up its local files. Ask about fitting a working display so you can copy them before you agree to have the device erased or replaced.
4. Identify the exact model and repair coverage
Read the model number from the label underneath your Chromebook, and keep the serial or service tag ready for support. A shop needs more than the brand and screen size to find the right replacement part.
Tell the shop whether your Chromebook has a touchscreen or folds into a tablet, and describe any lid or hinge damage. That helps them decide whether it needs a panel or a larger display assembly with other lid parts.
For a school or company Chromebook, contact IT first. The organization may own it, have damage coverage or require an approved repair. Ask what happens to your files if you're given a replacement device.
Dell's broken-screen repair guidance covers Chromebooks and explains when accidental-damage coverage applies or a repair charge is due. Check your own manufacturer's terms and plan.
Ask for a written quote covering the part, labor, any tax and the repair warranty. A Chromebook screen repair doesn't have one fixed price. Your model, touchscreen, damage to other lid parts and local labor all affect the quote.
5. Choose a repair route that matches the damage
A screen replacement can make sense when the rest of your Chromebook works. I'd get a quote for your exact model before buying another Chromebook, especially when your current Chromebook still does everything you need.
For a home repair, use the manufacturer's service manual for your exact model and configuration. Follow its steps to turn off the device and disconnect the battery before touching display connectors. A video for a similar lid isn't enough.
Some repairs require removing the whole display assembly; others let you reach the damaged part differently. Use a qualified repair shop if you don't have the correct manual, compatible part or tools.
If the lid was hit, ask the technician to check its hinges and cable as well as the panel. Replacing only the visibly broken part can leave another problem that causes more damage.
After repair, check the whole screen, lid movement, camera and touchscreen if fitted. Report any dead area or new flicker while the repair warranty applies. Keep the invoice and your notes about the original problem.
The Short Version
Back up through an external display when the Chromebook runs safely, then price the repair for your model. Physical screen damage needs replacement parts. School devices go through IT; home repairs need the correct manual.
Checked November 5, 2026.

Isaac Smith is the founder and editor of PC Glance, a website that covers computers, laptops, and technology. He is a tech enthusiast and a computer geek who loves to share his insights and help his readers make smart choices when buying tech gadgets or laptops. He is always curious and updated about the latest tech trends.