

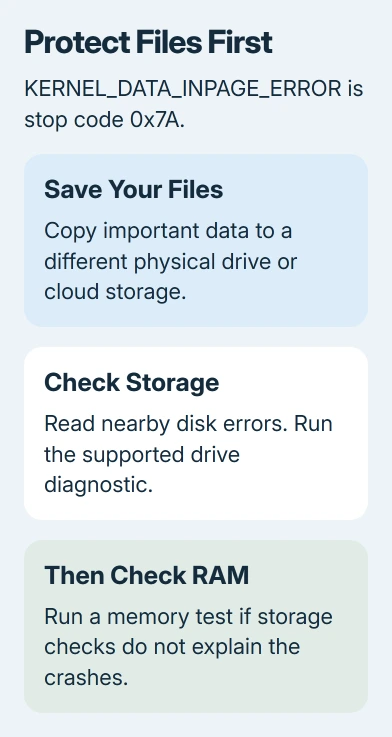
KERNEL_DATA_INPAGE_ERROR in Windows 11 means Windows couldn't read its paging file, which stores some memory data on the drive. Drive faults and bad RAM are common causes, so back up and check both before reinstalling Windows.
The stop code is 0x7A. A blue or black crash screen can show the same error, depending on your Windows version. If the crash repeats, any disk errors and test results can help you work out which part needs attention.
For 0x139, use the Kernel Security Check Failure steps; that code concerns damaged internal data rather than a failed paging read.
1. Back up, then undo a recent hardware change
If Windows starts, copy important files to another physical drive or cloud storage before a repair scan. Try opening several of those copies. Another partition on the same drive won't protect your backup if the drive fails.
I'd save your files before a long scan because Windows couldn't read data it needed. If the drive disappears, makes unusual mechanical noises, or keeps failing during copies, ask for a repair or data-recovery assessment first.
If the crashes began just after you attached new hardware, shut down and remove that newly added device before starting again. For a new internal drive or RAM upgrade, ask the installer to check its fit and compatibility.
Use the computer after reversing that change. If it stays stable, the added device or its connection needs attention. If the code returns, check the recorded errors next rather than buying memory because of the error's name.
2. Read the disk errors around the crash
Right-click Start, choose Event Viewer, and open Windows Logs > System. Look at the entries just before the restart. Open errors involving the disk, storage controller, or a device that disconnected, and keep their details.
Microsoft's 0x7A troubleshooting page explains that a second error value can identify the failed read more precisely. That value isn't always visible on the ordinary crash screen.
If a technician or crash report provides it, 0xC000009C or 0xC000016A usually points to bad disk blocks. 0xC000009D can mean a disconnected drive or a connection the controller can't see.
0xC000000E can indicate hardware failure or an incorrect drive configuration. These values help you choose the next check; they don't all call for the same replacement part.
Don't spend time searching for a second value that wasn't displayed. Save the actual stop code, the crash time, and any nearby storage errors. A shop can use the crash dump if the screen alone doesn't provide enough detail.
For the broader crash-screen controls, the Windows blue-screen guide explains how to keep a record. For this particular code, storage and memory deserve the first checks.
3. Check the drive before treating this as a Windows fault
Run the drive or computer maker's storage diagnostic if available. Follow its model-specific instructions and save the result. A failed test calls for repair, rather than reinstalling onto the same troubled drive.
On Windows 11, open Settings > System > Storage > Advanced storage settings > Disks & volumes, then choose Properties for the physical drive. Supported NVMe SSDs can show drive health and critical warnings there.
That panel doesn't monitor every SATA SSD or hard disk. The SSD-health checks explain the difference, so don't assume a drive without a health reading is healthy.
Once your files are backed up, run the disk check recommended for this stop code if you can still access the drive. Search Start for Command Prompt, choose Run as administrator, and enter:
chkdsk C: /f /rUse C: only if that is your Windows volume. /f fixes file-system errors, while /r checks for bad sectors and tries to recover readable information. The scan can take a long time, especially on a large hard disk.
When Windows says the volume is in use and offers to check it at the next restart, type Y and press Enter. Save your work, plug the PC into power, and restart when you have time for the scan to finish.
Afterward, check whether the stop code returns. File-system repairs can help a damaged volume, but a report of bad sectors or a failing manufacturer test still needs a storage assessment. Finishing the scan won't fix worn-out hardware.
4. Test RAM if the drive checks don't explain it
RAM is the computer's working memory. A bad memory module can also produce this error, even though the message points toward a read from storage. Run the PC maker's memory test when it provides one.
Windows also includes Windows Memory Diagnostic. Save open work, press Windows + R, enter mdsched.exe, and choose Restart now and check for problems. The computer restarts into the test, then starts Windows again afterward.
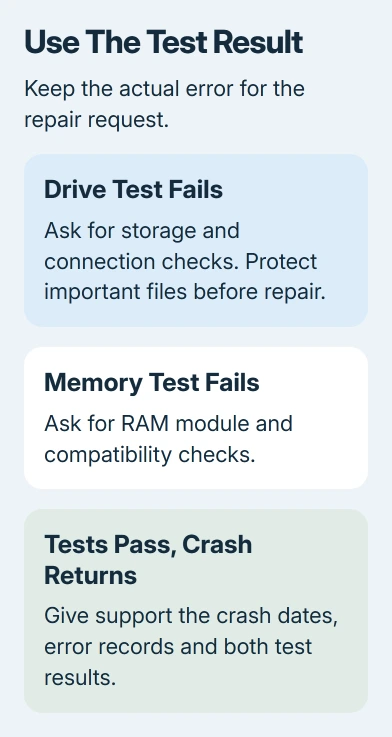
Save the test's result notification after signing in. If the test reports a memory problem, ask the maker or installer to test the RAM modules and their compatibility. A recent memory upgrade makes that conversation especially useful.
A pass means that test didn't catch a memory error. If the crash repeats, give support both the memory result and the storage results instead of assuming that one passing test settles the cause.
5. Check updates, free space, and marked devices
Open Settings > Windows Update > Check for updates on Windows 11. Install the offered updates and restart when requested. On Windows 10, the older route is Settings > Update & Security > Windows Update.
Right-click Start > Device Manager and check devices for warning symbols. Open that device and read its status. Update its driver through Device Manager or the PC maker's supported updater, then see whether it crashes during normal use.
Don't uninstall a storage controller simply because it's listed. Start with a device reporting an error or changed just before the crashes. Keep its driver version and status for the repair request.
Open Settings > System > Storage and check whether your Windows drive is nearly full. Move unwanted files elsewhere or uninstall unused apps. Leave the paging file enabled; switching it off won't repair a failing read.
Run an updated security scan as well. A virus infection can also cause this error, but a failed disk or memory test still needs attention. If updates and a scan don't change the fault, stop repeating them.
When Windows won't stay running
Keep your BitLocker recovery key available before entering recovery tools. From the sign-in screen, hold Shift while choosing Power > Restart. In recovery, select Troubleshoot > Advanced options > Startup Settings > Restart.
Choose 4 for Safe Mode. This starts a limited set of drivers so you may be able to copy files or inspect errors. It won't repair a damaged drive, and if your computer can't reach recovery, have a technician check it.
Ask the PC maker or repair shop to check storage health, drive connections, and RAM for recurring 0x7A. Supply the crash dates and test results. For irreplaceable files on an unreadable drive, request data recovery before erasure.
The Short Version
Back up first. Check recent hardware, storage errors and drive health, then run the appropriate disk and memory tests. Recurring 0x7A with failed hardware tests needs repair rather than repeated Windows reinstalls.
Checked November 8, 2026.

Isaac Smith is the founder and editor of PC Glance, a website that covers computers, laptops, and technology. He is a tech enthusiast and a computer geek who loves to share his insights and help his readers make smart choices when buying tech gadgets or laptops. He is always curious and updated about the latest tech trends.