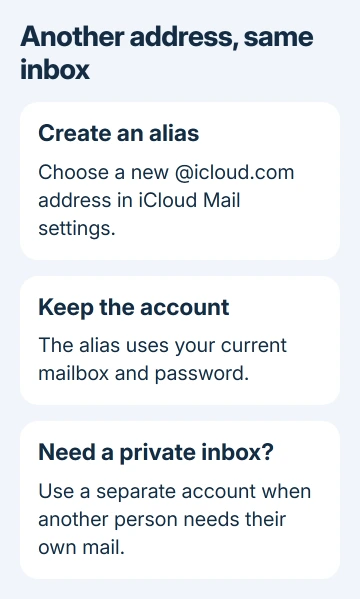
Another iCloud email address can share your existing inbox: create an email alias in iCloud Mail settings. It gives you a second address for sending and receiving mail.
Keep the same Apple Account signed in for an alias. A completely separate inbox needs a separate account instead.
In this guide
Choose an alias when the same inbox is fine
An alias adds another address to your mailbox. Mail sent there appears alongside messages addressed to your main iCloud address. It's useful for a club, a personal project, or an address you'd rather give out instead of your main one.
The alias doesn't get its own password, storage allowance, or Apple Account. Someone who can open the existing mailbox can read the alias's messages too. Choose a separate account when another person needs a private inbox.
I'd use an alias for a second public address and keep the main address for personal mail. That avoids moving photos, purchases, or device backups just to change the address people write to.
An existing second account is a different task. The second iCloud account setup adds its mailbox to iPhone Mail while leaving the phone's main account signed in.
Create the address in iCloud Mail settings
Visit icloud.com/mail. For sign-in, use the Apple Account belonging to the inbox where you want to receive mail. Check that the mailbox contains your familiar messages before adding an address.
Find the Settings button beside the Mailboxes list. Select it, choose Settings, and look for Add Alias. Some layouts group this with the account controls.
Enter the requested details:
- Alias Address: Type the part you want before @icloud.com. The address must contain between 3 and 20 characters.
- Label: Give the alias a recognizable label, such as Club Mail. The list is sorted alphabetically by this label.
- Full Name: Enter the name recipients should see in the From field.
- Select Create and check that the address appears in the alias list.
The label helps you manage addresses; it isn't another mailbox password. The full name is a sender name, so use the identity you actually want people to recognize in their inbox.
Apple's alias creation instructions currently list up to nine aliases, while the linked alias explainer still lists three. Check what your account allows.
Don't delete a useful address to experiment with the limit. The creation page says an account at its stated limit must wait seven days after deleting an alias before creating a replacement.
Check incoming mail and the sending address separately
From a different email account, send a brief test to the complete alias address. Open the existing iCloud inbox and look for it there. There isn't a separate inbox to open just because you've created an alias.
Check the To field of the received message. It should show the address you just created. That tells you mail sent to the new address reaches your inbox, rather than just checking the original address again.
If the alias isn't offered for sending, return to Mail settings and find Send From. Enable the alias as a sending address, then return to your message.
Start a new message in iCloud Mail. Open the From address selector and choose the alias before sending. Write to an account you can check, then inspect the sender address at that destination.
These checks cover different things. The incoming message shows that your alias receives mail; the From field on outgoing mail shows that replies and new messages can use the address you want.
You can also send and receive through the alias on devices with Mail enabled in iCloud settings. If the mailbox itself isn't available on the device, open and enable iCloud Mail before looking for its additional addresses.
Change the name without losing the address
Return to iCloud Mail's Settings and select the alias in the list. Edit its Full Name or Label, then select Save Changes or Done, whichever the page offers.
This helps when a club changes its name or you want a clearer label. Changing these fields doesn't replace the email address people already have. Send another message to check how the revised sender name appears.
The address itself can't be renamed, transferred, or converted into a primary account. If the spelling of the address is wrong, editing the label won't fix it. A different address requires another available alias.
Keep that distinction in mind before sharing a new address widely. A label is easy to adjust later; an email address printed on a form or given to contacts is something you'll need to keep receiving.
Disable an unwanted alias before deleting it
Select the alias in Settings, enable Disable alias, and save the change to turn it off temporarily. To receive mail again, clear that checkbox and save. This lets you pause the address without deleting it.
Mail sent while an alias is disabled is returned to the sender. Disabling isn't a way to quietly collect messages somewhere else, so leave it enabled if a bank, club, or recovery account still uses that address.
For permanent removal, choose Delete alias, then confirm Delete. First change any important services that send mail there. Deletion is permanent, and it doesn't turn the removed address into a separate mailbox.
Hide My Email serves another purpose: it creates random forwarding addresses for privacy. Use an ordinary alias if choosing its spelling matters to you. Neither option creates an independent account for another person.
When Add Alias isn't available
Confirm that you're inside Mail settings, rather than the general Apple Account email settings. The controls for your account's contact or sign-in addresses don't create an iCloud Mail alias.
If iCloud asks you to create the primary mailbox first, finish that setup before adding aliases. Ask iCloud Mail support about a missing control or a conflicting limit. Include the message you see and how many aliases you already have.
Use support.apple.com/icloud and choose the Mail problem. Describe the error and say whether the primary inbox opens.
The Short Version
Create an alias in iCloud Mail settings, then check delivery and the outgoing From address. A private second inbox needs another account. Before deleting an alias, move services that still send important mail there.
Checked November 16, 2026.