Grammarly for Windows made Word 2021's Hide spelling and Hide grammar options switch back on in a confirmed 2024 fault. Quit Grammarly, restart Word, then turn proofing back on in the document.
That's different from spell check simply being turned off in one file. If the boxes stay cleared after you change them, use Word's normal proofing controls. If they immediately select themselves again, check the running writing app first.
In this guide
1. Quit Grammarly before restarting Word
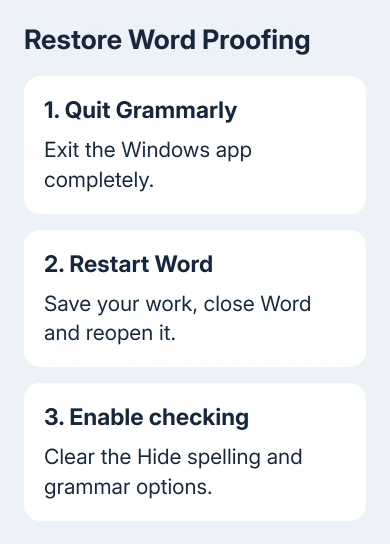
Save your document, then find Grammarly beside the taskbar clock. Check hidden icons for Grammarly too. Open Grammarly's menu and choose Quit Grammarly. Closing only its settings window can leave the app running.
Close every Word window, then reopen Word and the affected document. If a banner offers Turn on Proofing, select it. Otherwise, use the Proofing options in the next section to turn the document's error marks back on.
One owner traced the change to Grammarly: proofing worked with it closed and failed when it started. Quitting Grammarly and restarting Word restored checking. Others confirmed that removing Grammarly fixed their spell checker.
The reports included free and paid Grammarly installations. Paying for Grammarly didn't prevent the problem. Compare the settings with the Windows app running, then with it closed.
I'd check Grammarly before editing the registry or replacing templates. The owner first credited a registry change, then realized Grammarly had been off during that test. Starting it again brought back the fault.
2. Restore the current document's proofing settings
In desktop Word for Windows, choose File > Options > Proofing. In Exceptions for, check which document is selected. Clear Hide spelling errors in this document only and Hide grammar errors in this document only, then choose OK.
In the same Proofing pane, turn on Check spelling as you type. Enable Mark grammar errors as you type if offered. These are separate from the Hide boxes, so turning on automatic checking alone won't remove a document exception.
Add an obviously misspelled test word in ordinary body text. Type a space and look for a red wavy mark, then remove the test word. Return to Proofing and check that the Hide boxes are still clear.
If the boxes remain clear without error marks, check the text's language next. If they reset with Grammarly closed, note what happens so you can tell support, rather than clearing them repeatedly.
Microsoft's spelling and grammar controls distinguish automatic checking, document exceptions, and rechecking ignored errors. File > Options belongs to desktop Word; the browser edition uses other controls.
3. Check a second file and a new document
Open another existing document, then press Ctrl+N to start a blank one. Repeat the short misspelling test in each. Keep Grammarly closed while doing this so a running app doesn't change the conditions between files.
If only one file is affected, check that document's settings. If the boxes reset in older files and new documents, the problem extends beyond one file. This conflict affected templates too, so one repaired file wasn't enough.
Check the Exceptions for selection. Selecting the open file changes its settings; selecting All New Documents changes the defaults for new files. Changing those defaults doesn't automatically repair your older documents.
When new files check correctly and the options stop resetting, use the Word spell-check guide for any remaining document problem. Ordinary configuration is different from boxes that change themselves.
4. Check language settings when the boxes stay clear
Select the affected text. Press Ctrl+A for all the text in the current editing area. Open Review > Language > Set Proofing Language, choose the language the text uses, and clear the checkbox for Do not check spelling or grammar.
Select OK, then test an obvious spelling error again. This setting belongs to the text, so a pasted passage can behave differently from nearby text. Check a separate header or text box in its own editing area if that's the part Word skips.
If Word has remembered ignored errors, open File > Options > Proofing > Recheck Document. Accept the prompt, choose OK, and press F7 to run a spelling and grammar review. Word will check errors you previously ignored in that document.
If manual review works but automatic marks are missing, check the automatic-checking options again. Text skipped because checking is disabled needs its language setting corrected. Neither result calls for a registry edit.
5. Keep Grammarly out of Word if the conflict returns
For current Grammarly for Windows, click in your Word document, right-click the floating Grammarly widget or tab, and choose Turn off Grammarly for the application. Avoid a temporary one-hour option if you need it to stay off while working.
Grammarly's app-specific controls also provide Settings > Block list for managing blocked apps. Restart Word afterward and verify the Hide options again.
Grammarly can then remain available elsewhere. Quitting or uninstalling it was the confirmed 2024 fix. You can also try blocking Word through the current app controls, though the owners in those reports didn't confirm that method.
If the conflict continues and you prefer Word's own checking, remove Grammarly in Settings. For Windows 11, use Apps > Installed apps; on Windows 10, use Apps > Apps & features. Find Grammarly and choose Uninstall.
If you're moving from the old ribbon add-in, check the Grammarly Word add-in replacement separately. An add-in entry inside Word and the desktop app running in Windows aren't the same installation.
When the Hide boxes still reset
Record File > Account > About Word, the Grammarly version, and whether the problem occurs with Grammarly fully closed. If starting Grammarly brings the problem back, send its support team the steps that reproduce it.
For resets without Grammarly installed, give Office support or IT your Word build and new-document result. Ask them to check other writing add-ins and the installation. This old fault doesn't explain every current case.
The Short Version
Quit Grammarly, restart Word, and clear the document's Hide options. Check a new file before changing templates. If the options stay cleared but errors remain invisible, review the text language and press F7.
Checked November 17, 2026.