Open-Shell adds a classic-style Start menu to Windows 11. Get the stable installer from its GitHub release page, install the menu component, then choose a style in Open-Shell Menu Settings.
The app changes how you launch programs; it doesn't turn Windows 11 into an older Windows release. Start with the menu itself, then adjust its appearance and controls once you know it opens correctly.
In this guide
Check the Windows version and processor first
The project's current feature list includes Windows 11. Open Settings > System > About to check your Windows version and System type, especially on a Snapdragon laptop or another Windows-on-Arm computer.
The Open-Shell project page says Windows on Arm support starts with 4.4.196. Older versions can prevent the next sign-in on Arm, so don't install an old copy kept from another computer.
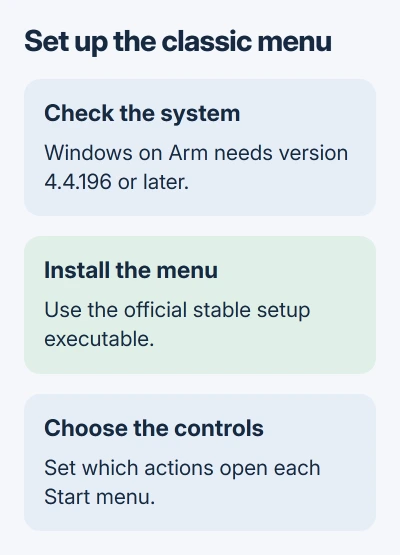
For an ordinary Intel or AMD Windows 11 PC, use the current stable release too. An old installer that worked on an earlier Windows build might behave differently on your recently updated PC.
To move Start left or display taskbar window names, the Windows 10-style layout settings may already do enough. Choose a replacement when the menu's structure is what you want to change.
On an organization-managed PC, ask IT to approve the app before installing it. They can check the software policy and help keep a supported layout across future Windows updates.
Get the installer from the stable release page
Open the project's latest stable release and expand Assets. Choose the installer ending in .exe, rather than the source-code archive or debugging symbols.
The stable release checked for this article is 4.4.198, and its setup file is OpenShellSetup_4_4_198.exe. The latest-release link can point to a newer stable version later, so match the setup filename to the release heading you see.
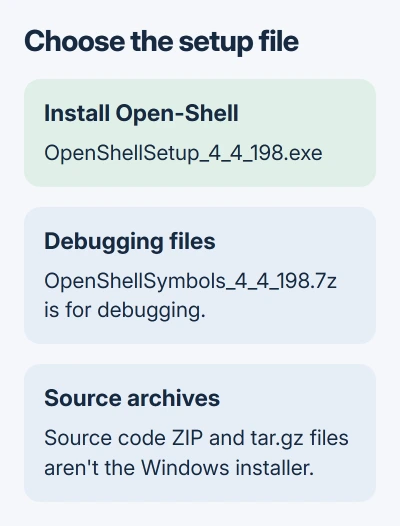
The source ZIP contains development files, not the normal Windows setup program. The symbols archive is for debugging. Downloading the setup executable avoids trying to install the wrong asset.
Keep the installer until setup is complete. If a security warning or signature problem appears, check the file's source and publisher information instead of switching off protection to make it run.
The repository describes its code signing through SignPath. A file with the right name can still come from somewhere else, so check where you downloaded it as well as what it's called.
Install the Start menu component you want
Run the downloaded setup file and follow its license and installation prompts. At the feature-selection screen, keep Open-Shell Menu for the classic Start menu. The other components let you customize other parts of Windows.
Open-Shell also includes features for File Explorer. Installing those isn't necessary just to change Start, so check the component names and select the features you want, rather than enabling everything together.
Finish setup, then open Open-Shell Menu Settings from Windows search if the configuration window doesn't appear. Choose the menu style you prefer and apply it with OK.
The familiar choices include a classic single-column style, a two-column classic style and a Windows 7-style menu. Pick the structure that helps you find programs, rather than starting with a custom Start-button image.
I'd keep the first setup simple. Check that the menu opens and launches a normal app before changing skins, button artwork or many individual items. That makes a later unwanted change easier to undo.
Set which action opens each Start menu
Open the settings again and enable Show all settings to reveal the detailed tabs. Open Controls to check which menu opens when you click Start, Shift-click it or press the Windows key.
Choose Open-Shell Menu for the action you want to use every day, and keep a convenient action assigned to Windows Start Menu. Apply the settings, then try both actions separately.
Don't assume that someone else's Shift-click instruction matches your saved configuration. You can change each action, and settings imported from another PC can change what those actions open.
Open-Shell's menu and the Windows menu can therefore coexist. Being able to reach the built-in menu is useful when a Windows feature or pinned item is easier to find there.
If clicking the button opens a different menu from pressing the Windows key, check those assignments individually. They can open different menus because each action has its own saved setting.
Adjust the layout and save the configuration
Return to Open-Shell Menu Settings to change the menu style or its skin. Apply one change, reopen Start and check the text and program list before making another.
A skin changes the menu's appearance; a menu style changes its structure. Choose them separately so you don't replace a layout you like when you only meant to change its colors.
Use the settings window's Backup control to save the configuration as an XML file when you're happy with it. Save that file somewhere you'll recognize so you can load your settings again after a reinstall.
That XML file saves menu settings, not your installed programs or personal documents. It isn't a substitute for a Windows or file backup, and copying it to a different PC doesn't install the apps listed in your menu.
For smaller changes to the native menu, the Windows 11 Start options cover its own layout and recommendations. Decide which menu you mean to customize before changing settings in either one.
Remove it or report a problem after an update
To return to the built-in menu, use Settings > Apps > Installed apps, find Open-Shell, choose More, then Uninstall. Follow the removal prompts rather than deleting the program folder manually.
Microsoft documents this app removal route, including Control Panel when Settings can't remove a program.
If a Windows update changes the menu's behavior, note your Windows version from winver, your Open-Shell version and which click or keyboard action fails. Include whether the built-in Windows menu still opens.
Check the project's GitHub Issues for a matching report, then include your details there or open a new issue. For a work PC, report that information to IT before installing a different shell customization tool.
The Short Version
Choose the stable setup file and its Open-Shell Menu component, then pick a style. Check the click and keyboard assignments, save your settings, and use Windows app removal if you want the built-in menu back.
Checked November 11, 2026.