Press Windows + Print Screen to create Windows 11's standard screenshot folder and save a full-screen capture. For a folder with your own name, create it in File Explorer, then choose it in Snipping Tool's save settings or Save as.
Creating a folder alone doesn't redirect every screenshot shortcut. The right setup depends on whether you want automatic full-screen captures, automatic snips, or a place to organize pictures you've already taken.
In this guide
Choose the kind of screenshot folder you need
Use Pictures > Screenshots when you want Windows' normal destination for the Windows + Print Screen shortcut. Start there if the main problem is that you can't find a folder called Screenshots yet.
Use a separate folder, such as Work Captures, when you want project pictures together. That folder can hold copied captures, manually saved snips, or new automatic snips after you select it in the current version of Snipping Tool.
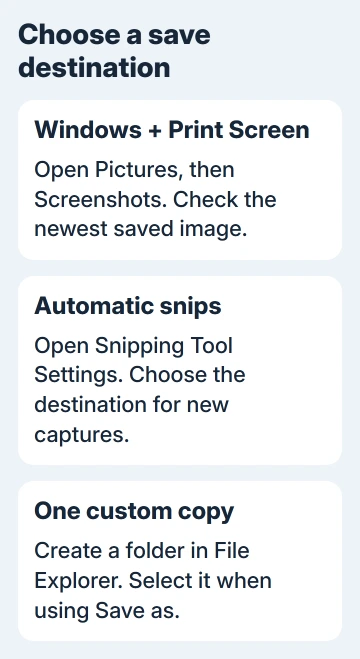
I'd choose the destination before taking a batch of pictures. It saves you from sorting a mixture of private desktop captures and edited images afterward, and you can check the first saved file before continuing.
A folder in File Explorer is just a storage location. It doesn't become the screenshot destination because its name contains Screenshots. Your capture tool needs to use that folder already, or you'll need to choose it when saving.
Let Windows create its standard Screenshots folder
Display something safe to capture, then press Windows + Print Screen. On keyboards where Print Screen shares another key, your keyboard may require Fn too. Check the printed key labels or your laptop's manual.
Open File Explorer with Windows + E, select Pictures in the navigation pane, and look for Screenshots. Open the newest picture to confirm the capture reached that folder.
Microsoft says to check Pictures, then Screenshots, in its Print Screen instructions. Follow those folders instead of guessing a C: path with your account name.
Pictures can be inside OneDrive when folder backup is enabled. The folder's address bar shows where your copy actually lives. A OneDrive location doesn't mean Windows failed to create the screenshot.
Pressing Print Screen alone can open the snipping overlay, depending on your settings. That isn't the same shortcut as Windows + Print Screen, so check which shortcut you're pressing.
For a Surface without an attached keyboard, the Surface screenshot button combinations provide the capture route. The tablet's physical buttons differ from a desktop keyboard's Print Screen key.
Create a separate folder in File Explorer
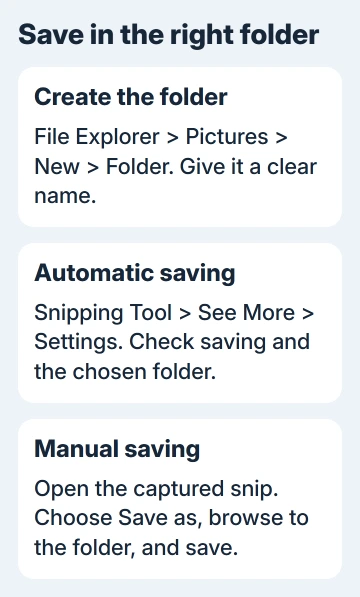
Open File Explorer, then open the place where you want the folder, such as Pictures. Select New > Folder, type a clear name, and press Enter. The new folder should appear in that same location.
For example, make Repair Photos inside Pictures for captures you plan to send with a support request. Open it once so you know where to find it again.
If Screenshots already exists, open it instead of making a second version with a similar name. A folder called Screenshots 2 can be useful for organizing, but the existing Windows shortcut won't start saving there just because it's newer.
To organize existing files, select the pictures, press Ctrl + C, open the new folder, and press Ctrl + V. Check that the copies open before deciding whether to remove the originals.
Use Ctrl + X instead of copying only when you want to move the files. Moving a picture changes where that file lives; it doesn't change where the next screenshot will be created.
If New > Folder is unavailable, try your own Pictures location. You might not have permission to create folders in a shared, protected, or managed location. Ask the owner for access rather than changing unrelated permissions.
Set the destination for automatic Snipping Tool captures
Open Start, search for Snipping Tool, and open it. In the current app, select the three-dot See More menu, then Settings. Find the automatic screenshot-saving options and the folder selection.
The current Snipping Tool instructions support changing both automatic saving and the default screenshot folder there. Select your new folder if your installed version offers that control.
Leave automatic saving on if you want each capture saved without having to do it yourself. If the folder control is missing, use Save as for now and check Snipping Tool for updates through Microsoft Store's app-update controls.
Take a small capture with Windows + Shift + S, select an area, then inspect the destination you selected. If the new image appears there, Snipping Tool is using the folder you chose.
Changing Snipping Tool's folder doesn't change the destination of every other capture app. Xbox Game Bar, a browser extension, and Windows' full-screen shortcut can each use their own saving behavior.
Save one snip directly into your new folder
For occasional captures, open the image in Snipping Tool and choose Save as. Browse to the folder you created, enter a filename, choose the file type offered, and select Save.
A name such as Printer Error Before Restart helps you find the right image without opening several similar thumbnails. The filename helps when an administrator asks for the original error rather than the screenshot taken after a repair.
Check the saved copy in File Explorer. A manually saved copy can sit alongside an automatic original, so two files aren't necessarily two failed capture attempts. Give the edited copy a clear name so you share the right one.
For clipboard captures or a different keyboard combination, the Windows screenshot methods explain which action captures an image and which action saves a file.
If captures still miss that folder, open Get Help for a Snipping Tool saving problem. Give the app version, chosen folder, and whether Save as works there. That helps support check the app setting and whether it can save to that folder.
The Short Version
Use Windows + Print Screen for the standard Screenshots folder. Create a custom folder through File Explorer > New > Folder, then select it in Snipping Tool Settings for automatic snips or in Save as for individual pictures.
Checked November 12, 2026.