
Better iPhone photos usually start with good light, a steady phone and focus on your subject. Clean the camera glass, choose your viewpoint, then tap the subject and adjust brightness before taking the picture.
Those changes help more than choosing a new filter after every shot. Try the camera controls with one scene so you can see what improves your photo, rather than changing several settings and guessing afterward.
Start with clean glass and a deliberate frame
Wipe the front and rear camera glass with a microfiber cloth. A fingerprint can soften a picture or spread bright light across it. Check that a case edge or added lens accessory isn't covering the camera you're using.
Apple says to clean the lenses and remove obstructing or magnetic accessories when picture quality is poor. Start there before assuming the camera needs replacing.
Choose your subject before opening more controls. For a portrait, check the person's face and what's behind them. For a document, include every edge. A small move can keep an unwanted object out of the background.
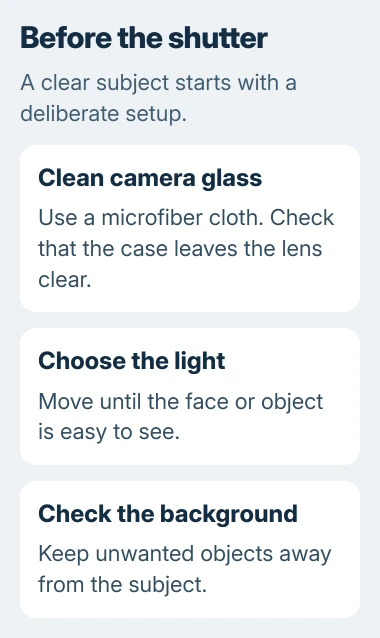
For a casual indoor portrait, move the person near a window and compare it with your first shot. Judge it by how clearly you can see their face; the same position won't suit every room.
Unless you want a bright window in the background, try keeping it out of the frame. If the person's face looks dark, move yourself or the person before making a large brightness adjustment.
I'd try that small move before opening a filter menu. It changes the light reaching the camera and often makes it easier to judge focus and exposure in the next shot.
Tap the subject, then control the brightness
Open Camera in Photo mode and tap the part of the scene you want sharp. For a person, start with the face. That tells the camera where to focus instead of leaving the choice entirely to it.
Next to the focus area, drag the exposure control up or down. Exposure means how bright the camera records your picture. Watch your subject as you adjust it, especially if bright surroundings make a face look dark.
The camera-tool instructions cover tapping to move focus and dragging to adjust exposure. A brighter photo isn't always better; check that you can still see detail in the parts you care about.
For several shots from one position, hold the focus area until AE/AF Lock appears. That locks automatic exposure and autofocus at that point. Tap again to release it when your subject or distance changes.
The lock helps when the camera keeps adjusting as you reframe a still object. But if a person moves toward you, focus stays at the old distance and the next shot can be soft. Release it when you need the camera to focus again.
Tap the screen to focus even if your model has Camera Control on its side. You don't need that extra hardware to choose a subject and check the brightness in the preview.
Turn on Grid and Level for straighter framing
Go to Settings > Camera and turn on Grid and Level. Reopen Camera and use the guides to check the horizon and your subject's position before pressing the shutter.
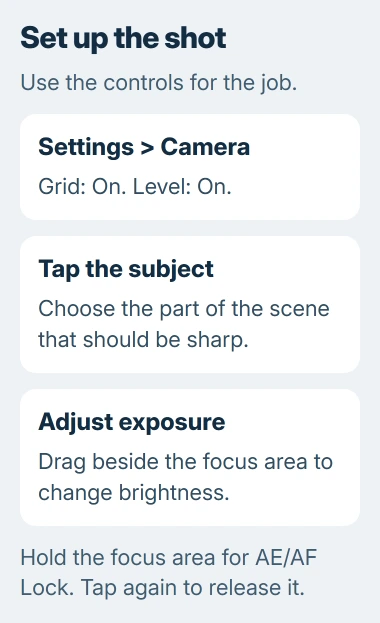
Grid helps you compare the space around your subject; Level helps you line up the shot. They help with framing; they don't change the number of pixels in your photo.
For a building or an object on a table, compare the picture's edges with the object before shooting. Leave room around anything you want to keep in the photo. Cropping afterward can cut away detail you wanted.
Your subject doesn't have to sit in the middle. Try a centered photo, then another with more space in the direction a person is facing. Compare them afterward and choose the one that tells the story more clearly.
If the whole photo is tilted, straighten it in Photos. If the problem is an unusual color treatment, check iPhone Photographic Styles and display color. Changing the framing won't undo a saved color style.
Choose the view before pushing zoom farther
Try the zoom choices in your camera and check what each one includes. The camera basics guide explains that the labeled zoom options depend on your iPhone model.
Choose a view that fits your subject, then move when it's practical and safe. Zoom buttons differ between models, and the largest zoom number won't necessarily give you the best detail. Compare the pictures themselves.
For a close-up, check focus before taking more shots. If the detail stays soft, back away a little and tap your subject again. Getting closer stops helping once the camera can't focus at that distance.
Hold your phone with both hands when you can. Press the shutter without jerking the phone away, then check the picture before leaving a scene you can't easily repeat.
Give Night mode time to finish
On supported models, Night mode turns on in low light and its icon turns yellow. The time beside it tells you the camera may need longer to take the picture than it does in daylight.
Keep your phone still until it finishes. Resting it on a secure surface or using a tripod can help. Moving the phone straight after tapping the shutter can spoil a picture that's still being captured.
The Night mode guide explains that turning on flash or Live Photos deactivates Night mode. If the yellow indicator disappears after you change either control, check that choice before looking for a fault.
A longer capture won't help every dark scene. If a person or pet keeps moving, try better light and take another shot. Keeping your phone still won't keep the subject still.
For a group photo with the phone supported, open the camera controls and choose Timer. Pick a delay your version offers, press the shutter, then get into position without touching the phone while it takes the picture.
Review sharpness before editing the look
Open the photo and check the detail that matters, such as a face or the words on a sign. If it's sharp, crop it, straighten it or adjust brightness a little. Make each edit for a reason you can see in the picture.
For a paper copy, check the photo's print preview so a tight crop doesn't cut into the subject.
If one camera stays blurry in ordinary light after you clean it and remove an accessory, use the phone camera fault checks. That's a different problem from improving a photo taken with a working camera.
Compare the front and rear cameras and note which one fails before contacting support. Tell them if the blur or black viewfinder keeps happening. Another filter won't fix that camera problem.
The Short Version
Clean the lens, choose the light, then tap your subject and adjust exposure. Use Grid and Level to frame the shot, hold steady through Night mode, and check sharpness before editing. Zoom and camera controls depend on your model.
Checked November 4, 2026.

Isaac Smith is the founder and editor of PC Glance, a website that covers computers, laptops, and technology. He is a tech enthusiast and a computer geek who loves to share his insights and help his readers make smart choices when buying tech gadgets or laptops. He is always curious and updated about the latest tech trends.