
Quick Start can move data directly from your old iPhone to your new iPhone without restoring an iCloud backup. Choose the direct transfer from the previous iPhone during setup, then keep both phones nearby and powered until they finish.
A cable is another option, with the right connection for each phone's charging port. If the old phone isn't available, a computer backup can work instead. Without the old phone or an existing backup, a full local transfer isn't possible.
Get both phones ready before starting setup
Update the old phone to the latest iOS version it supports. Have its passcode and your Apple Account password ready. Direct transfer avoids an iCloud backup, but it doesn't remove account sign-in or activation requirements.
On the old phone, connect to Wi-Fi and enable Bluetooth. Leave it unlocked at the Home Screen. Charge both phones, and plan a break when neither will be needed for calls or other tasks.
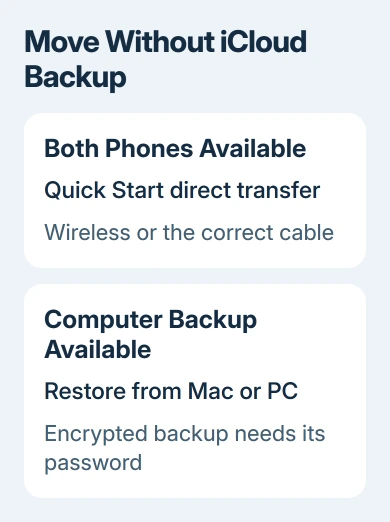
Apple explains the difference between direct transfer and cloud download in its Quick Start procedure. Choose direct transfer to move between the phones without an iCloud restore.
Quick Start setup is available with an older device running iOS 11 or later. To get the direct transfer options, use the latest software your phone supports. Earlier iOS versions don't all have the same transfer screen.
The new phone should be at its welcome setup screen. If it's already set up, the full migration process requires starting setup again. Back up anything new on that phone before erasing it.
Use Settings > General > Transfer or Reset iPhone > Erase All Content and Settings on the new phone only when you're ready to remove its current content. Leave the old phone's data intact.
On iOS 14 or earlier, the erase control is under Settings > General > Reset. Quick Start isn't available for devices enrolled through Apple Business or through Apple School Manager; ask the organization about migration.
Move data directly with wireless Quick Start
- Turn on the new iPhone and place it beside the unlocked old one.
- Follow the setup prompt on the old phone and the instructions on both screens.
- Connect the new phone to Wi-Fi or its cellular network when prompted.
- Activate cellular service if asked, then configure Face ID or Touch ID.
- When asked how to transfer data, choose transfer directly from the previous iPhone rather than download from iCloud.
The exact wording can vary with iOS, so read the description beneath the transfer choice. It should describe moving from the other device, rather than downloading a saved cloud backup.
Keep both phones close together and connected to power through the transfer. You must wait for it to finish on both before using them. The estimate depends on the amount of data and network conditions.
Don't judge completion by the new phone alone. Check that each phone reports a completed transfer. A large photo or video collection can make this a longer job than copying a handful of contacts.
If the setup prompt disappears before the transfer starts, restart both phones and bring them together again. Confirm that the old one has Wi-Fi, Bluetooth and an unlocked Home Screen before repeating setup.
If migration reaches account sign-in but stops there, work through the Apple ID setup spinner while keeping the old phone intact.
For a phone that repeatedly restarts during migration, use the separate iPhone transfer restart checks. If the same attempt keeps failing, work through those checks before starting it again.
Choose the cable that matches both iPhones
A wired transfer still uses the setup instructions. Connecting a cable doesn't turn two already configured iPhones into a file-copy window, and the new phone may still need a network connection for setup.
For iPhone 15 or later to another iPhone 15 or later, connect the phones with a USB-C Charge Cable. Both ends plug into the phones' USB-C charging ports.
For iPhone 14 or earlier to iPhone 15 or later, use a USB-C to Lightning cable. Put Lightning in the old phone and USB-C in the new one.
For two iPhones with Lightning ports, use a Lightning to USB 3 Camera Adapter, along with a Lightning to USB cable. The adapter also needs a power adapter rated at 12W or higher.
Connect power to the camera adapter's Lightning port, plug that adapter into the old iPhone, and connect the new iPhone's Lightning cable to the adapter's USB port. Then turn on both phones and follow setup.
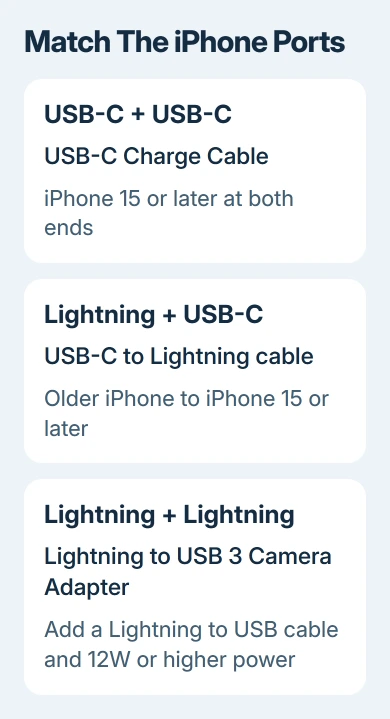
These are different connections, so check the ports before buying an adapter. I'd use wireless Quick Start if the alternative is buying a powered Lightning adapter you'll only need once.
With the phones connected, follow the onscreen instructions, set up the network and cellular service if requested, and complete Face ID or Touch ID. Wait for both phones to finish transferring.
Restore a computer backup when direct transfer isn't practical
You can also back up the old phone to a Mac or Windows PC and restore that backup to the new one. Use Finder on a Mac, Apple Devices on a supported Windows PC, or iTunes if that's the software you use to manage the iPhone.
Make a backup of the old iPhone on that computer first. Choose Encrypt local backup if saved passwords and Health data need to be included, and keep the backup password somewhere you can retrieve it.
An ordinary backup without encryption doesn't save all the same information. You'll need the encryption password to restore the backup, so don't rely on remembering it during the phone swap.
Start setup on the new phone, select From Mac or PC at the data-transfer screen and connect it to the computer. In the management app, select Restore Backup and choose the correct backup by date and device.
Enter the encrypted backup password when requested, then let the restore finish. A backup made with newer iOS can require you to update the new phone first.
For a backup requiring newer iOS, finish setup using Don't Transfer Apps & Data, then install the available update in Settings > General > Software Update. Save any new content before erasing the new phone again to retry the restore.
If the old iPhone is lost or broken, you'll need an existing usable backup for this full restore from a computer. A cable connected to an empty new phone can't retrieve data from an unavailable device.
Verify the content after migration
Open important apps, contacts, messages and photos on the new phone. Confirm that you can make calls and access the accounts you need. Payment cards, authentication apps and some services can need their own setup.
Content already stored in online services may still need to download or sync after sign-in. Avoiding an iCloud backup doesn't mean every app and cloud-stored file can work without its service afterward.
If icons are waiting or apps are missing, the apps that didn't transfer guide separates pending downloads from apps that can no longer be downloaded.
For persistent setup failures, give Apple Support each phone's model, iOS release and the message or stage where it stops. Keep the old iPhone until you've checked that your important content is on the new one.
The Short Version
Choose direct transfer in Quick Start, keep both iPhones powered and wait for both to finish. A model-matched cable or a local computer backup also avoids an iCloud restore. Check important data before erasing the old phone.
Checked November 9, 2026.

Isaac Smith is the founder and editor of PC Glance, a website that covers computers, laptops, and technology. He is a tech enthusiast and a computer geek who loves to share his insights and help his readers make smart choices when buying tech gadgets or laptops. He is always curious and updated about the latest tech trends.