Rufus turns a Windows 11 ISO into a bootable USB installer. Select the correct USB drive and ISO, use GPT with UEFI for a standard supported PC, then start that PC from the finished stick to open Windows Setup.
Making the stick doesn't install Windows on the computer running Rufus. The installation happens later, on the PC you boot from it. This procedure covers a clean Windows 11 installation on an Intel or AMD x64 PC.
In this guide
1. Prepare the ISO, USB drive, and target PC
Back up the target PC's important files and anything on the USB stick before continuing. Creating the installer erases the selected stick, and the clean-install procedure later removes the chosen Windows installation.
Use a stick with 8 GB capacity or more and a working Windows computer to prepare it. The Windows installation files arrive in a disk image called an ISO; copying that file onto a stick isn't the same as making an installer.
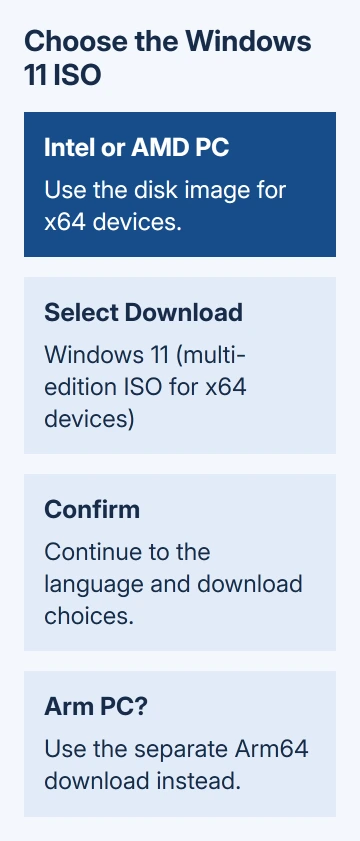
Download the Windows 11 ISO from the official Windows 11 download page. Choose the disk-image download for x64 devices, select the release offered, and follow its language and download choices.
Keep the ISO language and Windows edition in mind. When reinstalling an activated PC, the installed edition must match its license, such as Home or Pro. Rufus doesn't supply a Windows license or turn a Home license into Pro.
Check that your intended Windows 11 PC meets the requirements, including a supported processor, TPM 2.0, and Secure Boot capability. Making a USB installer doesn't make unsupported hardware eligible for Windows 11.
2. Select the stick and image in Rufus
Download Rufus from rufus.ie and open it on the Windows computer that will prepare your stick. Rufus needs no installation. Pick the version for that computer's type of Windows, which can differ from the PC you're making the installer for.
Connect the USB stick. Under Device, select it by its name and capacity. Disconnect other removable drives if that makes the choice clearer. Device is the stick Rufus will erase; you'll choose the Windows installation disk later in Setup.
Under Boot selection, choose Disk or ISO image, select SELECT, and open the Windows 11 ISO you saved. Wait for Rufus to read it before changing the remaining options.
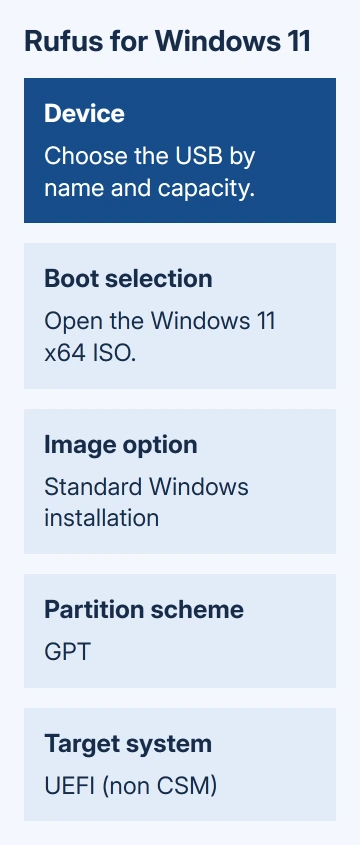
Choose Standard Windows installation under Image option when that choice appears. Windows To Go is a different task: it prepares Windows to run from an external drive, rather than making this installer.
I'd compare the Device capacity one last time at this point. It takes a moment, and is much easier than discovering afterward that the selected stick held the only copy of another project.
3. Use GPT and UEFI, then write the installer
Set Partition scheme to GPT and check that Target system shows UEFI (non CSM) for this Windows 11 procedure. UEFI is the modern firmware startup mode; GPT is the disk layout paired with it here.
Keep the file system and cluster size Rufus chooses unless its instructions for your image say otherwise. Rufus can use NTFS for Windows installation files; you don't have to force the stick into FAT32 by hand.
Select START. A current Rufus version can show a Windows User Experience dialog with optional setup changes. Read each choice. You don't need every selected option to make a normal installer.
For a supported installation, leave hardware-requirement bypass choices off. Account and privacy choices change how Setup behaves; they're separate from writing the USB. Confirm that the stick's contents will be erased to continue.
Wait until Rufus returns to READY after writing finishes. A drive appearing in File Explorer during the process isn't the completion signal. Close Rufus and safely eject the finished stick when you need to move it to another computer.
If writing fails, keep Rufus's error message and open its log before retrying. Its FAQ and support details distinguish image, device-access, and firmware problems that need different repairs.
4. Open Windows Setup through the boot menu
Plug the stick into your intended Windows 11 PC, turn it on, and open its one-time boot menu to choose a drive for this startup. Select the UEFI USB entry. Check the manufacturer's startup instructions for the exact key.
The Windows Setup language screen means the computer has started the installer. A normal Windows desktop means it started the existing system instead. Selecting the stick in File Explorer doesn't switch the computer into USB boot mode.
If the boot menu doesn't list the drive, or selecting it returns to Windows, use the USB boot troubleshooting before remaking it repeatedly. Confirm the stick and firmware mode match.
Keep Secure Boot enabled for a normal supported installation. Current Rufus UEFI:NTFS bootloaders are signed for Secure Boot; advice based on much older Rufus releases can send you toward an unnecessary firmware change.
5. Choose the installation disk in Windows Setup
Set the language, then the keyboard layout, then continue with Install Windows 11. Current Setup asks you to acknowledge that files, apps, and settings will be deleted for this clean-install route.
Select the licensed edition if asked. When reinstalling Windows on an activated PC, choose I don't have a product key if its matching digital license will reactivate it. A new PC needs its own valid license.
At disk selection, identify the intended Windows disk using its capacity and layout. Do not delete partitions on other storage disks. Stop for help if you can't distinguish them.
For a backed-up clean install, remove that Windows disk's partitions and select its Unallocated Space. The installer builds the required layout. Microsoft says to follow its installation-media procedure.
Let installation and its restarts finish. When the installed Windows starts, complete the region, network, account, and privacy screens. If the PC starts the USB installer again, choose Windows Boot Manager for the internal drive.
Choose a different route when keeping apps or using Arm
For an in-place upgrade that keeps apps and personal files, start from within Windows and review Change what to keep. This upgrades the existing installation. Booting the stick into the clean-install route won't preserve installed apps.
A Windows-on-Arm PC needs an Arm64 Windows image and device-compatible boot instructions. That x64 download is intended for Intel and AMD hardware. Use the PC manufacturer's recovery guidance when its drivers or recovery image are required.
After a successful install, check activation and run Windows Update. Keep the installer until Windows starts normally. When it's no longer needed, restore the Rufus stick for ordinary storage.
If Setup still fails, give the PC manufacturer the model, firmware mode, ISO release, Rufus version, and exact error. If Rufus can't write the stick, report the problem and log to its issue tracker. Activation questions need different help.
The Short Version
In Rufus, choose the intended stick and x64 image, use Standard Windows installation with GPT and UEFI, and wait for READY. Boot the target PC from the stick, then select its installation disk carefully in Windows Setup.
Checked November 16, 2026.