A cable connects an iPhone to a MacBook for backups and syncing through Finder. Unlock the phone, approve the connection on both devices, then select the iPhone in Finder's sidebar.
For file sharing or viewing the phone's screen, AirDrop and iPhone Mirroring are separate choices with different controls.
In this guide
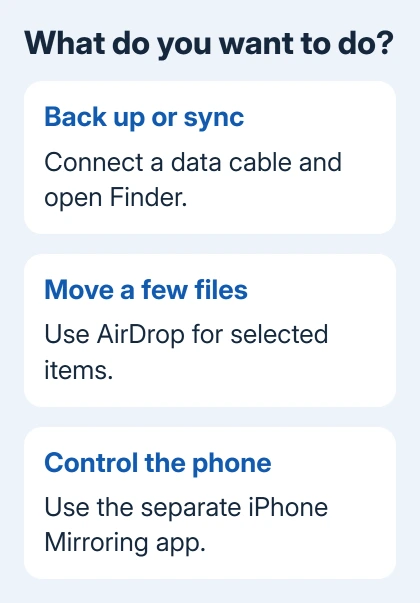
Choose the connection that matches your job
Use Finder when you want the Mac to manage the connected phone: make a local backup, sync selected content, or open its device settings. A charging symbol alone doesn't mean the Mac has permission to access your phone.
Finder handles this on macOS Catalina 10.15 and later, on both Intel and Apple silicon MacBooks. A Mac running Mojave 10.14 or earlier uses iTunes instead. Check Apple menu > About This Mac if you're unsure which applies.
For a few pictures, AirDrop may be the more convenient route. For a photo library import, use the iPhone-to-Mac photo transfer steps. Neither requires turning on every Finder sync category.
To control the phone from your Mac's display, follow the separate iPhone Mirroring setup. Pairing the devices in the Bluetooth settings pane isn't a substitute for any of these jobs.
I'd start with the cable for a first Finder connection. Once the phone appears and you've approved access, you can switch Finder syncing to Wi-Fi knowing the Mac can find and access your phone.
1. Connect a cable that carries data
Use a cable that fits both devices and supports data transfer. An iPhone with USB-C needs a USB-C connection at the phone; an older iPhone with Lightning needs a Lightning cable. The Mac end depends on your MacBook's ports.
Plug the phone into the MacBook, then unlock it with its passcode. Keep the phone handy while you answer the connection prompts. A locked phone can leave the Mac waiting for approval.
If the Mac asks Allow accessory to connect?, choose Allow. Open Finder from the Dock and look under Locations in its sidebar for the iPhone's name.
No name there yet? Choose View > Show Sidebar if that area isn't visible.
When the name appears, click it. You'll see a device page rather than a folder containing the phone's entire storage. Use the tabs and supported apps shown there to manage your iPhone's content.
2. Approve Trust on both devices
Click Trust in Finder if prompted. On the phone, tap Trust in the Trust This Computer? alert and enter its passcode if requested. In older iTunes, the button on the computer can be Continue.
Apple's trust-setting instructions explain why both approvals matter: a trusted computer can access photos, videos, contacts and other content. Approve your own Mac, rather than treating the alert as a routine charging prompt.
Once you've approved access, Finder should show the iPhone's General page and other available tabs. The Mac can then offer backup and sync controls instead of waiting for permission.
The trust prompt can appear again during backups on iOS 16 and later. Seeing it again doesn't by itself mean the cable is broken or that the Mac has forgotten every previous connection.
If you accidentally chose Don't Trust, disconnect and reconnect first. Keep the phone unlocked and check both screens again. Continue to the last section only if the prompt won't appear or the Mac doesn't accept your answer.
3. Make a backup or select what to sync
For a local backup, select the iPhone in Finder, then open General. Select the backup-to-this-Mac option and click Back Up Now. Wait for the latest-backup date and time to update.
Choose Encrypt local backup if you need the backup to include saved passwords, Wi-Fi settings, Health data and other items that an unencrypted computer backup leaves out. Keep the backup password in a place you'll remember.
On macOS Mojave or earlier, open iTunes and select the device button, then Summary. Choose Back Up Now there. Use its encrypted-backup option when you need Health and Activity data saved.
For syncing, select a content tab such as Music, Movies or Photos. Enable that tab's Sync option, choose the content you want, then click Apply. Use Sync if it doesn't begin automatically.
Connecting the cable and turning on a sync category are separate decisions. Leave categories unchanged for a backup-only connection. That avoids changing a library just to confirm the phone has connected.
Stop at an Erase and Sync message until you've read it. That action replaces the selected type of content with content from this Mac. It isn't a harmless way to make the connection prompt disappear.
4. Turn on Finder access over Wi-Fi
Leave the cable connected for this setup. Select the iPhone in Finder and click General. Scroll to Show this iPhone when on Wi-Fi, select it, then click Apply.
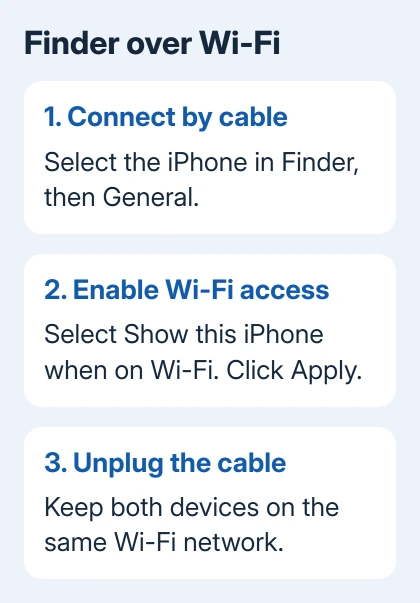
Now unplug the cable. Keep the phone and Mac on the same Wi-Fi network and check whether the phone still appears in Finder. If it does, Finder can reach it wirelessly.
The Finder syncing instructions say the phone syncs automatically over Wi-Fi when connected to power. Your selected sync categories still control what gets transferred.
This setting doesn't make the phone available from an unrelated network across town. If it disappears after you change networks, rejoin that shared network before changing trust settings or reinstalling anything.
5. Fix a missing phone or a connection prompt that repeats
First try a different data cable and another Mac port. A cable can charge the phone without providing a working data connection. If changing it makes the phone appear, keep using the working cable.
Next, update macOS and restart both devices. If a software-update alert appears specifically when connecting the iPhone, complete the offered update before trying to sync again.
For a Trust prompt that stays missing, go to Settings > General > Transfer or Reset iPhone > Reset > Reset Location & Privacy. Reconnect the phone and approve Trust again. This also resets other location and privacy permissions.
Avoid resetting all network settings just because the phone isn't in Finder. Start with the cable and permission checks that match a USB connection; the network reset removes saved Wi-Fi details as well.
If another cable and port still fail, follow the computer-recognition checks. Ask support about an iPhone missing from Finder, giving the macOS version, iPhone model and results with the second cable.
The Short Version
Connect a data cable, unlock the iPhone, approve Allow and Trust where shown, then select it in Finder. Choose whether to back up or sync. For Wi-Fi access, enable Show this iPhone when on Wi-Fi during the cable connection.
Checked November 10, 2026.