A dead pixel on an iPhone isn't repaired by changing a setting. Check for dirt, a damaged protector, or a temporary afterimage first. If it stays, have the display inspected rather than pressing the glass or using a flashing-color app.
A tiny dark dot, a bright colored point, and a faint outline of an old image aren't the same problem. The checks here help you describe the symptom clearly when asking about repair.
In this guide
1. Check whether the mark is on the glass
Turn off the iPhone and disconnect its cables. Gently wipe the display with a soft, lint-free cloth. Look at the mark with the screen off, then switch it back on for a comparison against a light background.
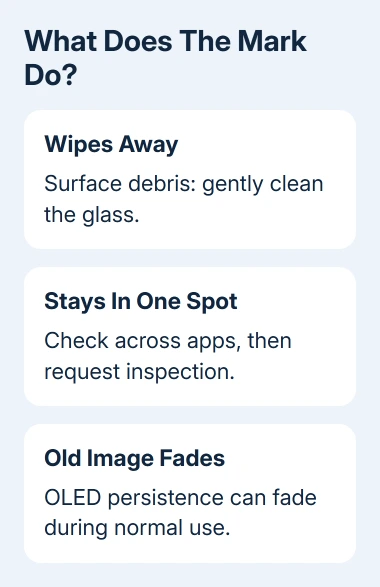
A speck that wipes away was on the surface. An uneven mark you can see with the screen off can be in the protector or glass. A point that appears only when the screen is on is a different symptom.
Apple's LCD pixel guidance distinguishes dark pixels, bright pixels, and foreign material. It also notes that material trapped inside a screen needs professional attention. Don't try to reach it by lifting the display.
Inspect any screen protector for a chip, bubble, or trapped debris at the same position. If the protector is visibly damaged, the screen protector checks help you decide whether that outer layer is the problem.
Stop pressing the spot to see whether it changes. Even if pressing makes the mark change, that isn't a safe way to fix it. Handle a damaged screen as little as possible while arranging service.
2. Check whether the point follows the content
Open a different app, then return to the Home Screen. Look at several ordinary screens with different backgrounds at a comfortable brightness. Check whether its position on the glass changes.
A dot that appears only in one photo or one app needs an app or content check first. Open that same photo on another device if possible. A defect already present in the image will travel with the image.
View a screenshot on a second screen, too. A mark visible in the captured image on another device calls for a content or app check. A screenshot records the image the phone produces, not dirt sitting on its glass.
This comparison helps describe the problem, but can't tell you which repair it needs. Tell the technician whether the point stays fixed across apps and backgrounds, and whether another screen shows it in the screenshot.
Check the shape as well. A spreading black patch, a long line, or a damaged area after a drop shouldn't be described as one dead pixel. Tell the repair provider about that larger pattern and when it first appeared.
I'd make these comparisons before installing a pixel-test app. They're enough to explain the symptom, and they don't require granting another app access to your photos or account.
3. Restart once when the problem appeared suddenly
On Face ID models, starting with iPhone X, hold either volume key along with the side key until the shutdown slider is visible. Drag it, wait 30 seconds, then restart the phone with a long press of its side button.
For iPhone 6, 7, 8, or iPhone SE second or third generation, keep the side button held until the slider appears. The top button handles shutdown on first-generation iPhone SE and iPhone 5 and earlier models. Use that button to restart it.
After the restart, check the same location in more than one app. If the mark has gone and doesn't return, a technician no longer has a fixed dot to inspect.
If it remains, another restart doesn't change what you've learned. Continue by checking the type of display symptom. Temporary app or display errors can disappear during restart, but it can't rebuild a physically failed pixel.
Touch trouble is a separate symptom. If the phone also misses taps, the unresponsive phone screen checks address controls and touch input. Mention both symptoms when booking an inspection.
4. Separate an OLED afterimage from a fixed dot
On iPhones with a Super Retina or Super Retina XDR OLED display, a faint leftover image can be temporary image persistence. For example, the outline of a previous screen may remain after different content replaces it.
Apple describes that temporary effect as disappearing after a few minutes of normal use. Switch to ordinary changing content at a comfortable brightness. A fading ghost image fits that description; a permanently dark point doesn't.
Burn-in is different: a lasting remnant can develop after prolonged display of the same high-contrast image at high brightness. Don't count on a timer, video, or color-cycling page to remove a lasting mark.
The display type matters. The iPhone XR and 11 have LCD panels, as do iPhone SE (2nd or 3rd generation); don't apply an OLED explanation to every iPhone simply because its display has a small mark.
For OLED care, keep automatic brightness on and avoid prolonged static images at high brightness. In Settings > Display & Brightness > Auto-Lock, choose a suitable time so an unused screen doesn't stay on indefinitely.
These changes help with display use over time. They aren't a way to turn an already failed pixel back on. If the fixed point survives the earlier comparisons, arrange the inspection rather than extending the test for days.
5. Ask for a display inspection and a repair estimate
Arrange an inspection through Apple, or book one at a local authorized repair center. Describe the fixed point, model, and start date. Mention a drop, liquid exposure, or past screen replacement.
Ask them to examine the display and explain the repair options before approving work. Coverage and the fee depend on the device, the damage, and the inspection. A free replacement isn't automatic just because one point has failed.
Back up the iPhone before handing it over for service. Follow the provider's preparation instructions, including any request about Find My. Don't erase your only copy of important photos just to check whether the mark is hardware.
For a previously replaced display, mention who performed that repair and when. That provider's screen repair warranty may apply. The technician also needs the repair history to check the current fault.
Ask whether the quote includes a display replacement, what parts will be used, and what repair warranty applies. That gives you a concrete decision instead of paying for an unspecified attempt to fix pixels.
The Short Version
Compare the mark across apps after cleaning, then restart once. A fading OLED afterimage differs from a fixed pixel fault. Persistent dots or larger damaged areas need a display inspection; flashing apps and pressure aren't confirmed fixes.
Checked November 11, 2026.