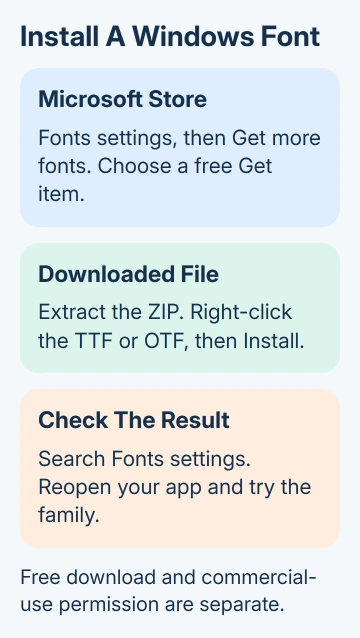
Free fonts can be installed from Settings > Personalization > Fonts through the Microsoft Store, or from a downloaded .ttf or .otf file. Choose a Store font labeled Get, or extract the downloaded file and use Install.
Once it's installed, apps that support the font can use it. Free describes the price. Check the creator's license separately if you'll use the font in commercial work.
In this guide
Check the fonts already installed
Open Start > Settings > Personalization > Fonts. Look under Available fonts, then search for the family name you want. It may already be installed, especially if another design app supplied it.
Choose a family to see its styles and preview the lettering. Check a sample containing the characters your work needs, such as numbers, punctuation or letters from another language.
A font family can include Regular, Bold, Italic and other styles. Installing one file doesn't always add the entire family. Check which files the creator supplied before deciding that Windows has lost a style.
I'd start with one family rather than installing an entire collection. That makes it easier to recognize the right font in an app's menu and check that its styles work together before using it throughout a document.
If the family is already there, skip downloading another copy and try it in your app. If it isn't, choose the Store route or the file route that matches what you have.
Get a free font through the Microsoft Store
From the Fonts settings page, select Get more fonts in Microsoft Store. Windows opens the Store's font selection. Browse or search for the font you want and open its product page.
Read the price and product description before continuing. Get is the option for a free font; Buy means you'll have to pay. A font listed in the Store isn't automatically free just because other choices there are.
Select Get for the free font you chose and wait for the download and installation to finish. Return to Settings > Personalization > Fonts and search for the installed family.
This route installs the font through the Store, without requiring you to unpack a ZIP archive. If the installation hasn't finished, don't look for a downloaded font file to double-click instead.
If Store access is blocked on a school or work computer, ask its administrator which font sources you're allowed to use. A restriction on installing items isn't solved by downloading the same font from an unrelated site.
Microsoft's font-management instructions explain both Store installation and installation from a file. Choose one route, then verify the result in the same Fonts page.
Prepare a downloaded font before installing it
For a font supplied as a download, use the creator's or a trusted distributor's package. Windows' instructions for installing font files cover TrueType (.ttf) and OpenType (.otf) files.
Read any license or readme included with the package. A download can be free for personal use while requiring a different license for a business logo, client work or another commercial use.
If the download ends in .zip, right-click it and choose Extract All. Choose a destination and finish extracting. Open the resulting folder, where the actual font files should be visible.
A ZIP archive is the container, not the font to install. The ZIP extraction guide explains the difference if File Explorer makes the archive look like an ordinary folder.
Check file extensions when the package contains several kinds of files. A license document or preview picture isn't a font. Web-font packages may include formats intended for websites rather than the normal Windows TTF or OTF procedure.
Keep the extracted package until you've checked the installation. It contains the original files, family styles and license details that may be useful when moving your project to another computer.
Install for your account or for all users
Right-click the extracted .ttf or .otf file and choose Install. On a Windows 11 menu that doesn't display the command immediately, check Show more options.
Use Install for all users when the font needs to be available to other Windows accounts on the same PC. This won't install it on another person's computer when they open your document.
Installing for all users may ask for administrator approval. On a managed computer, let the administrator handle that permission rather than changing security settings to get past that request.
If Windows asks to allow a change, approve it only for a font package whose source you trust. You don't need a download manager to install a font file.
Install the other family styles you actually need from the same extracted package. For example, a separately supplied Italic file may need its own installation before the app offers that real italic design.
Then reopen Fonts in Settings and search by family name. The displayed family name can differ from the archive or download filename, so use the name shown in the font's preview when checking it.
Make the font appear in Word or another app
Save the open project, then quit and relaunch the app once installation finishes. In Word, open the font list on Home and search for the family you just confirmed in Windows.
Select a short piece of sample text and apply the font. Check the actual letters as well as the name in the menu. A font without the needed characters can leave you with replacement letters that don't match the rest of the text.
Installing a font makes it available; it doesn't automatically replace every existing font in your document. Select the relevant text or change the document's styles if you want existing content to use it.
Not every app supports custom fonts. If the family appears in Windows but not in one program, try another desktop app that supports custom fonts. If it works there, the first app's font support is the part to check.
For presentation-specific choices, the PowerPoint font guide covers using installed fonts and sharing a deck. A font installed on your PC isn't automatically installed on the recipient's device.
If the installation error keeps appearing, use the existing Not a Valid Font File guide rather than repeatedly downloading copies. Note the precise message and the file's extracted location when asking for help.
Remove a font or add language support separately
To remove an unwanted family, return to Settings > Personalization > Fonts, find it and open its available options. Choose Uninstall for the family you intend to remove.
Check projects that use it before uninstalling. Removing the font from Windows can change how those documents appear on this computer, even though their text remains in the files.
For Microsoft's extra language fonts, the Fonts settings page also offers Download fonts for all languages under Related settings. That adds language support rather than a particular designer's decorative family.
If a trusted TTF or OTF still won't install, give Microsoft Support the error text, your Windows version and the Store-installation result. For missing characters or unclear usage rights, ask the font creator about that specific package.
The Short Version
Use Fonts settings to get a free Store font, or extract a trusted TTF or OTF download and choose Install. Confirm the family in Windows, restart the app and apply it to sample text. Check the license before commercial use.
Checked November 10, 2026.