Headphone Notifications can be turned off when your iPhone offers the control in your region. Open Settings > Sounds & Haptics > Headphone Safety and switch off Headphone Notifications.
Search Settings for Headphone Notifications if the page doesn't show it. If a matching result appears, tap it to reach the control on your software version.
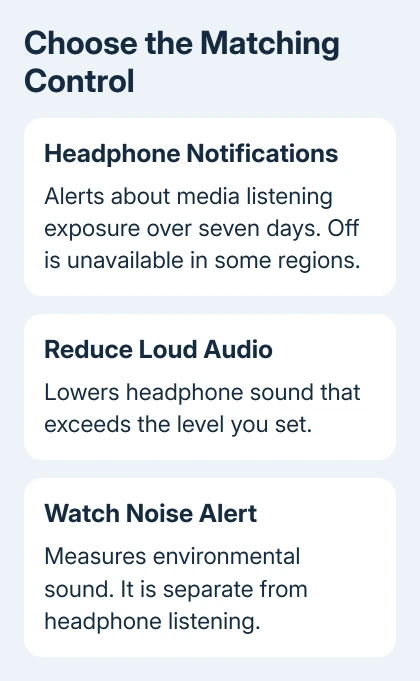
An unavailable switch can be a regional restriction rather than a fault. Also check the warning's name: Headphone Notifications, Reduce Loud Audio and an Apple Watch noise alert control different things.
In this guide
1. Open the setting for the headphone exposure warning
Open Settings > Sounds & Haptics > Headphone Safety. Look for Headphone Notifications and turn it off if the switch is available. Apple describes that setting in its headphone notification instructions.
This warning is about headphone listening over time, rather than notifications from an app. Going through Settings > Notifications and searching for a music app won't change this control.
If Headphone Safety contains only the volume-limiting control, open Settings search and look for Headphone Notifications. Open a matching result if offered; don't repeatedly change Reduce Loud Audio instead.
Check the switch after leaving and reopening the page. If the switch stays off, your change was saved. An old Notification Center alert can remain there, so seeing it doesn't mean the switch has turned back on.
Keep your listening level comfortable after disabling the warning. The control changes the notification; it doesn't change how loudly the headphones play or turn a high listening volume into a safe one.
2. Recognize a region that doesn't allow the change
The notification can't be disabled in certain countries or regions because of regulations and safety standards. A phone reset or replacement headphones won't remove that regional restriction.
Note the version in Settings > General > About after checking the page and search results. If you can't edit the switch, ask Apple Support whether your phone's region requires this notification.
Give support the exact wording on the settings page. Tell them whether the switch appears but won't stay off, or whether it never appears at all. A screenshot helps show which case you're dealing with.
Changing an App Store country or erasing the iPhone isn't a supported way to remove the restriction. I'd check whether the regional restriction applies before making account changes that could affect purchases or subscriptions.
If the phone lets you disable the control, there is no need to alter its region. If it doesn't, use the exposure information and volume settings rather than following an unsupported bypass.
3. Keep Reduce Loud Audio separate from notifications
Reduce Loud Audio analyzes headphone sound and lowers it when it exceeds your chosen level. Headphone Notifications warns about total listening exposure over time. They sit together in Settings, but switching one doesn't change the other.
For an unwanted volume cap, return to Settings > Sounds & Haptics > Headphone Safety and check Reduce Loud Audio. Check whether it's enabled and what level is selected before deciding whether to change it.
For a warning after listening, check Headphone Notifications instead. Turning the volume-limiting feature off simply to clear an exposure warning changes the wrong behavior and removes a separate control you may want to keep.
The phone can also lower the headphone volume when you reconnect after receiving an exposure notification. That's why a warning and quieter playback can appear together, even though the app's own settings haven't changed.
If AirPods become quieter without a headphone warning, the AirPods automatic volume checks cover other controls that can change playback. Follow the symptom rather than disabling every audio feature.
4. Read what caused the warning in Health
Open Health > Browse > Hearing > Headphone Notifications. This shows the recorded notifications. To see the listening levels behind those alerts, open Headphone Audio Levels in the Hearing section.
The warning is based on the recommended seven-day exposure limit. It isn't simply triggered by crossing one volume setting for an instant. Both how loud you listen and how long you listen affect that total.
One example is more than 80 dB for 40 hours total within seven days. Phone calls don't count toward this headphone exposure calculation; the limit described here applies to media audio.
Check when Health recorded the event before assuming the current song caused it. A warning received now can reflect listening accumulated during the previous days, including earlier sessions with another connected audio device.
If an Apple Watch is involved, exposure information from a secondary iPhone that's not paired with it can be delayed. Keep that possibility in mind when the timing of the Health entry doesn't match the session you remember.
5. Check readings that don't match your listening
Headphone measurements are most accurate with Apple or Beats headphones. With other headphones, the phone can estimate the level from its own volume setting. A high slider position isn't a direct measurement taken inside your ear.
If the warning seems wrong, note the connected accessory and check the matching Health records. Tell support if the sound was coming from a car stereo or external speaker, so they can check how that accessory is being counted.
For a live reading, open Control Center, enter its editing controls, then choose Add a Control. Under Hearing Accessibility, add Hearing. Open that control while media plays to see the headphone level meter.
For Face ID models, a downward swipe from the upper-right screen corner opens Control Center. On Home button phones, swipe upward, beginning at the display's bottom edge. Check that media is playing through the headphones you're using.
Use the meter alongside the longer-term Health records. A quiet moment now doesn't remove louder listening recorded earlier in the week. Take screenshots of the readings that don't match if you need support to check an unexpected warning.
If the accessory disconnects before you can check it, the iPhone Bluetooth connection guide addresses that connection problem first.
6. Separate a Watch noise alert from headphone listening
An Apple Watch can measure environmental sound with its Noise app. An alert about a loud environment is different from a headphone exposure notification, even if both appear while you're listening to music.
Read the alert before changing the iPhone setting. If it names environmental noise, changing Headphone Notifications won't address that Watch feature. Use the Watch's Noise settings or ask support about the wording shown.
If an editable switch keeps turning itself on, report the installed iOS release to Apple Support and name the page where it happens. Mention any recent update, then ask them to check why the switch won't stay off.
The Short Version
Disable Headphone Notifications where allowed, using Headphone Safety or Settings search. A regional restriction can prevent it. Check volume limits, measurement accuracy and Watch noise alerts separately.
Checked November 12, 2026.
 If you have any business, I can build it online