A DYMO LabelWriter that won't print needs its power, labels, and feed button checked first. A handheld tape maker needs a battery and cassette check instead. Check the model name so you use the right steps for your printer.
Blank labels, no movement, and a job stuck on the computer aren't the same fault. A printer that feeds and prints its own test pattern needs software checks; one that can't feed its labels needs attention at the printer first.
In this guide
1. Match the checks to the model and symptom
Read the model name on the device. LabelWriter 450 and 550 printers use rolls. A handheld LabelManager, such as the 260P, uses a tape cassette and can print from its own keyboard.
The supplies and button sequences differ. A 450's self-test instructions don't apply unchanged to a 550, and replacing a computer driver won't fix a handheld's low-battery message.
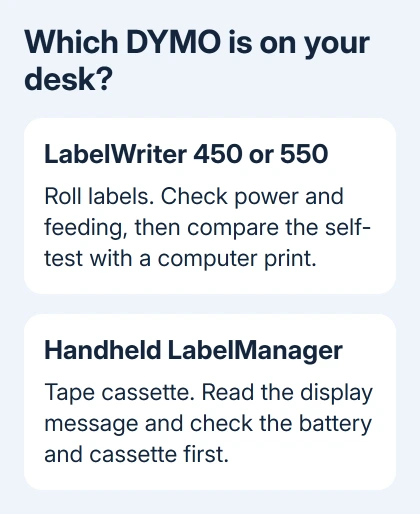
For a LabelWriter, note whether the status light comes on, whether pressing Feed moves one label, and whether the computer reports an error. For a handheld, note the exact message on its display.
If a computer-connected LabelManager prints from its own keyboard but not from the computer, start with the software and selected-printer checks. That tells you it can print without the computer.
2. Restore power and label feeding on a LabelWriter
Use the power adapter and cable supplied for that printer. Different LabelWriter models have different power requirements, so an adapter that fits the socket isn't enough to confirm compatibility.
Check both ends of the USB cable as well. Connect directly to the computer while testing, to rule out a loose connection at the hub. Then press the printer's label feed button once.
On a 550, use the label forward feed button. A correctly loaded roll should advance. If it doesn't, open the cover and check the roll's loading against the diagram inside the printer or its model guide.
The spool guide should sit firmly against the roll's right edge, and the roll should sit against the spool's left side. Guide the label through the feed slot with its left edge aligned to the slot's left edge.
The 550 series works only with Authentic DYMO LW Labels that support its label recognition. A roll suitable for another thermal printer isn't automatically usable in a 550. Check the actual roll before reinstalling anything.
For a jam, use the model's label-release or reverse-feed procedure. Don't pull against a locked feed mechanism. After clearing the path, reload the roll and retry one label before sending a batch.
3. Check blank output and the printer's own test
LabelWriter printers use heat-sensitive labels rather than ink cartridges. Blank output can come from the label roll or the print mechanism, so changing ink isn't a repair for this printer.
Try a fresh compatible roll when labels feed but printing is faint, patchy, or blank. If the fresh roll prints correctly, replace the original roll rather than changing the computer's driver.
On the LabelWriter 450 series, load labels and hold the front form-feed button for 5 to 10 seconds. Release it when the printer starts printing its test pattern. Press and release it again to stop the test.
On the LabelWriter 550 series, load labels, then hold Power and label forward feed together for at least ten seconds. Release both once the test begins. Press and release Power to stop it.
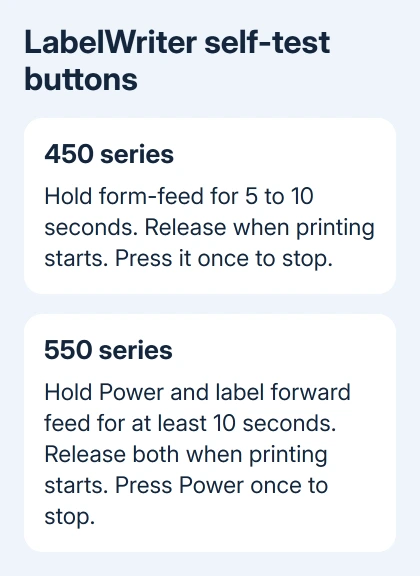
Each model's manual gives its own button sequence. A clean pattern shows the printer can print without a computer-generated job. If that works but your label file doesn't, continue to the app and printer selection.
If a fresh compatible roll still produces a poor self-test, follow the model's print-head cleaning instructions. The DYMO support center provides model guides and support contacts.
I'd save one failed test label before contacting support. It shows missing print or a repeated defect much more clearly than a description that the printer isn't working.
4. Send one simple label from the correct app and printer
Open the DYMO software supported for your model and operating system. Select the actual connected printer, create a simple text label, choose the matching label type, and print one copy.
A virtual printer in DYMO Connect lets you design a label without a device. You must select a connected physical printer to print it. Seeing a model in the design controls doesn't always mean that printer is connected.
If the simple label prints, return to the app that failed and compare its printer selection, label size, and page layout. That tells you the printer works and points to settings in the shipping, retail, or document app that failed.
For ordinary Windows print selection, the Windows printing steps explain how to check the physical printer and preview. A label job still needs the correct label dimensions, rather than a full sheet layout.
5. Remove a waiting job from the Windows queue
In Windows 11, open Settings > Bluetooth & devices > Printers & scanners, select the LabelWriter, and open its print queue. In Windows 10, start at Settings > Devices > Printers & scanners.
Microsoft says to right-click the failed job and select Cancel in its queue-clearing steps. Then send one test label.
If it prints, the queue has cleared. If the same error returns, note its wording before removing the printer or changing its software.
DYMO's Windows reinstall procedure covers printing and out-of-paper errors. Follow the full procedure for your model if the simpler checks don't help.
It takes you through removing the printer and its LabelWriter driver, restarting Print Spooler (the Windows service that handles print jobs), then reconnecting the device.
If a Windows update left several thermal printers unable to print, check the thermal-printer update issue separately. That doesn't explain a printer that also fails its own self-test.
6. Follow the handheld's battery or cassette message
On a LabelManager 260P, Charge Battery! means its rechargeable battery pack needs charging with the power adapter. For Battery Failure!, check that the pack is seated properly and replace it if it's damaged.
For poor printing on that model, charge the pack, check that the cassette is seated correctly, clean the print head using the model's cleaning tool, and try another cassette if necessary.
For Tape Jam, remove the jammed label and replace the cassette as directed in the manual. Too many lines needs fewer text lines or a wider supported cassette, rather than repeated attempts to print the same layout.
Other handheld models use different batteries and controls. Use the guide for the model printed on yours. If these checks fail, ask DYMO Support about feed or print-head service for your model. Have the error and test result ready.
The Short Version
A LabelWriter needs working power, feeding, and a compatible roll. Compare its self-test with a computer print. On a handheld, follow its battery, cassette, or tape-jam message before changing software.
Checked November 12, 2026.