A Microsoft Word invoice format needs business and customer details, an itemized table, and a clear amount due. Start with a template or a blank document, then save a reusable master before entering the customer's charges.
Word works well for invoices with a short list of services or products. When quantities and prices change often, a spreadsheet is easier to check. Keep your editable master separate from the copy you send.
In this guide
Find an invoice design in your version of Word
For Windows, select File > New, search for invoice, and open a suitable result. Choose Create when offered. Pick the layout for its readable item list and payment details, rather than the size of its logo.
Word for Mac puts the template gallery at File > New from Template. Search for an invoice there. Available templates can change. If you can't find a suitable design, start with a blank document instead of downloading an unfamiliar file.
Prefer a blank document? Select Blank document and use Layout > Size to choose the paper you'll use. Leave enough room for ordinary printer margins. A one-page invoice shouldn't need tiny type to keep its total on the same sheet.
Microsoft's template instructions explain how to turn a finished document into a reusable starting point. Add the content and check a sample invoice before saving your master.
The desktop steps here work in Microsoft 365 and recent one-time-purchase versions of Word. In Word for the web, start a blank document and insert a table, or edit a document made in desktop Word. The browser's template menus differ.
Put the invoice details where the customer can find them
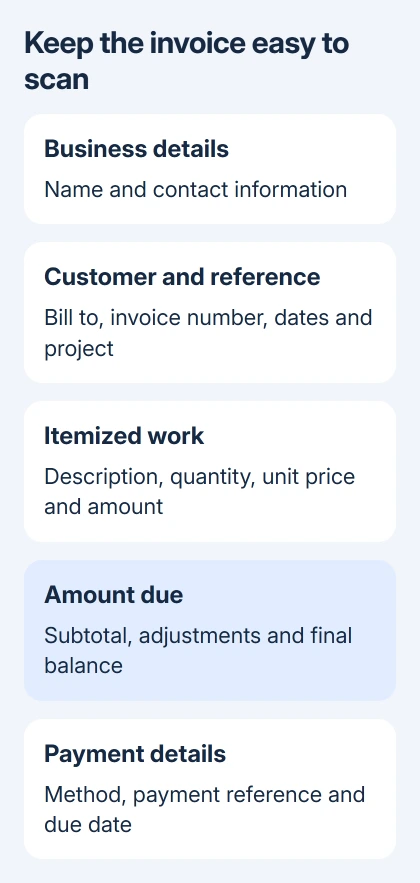
Use a short heading such as Invoice, followed by an invoice number, issue date, and payment due date. Give each invoice its own number so your payment records point to one document without depending on a filename alone.
Enter your business contact information, then a labeled customer section. Include their business name and billing address when needed. Keep any purchase order or project reference close to those details.
An example layout could read:
- Invoice number: INV-2026-014.
- Invoice date: November 13, 2026.
- Payment due: November 27, 2026.
- Bill to: the customer's name and billing details.
- Project reference: the agreed job or purchase order.
These are examples; use your own invoice numbering and the payment terms agreed with the customer. Write the actual due date so the customer doesn't have to calculate it from a payment term.
Keep business information in ordinary text unless the layout needs a text box. A box that shifts across the item list creates extra work. I'd choose a plain heading over a design that needs adjusting for every customer.
Build an item table that stays aligned
Place the cursor after the billing details and select Insert > Table. Make four columns for Description, Quantity, Unit Price, and Amount. Include one heading row and enough rows for the work you're billing.
Give Description the most space. A service might need a date range, project name, or short explanation; quantity and price need less room. Separate cells keep those numbers aligned without repeated spaces.
For a service invoice, quantity can represent hours, sessions, or individual jobs. State the unit in the description or heading. A quantity of three means little when the customer can't tell whether it represents hours or products.
Click within a numeric column and use right alignment on the Home tab to line up its values. Use a consistent number of decimal places for money. Write the currency clearly when a customer could mistake one country's dollar for another.
For example, a sample row could show Editing work, 3 hours, $40.00, and $120.00. That amount is three multiplied by forty. Replace every sample with your own agreed charge before saving the customer copy.
If your invoices need repeated calculations, our Excel invoice layout is a better starting point. Keeping a particular heading style isn't a good reason to move complicated calculations into Word.
Check the totals and explain how to pay
Put the subtotal, adjustments, and final amount due after the item list. Make the final amount easy to spot, using bold text and a little extra paragraph spacing. The customer shouldn't have to search the rows for it.
Calculate each row and the total separately. Changing a quantity doesn't update another number you've typed manually. Recheck the arithmetic after editing a rate, quantity, discount, or deposit, including the final amount due.
Show deductions clearly. A deposit already received reduces the balance owed; it shouldn't look like another charge. Apply the tax treatment required for your business and location instead of copying a template's percentage.
Add the payment method and enough information to use it, such as a payment reference or the agreed transfer details. Check them against your own records so the customer has the right details to pay you.
Remove template instructions, sample addresses, and unused rows. For unwanted gaps, show the paragraph marks in Word to see which spaces come from empty paragraphs. Remove unused paragraphs rather than shrinking all the text.
Save the master, then inspect the customer copy
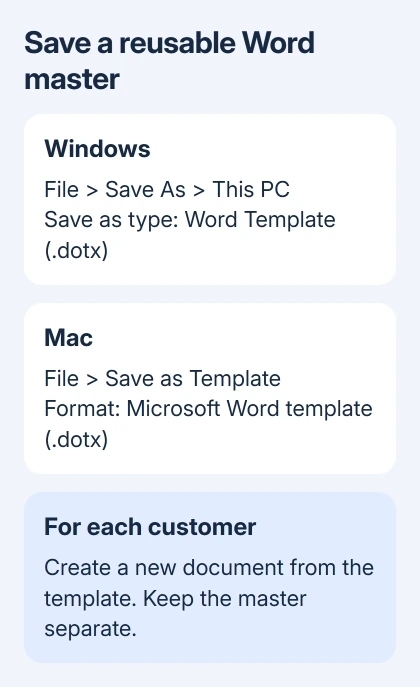
In Windows desktop Word, choose File > Save As > This PC, name the master, and choose Word Template (.dotx) in Save as type. Save it. Use File > New > Personal, or Custom, to make an invoice from that template.
On Mac, select File > Save as Template, name the master, then select Microsoft Word template (.dotx) as the format. Start future invoices through File > New from Template, then select your saved design.
Keep customer-specific invoices as separate documents. A descriptive filename containing the invoice number and customer name makes the right copy easier to find, especially when you need to correct a charge later.
Use File > Print to inspect the page before sending. Check that the description hasn't pushed a price onto another line and that the amount due isn't stranded on a second page. Add a longer sample description when checking the master.
For a fixed-layout copy, save or export using Word's PDF option. Open that file and read it once. Check the recipient, invoice number, dates, totals, and payment information in the copy the customer will receive.
If a template keeps shifting or won't save, try the content in a plain new document. If it fails there too, open Word's Help search and describe the action, Word version, and whether it affects every document.
The Short Version
Use a readable invoice template or a four-column table, separate the billing details from the charges, and verify the amount due. Save a .dotx master, make individual customer documents from it, then inspect the exported file.
Checked November 13, 2026.