A separate MacBook user account gives another person their own desktop, files, and settings. Open System Settings > Users & Groups > Add User, then choose Standard if they don't need to manage other accounts.
The account starts on this Mac. It isn't a new Apple Account, and adding another person's email under Internet Accounts won't create a separate login. An administrator must create the user before that person can sign in.
In this guide
Choose the account that fits the person
For a partner, family member, or regular coworker, I'd choose Standard. They can change their own settings and install apps, but they can't create other users or change another user's settings.
An Administrator can manage users and change settings that affect the Mac. Choose that role only when the other person needs that control. Giving someone their own login doesn't require giving them administrator access.
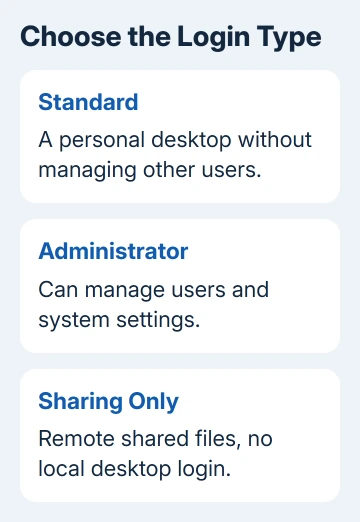
Sharing Only is for someone accessing shared files remotely. It doesn't let them sit down at the MacBook and log in to a desktop. Choose Standard instead when the goal is another name on the login screen.
A group isn't another person either. Groups let you give several existing accounts the same access to shared files. Add Group won't create the separate desktop you're looking for.
For someone who uses the Mac regularly, a permanent account makes more sense than a temporary session each visit. Choose the account type before entering their details so they get the access they need from the start.
Create the user in Users & Groups
For macOS 13 Ventura or a newer release, Apple's user account instructions use System Settings. Both processor types, Intel and Apple silicon, use those controls.
- Sign in to an administrator account on the MacBook.
- Open the Apple menu > System Settings.
- Select Users & Groups in the sidebar. Scroll if necessary.
- Click Add User, then enter the administrator password if requested.
- Open New User and select Standard, or the account type you've chosen.
The password prompt needs the existing administrator's password to approve the change. It isn't asking for the new person's password, which you haven't set yet. Don't enter their Apple Account password here.
On macOS Monterey 12, open Apple menu > System Preferences > Users & Groups. Click the lock, authenticate as an administrator, then click the plus button beneath the account list. Choose the new account type there.
That older layout puts the controls inside one preference pane instead of the newer Settings sidebar. Once the new-user form opens, the important choices are the same: account type, name, account name, and password.
If Add User is unavailable, check the account you're currently using. A Standard user can't add another account. On an employer's Mac, ask its manager to create the account if the required administrator access isn't yours.
Enter the name and a separate login password
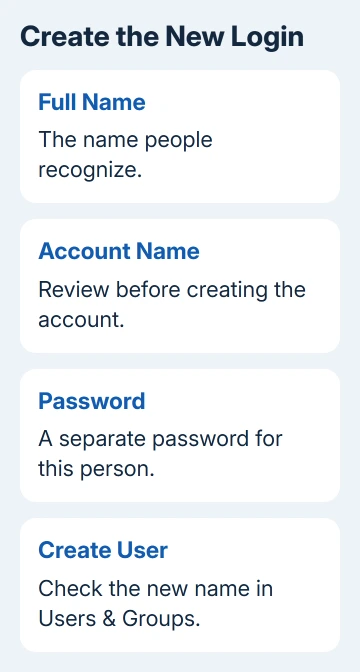
Enter the person's Full Name. macOS generates an Account Name from it. Review that shorter name now, before creating the account, especially if the full name includes spaces or the suggested spelling isn't what they want.
The account name also names the user's home folder. Choose it carefully now, and don't casually rename that folder in Finder later. Changing the full name shown on screen and changing the home folder are different tasks.
Enter a password for the new user and repeat it in the verification field. Add a useful password hint if needed, then click Create User. The new account should appear in the Users & Groups list.
Use a password the new person can remember without sharing your administrator password. Each person should be able to sign in as themselves, so their documents and everyday settings stay attached to their own account.
Creating this login doesn't move someone else's files into it. If the person is bringing an existing Mac's documents and settings, transferring data from another Mac is the separate migration job.
For an account created accidentally, stop before copying data or setting up apps. Confirm which login the person will actually use first. It's much easier to settle the account name while the account is still new.
Sign in once and check the new desktop
Save the current user's work, then use Apple menu > Log Out. At the login window, select the new user and enter that user's new password. Complete the setup prompts shown for that person.
Their desktop and personal folders should be separate from yours. A new desktop that doesn't contain your documents is the expected result. Don't copy your entire home folder into theirs just to make the first login look familiar.
The person can set up their own Apple Account for services such as iCloud. They sign in to those services from inside their own macOS account. It doesn't replace the local password used to create and enter the new login.
For purchases or email under an additional identity, choose the Mac's account route before changing its main iCloud sign-in.
With Touch ID on the MacBook, the new user can add their own fingerprint after signing in. Their fingerprint setup is separate from yours. Sign in with the password first to check that the new login works.
For switching while multiple users stay signed in, use Fast User Switching when it's enabled. Its menu can show a name or user icon. Select the intended account and authenticate to return to that person's session.
Menu placement changes across macOS versions, so logging out is the clearer first check.
Once both accounts work, set up Fast User Switching using the controls for your macOS version. Keep each account's permissions suited to its user instead of changing them for easier switching.
Resolve an account that doesn't work as expected
If the person needs remote viewing instead of a separate local desktop, Mac screen sharing uses its own access controls. Adding a user doesn't set up remote control on its own.
If the new account can't sign in, check the selected name and its local password first. Note the message exactly as it appears. A password failure, a missing login name, and a managed-device restriction need different help.
For a personal Mac, give Apple Support the installed macOS release and whether Users & Groups lists the account. For a work Mac, ask IT to check account creation and login restrictions before deleting or recreating anything.
The Short Version
Create a Standard user from Users & Groups while signed in as an administrator. Review the account name, set a separate password, then log out and check the new login. Each user gets their own desktop and settings.
Checked November 15, 2026.
 If you have any business, I can build it online