Start with one OneNote notebook, a section for each subject, and a page for each meeting or task. Choose OneDrive to reach your notes on another device. Edits save automatically; check sync before depending on the online copy.
These steps use the current OneNote desktop app on Windows. The older app named OneNote for Windows 10 has reached end of support and is moving to read-only use. Choose the current app for new notes.
In this guide
Open the current app and choose your notebook's home
Open OneNote from Start and look for a File menu. The current Windows desktop app has one. If the window says OneNote for Windows 10 and has no File menu, you're in the retired app. Switch to the current version.
Microsoft's migration instructions explain that the retired app displays notes but can't create, edit or sync them. In that app, looking for another editing button won't help.
In the current app, choose File > New. Choose where to store your notebook, give it a name and complete the creation prompts. A name such as Home Projects or Biology tells you more than a second notebook called My Notebook.
Choose OneDrive for notes you need on another device. Check the account before creating the notebook. Personal and school accounts can each have a OneDrive, and they store work separately.
When every notebook name is rejected, check the OneNote account type before trying more names.
A notebook stored only on This PC stays on that computer. Storing it in the cloud lets you open it on your other devices. A cloud notebook remains private until you choose to share it.
If your existing notebook is already the right one, use it rather than creating another copy with a similar name. You'll have less to search and less chance of adding pages in the wrong account.
Build sections around subjects and pages around events
Right-click the section list and choose New Section, or use New Section at the end of that list. Name it for a subject, such as Kitchen, Budget or Contractors.
Within the selected section, choose Add Page. Type a clear title in the heading area at the top. That title appears in the page list, which makes it much easier to return to the right note later.
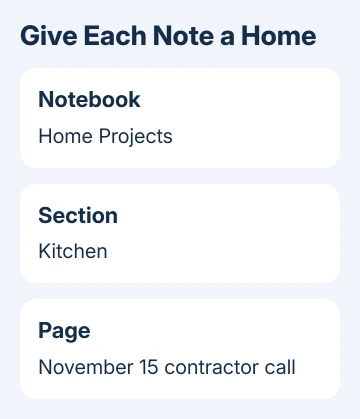
For example, a Home Projects notebook could contain a Kitchen section and a page called November 15 contractor call. Put the next call on another page in the same section instead of extending one endless page through the whole project.
I'd start with only a few sections. Creating an elaborate filing system before taking any notes makes it harder to decide where a simple reminder belongs. Add a section when a real collection of related pages needs one.
Drag a page tab to change its position in the page list. Keep the latest meeting near the top if that's what you open most often. You can rearrange the pages to suit how you work without retyping any notes.
Type notes where you want them on the page
Click on the page and begin typing. Click elsewhere to start a separate block of notes. OneNote doesn't require every paragraph to continue in a single column the way a Word document does.
Keep related details in one block so you can read or copy them together. A meeting's decisions can sit in one block and follow-up tasks in another. That creates structure without scattering every sentence around the page.
Use the Home tab to format selected text. A short heading and a list are usually enough to distinguish decisions from actions. Apply emphasis to the words you need to spot quickly rather than formatting every line differently.
On a computer with pen or touch support, open Draw, choose a pen and write directly on the page. Typed and handwritten notes can share the same page. If your computer only has a mouse and keyboard, you can keep typing your notes instead.
The Windows OneNote instructions describe automatic saving. Notes saved on this PC still need to sync before you can read the latest changes on another device.
Add useful material without losing track of the original
To attach a document, put the cursor on the page where you want the copy and choose Insert > File Attachment. Select the file and choose Insert. This keeps a copy alongside the notes about it.
An attachment is a copy, so later changes to the original file don't automatically update the one in OneNote. For a document that keeps changing, note where you keep the current original, even if you attach a copy.
Choose Insert > Pictures to add an image file. This is useful for a receipt, an existing diagram or a project photo. Put a short explanation beside it so the page still makes sense when you return months later.
For a link, select the relevant words and choose Insert > Link. Enter the destination in Address and confirm. A descriptive label such as supplier estimate is easier to understand than a long address pasted without context.
Use Insert > Table when several notes belong in a small set of columns. A task, owner and due date can fit comfortably in three columns. Keep calculations that need spreadsheet formulas in Excel.
Check synchronization before depending on another device
For a cloud notebook, open File > Info > View Sync Status. Choose Sync Now beside your notebook, or Sync All for all shared notebooks. Read any error instead of dismissing it.
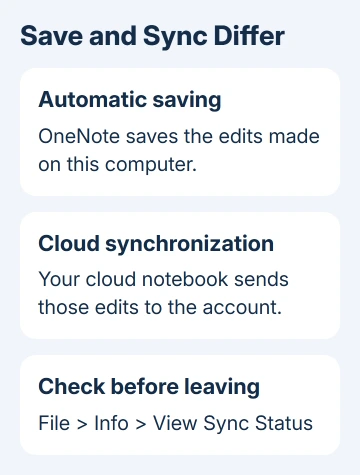
If you're preparing to leave the computer, check that the notebook has finished syncing. The absence of a Save button doesn't mean every new page has already reached OneDrive.
Sign in on the second device with the account holding your notes, then open the existing notebook. Don't create a blank notebook with the same name. The iPad sync guide explains the account and notebook choices.
If the second device is a Mac showing Saved offline, use the Mac OneNote sync repairs. Keep a copy of notes that haven't synced before signing out or removing a notebook.
If sync still fails, give IT the error code and notebook location. For personal notes, use OneNote's Help options and report whether one notebook or every notebook fails.
The Short Version
Use the current Windows OneNote app, create a notebook in the right account, and organize it into subjects and titled pages. Edits save automatically. Check View Sync Status before relying on those edits from another device.
Checked November 15, 2026.