
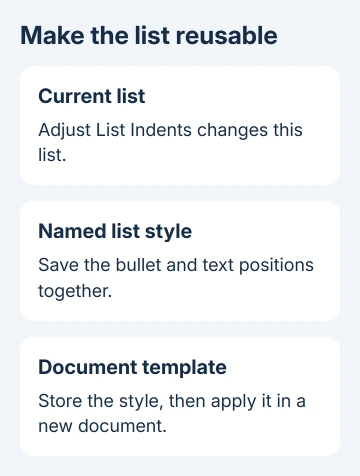
Word can reuse your list indents when you link the list to a style and save it in your template. Use Define New Multilevel List to link it, then apply the saved style for each list. Adjust List Indents alone changes the current list.
The distinction matters when the indent looks right until you turn bullets off and on again. Repeating the same adjustment fixes the current list without giving the next list a dependable format to reuse.
In this guide
1. Separate a list change from a reusable default
Make a small sample using Word's Windows desktop app. Create a short bulleted list, right-click an actual bullet, and choose Adjust List Indents. This dialog lets you change where the bullet and its text sit in that list.
The bullet position and text indent do different jobs. The first positions the marker; the second sets where the words begin. A tab after the marker needs a matching tab position if you want the text to start neatly at the chosen indent.
Typing ordinary text and then clicking Bullets can start another list format. The generic button hasn't selected your named style, so this doesn't tell you whether that style was saved.
One owner fixed this through Define New Multilevel List after template edits and bullet-button toggling had failed. Their final reply confirmed that linking the list to a style with those detailed steps solved it.
2. Link the bullet level to a paragraph style
Create a paragraph style through Home > Styles > Create a Style, and name it clearly. For several levels, use a separate paragraph style for each.
Open Home > Multilevel List > Define New Multilevel List. Select 1 for a simple list, then choose More to show the extra controls.
Choose your new paragraph style in Link level to style. Set Number style for this level to the bullet marker you want. Use Aligned at: 0 to place the marker at the left margin, or choose your preferred position.
A paragraph style stores formatting under a name. Linking it to a list level means selecting that style also applies the list format. Each level can then be chosen through its linked style.
Use distinct names for ordinary bullet text and numbered headings. If the problem involves heading sequences rather than bullet positions, the heading-numbering repair covers linking those levels to heading styles.
Set Text indent at for the words. With Tab character as the following separator, align its tab stop with that text indent. Accept the dialog, apply your paragraph style and check a long item with a wrapped continuation.
3. Use a named list style as an alternative
For whole-list reuse instead, select the sample. Open Home > Multilevel List > Define New List Style in the Paragraph group. Name it Report Bullets, or another distinctive label you'll spot in the gallery.
Choose the level you want to format. For a simple bulleted list, begin with level 1. Select the bullet style and use Format > Numbering to open the detailed list-format controls when you need precise positions.
Microsoft's list-definition instructions describe this named-style route too. The named style also offers a choice between the current document and new documents based on the template.
For a simple recurring list, choose a meaningful name and set its level's positions. That keeps the levels you need together under one name.
The preview should leave enough room between the marker and the text. Keep font choices with the list style when its markers need a particular appearance. Then decide where the definition should be saved.
4. Save the formatting in the correct template
For a linked paragraph style, right-click its name in Home > Styles and choose Modify. Select the New documents option for the template. For a named list style, choose where to save it in its own dialog.
Choosing Only in this document stores the change in the current file instead. It won't give the next new document that format.
Save the document and accept a template-save prompt if Word asks to retain the customization. Then close Word normally. Seeing the style in this document doesn't mean it's saved in the template for your next one.
For a reusable report rather than every blank document, save a separate template through File > Save As and choose Word Template (.dotx). Give it a clear name. A template that needs macros uses the macro-enabled .dotm format instead.
Create later reports from that template. Opening an unrelated old document doesn't give it every formatting choice you added to a different template. Check which starting template you used before assuming the saved style has disappeared.
If you want to edit Normal.dotm directly, make a backup first. Open it through Word's File > Open controls so you're editing the template itself, then save the change. Don't delete Normal.dotm as a way of keeping a customization.
The Word default-font guide explains another setting with the same document-versus-template distinction. To use a change in new documents, save it in the template rather than just the current file.
5. Apply the saved style and test a fresh document
Create a new document from the template you changed. Open the Multilevel List gallery and choose your named list style. For a style-linked setup, apply the intended paragraph style to the list paragraph.
Type a short item, a long item that wraps, and a second list after a normal paragraph. Check that the marker and text positions remain consistent. Use your saved style for the second list rather than the generic Bullets toggle.
A missing style points to the template or save scope. A visible style with wrong positions needs its level settings checked. Positions changing after a generic button click suggest a different list format was selected.
I'd keep the small test document until the template behaves correctly. It shows the difference between storing a style and applying it without a long document's inherited list formats getting in the way.
When the template still won't retain the style
Ask Word support whether your template allows saved changes or is replaced by a managed copy. Send the template name, list-style name and actions that lose it. Attach a short sample with personal information removed.
These Windows desktop dialogs aren't the same as Word for the web. Use Open in Desktop for the style-definition work if you're currently editing in a browser. The browser's list buttons aren't a substitute for the desktop template controls.
The Short Version
Keep the chosen indent in a named list style or style-linked levels, saved to the intended template. Apply that format in new documents. Use the saved style to start your custom list rather than relying on the generic Bullets button.
Checked November 17, 2026.





