OneNote can reject every notebook name because the wrong account is selected. Choose the personal or work account that should store the notebook, then try creating it again. A valid name won't correct the wrong sign-in.
An owner with both account types attached to the same email address fixed this error by choosing Work or school during sign-in. Repair hadn't helped. One rejected name is different from every simple name failing.
In this guide
1. Select the notebook's intended account
In current OneNote for Windows, click the account switcher in the top-right corner. Check the accounts listed there. If the intended one is missing, select Add an account and sign in with that account's email address and password.
When Microsoft asks whether to use a Personal account or Work or school account, choose the type that owns the storage you need. The email address alone doesn't tell OneNote which of those two accounts you mean.
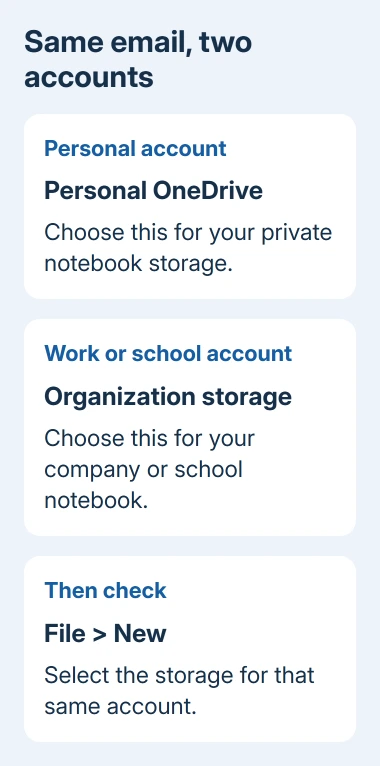
For a company or school notebook, select the organization-managed account. For private notes stored on your personal OneDrive, choose the personal account. Keep work material out of personal storage when checking this error.
A forum owner found OneNote defaulting to their personal account. Signing out and returning through Work or school account fixed the repeated error. Their notebook name didn't need changing.
Add the intended account before removing an existing one. That keeps your open notebooks accessible while you check the destination. Then choose where to create the new notebook.
2. Select the matching storage location in File > New
In the current Windows desktop app, open File > New. Choose the OneDrive or shared location belonging to the intended account, enter a simple name such as Meeting Notes, and follow the creation prompts.
The storage location needs to belong to the account you're using. A work account added to OneNote won't help if the new-notebook screen is still pointing to personal OneDrive. Read the storage label before selecting Create Notebook.
Microsoft's new-notebook instructions describe choosing the location first. A successful creation adds the notebook to the notebook list with an initial section and blank page.
Type a short note on that first page and check its name and account against what you selected. Check that the notebook opens normally in the correct account. Closing the error message alone doesn't tell you it worked.
If a plain name works, try changing one part of the rejected name. If every plain name still produces the same warning, move to the account and service checks rather than trying endless spelling variations.
I'd try one simple name and then stop renaming. In the confirmed account case, more words, underscores and different names weren't going to correct the account OneNote had chosen.
3. Check the same account in OneNote on the web
Visit onenote.com, then use the account selected in your desktop app to sign in. If an existing browser session uses a different account, switch it before comparing notebook access.
Look for your expected notebooks, then try the new-notebook control for that account. If you expect school notes but see only personal notebooks, change the browser's selected account before comparing results.
If that account can create a notebook online but the desktop attempt fails, the desktop sign-in or installation needs attention. Open the web-created notebook in OneNote using its desktop-opening option when offered.
If creation also fails online, write down that error. For organization accounts, ask your administrator whether you have OneDrive or SharePoint access and permission to create notebooks there.
The web check also helps when notes appear to be missing after changing accounts. The OneNote account and sync checks explain why signing in isn't enough if the intended notebook hasn't been opened on that device.
4. Protect unsynced notes before signing out
Before removing an account, compare the latest notebook pages online with those in the app. Copy any app-only notes to a safe place before signing out, resetting or reinstalling.
Use File > Info > View Sync Status in desktop OneNote to check sync when offered. Write down errors and keep those notebooks open while you fix them. Your existing notes need protecting even when you can't create a new notebook.
For OneNote error 0xE000002E, compare the newest local pages with the stored copy before reopening the notebook.
Once your important notes are safe, open the account switcher, select the three-dot menu for the wrong account, and choose Sign Out. Then add or select the intended account and retry the creation steps.
Signing out leaves the account's notebooks listed. To remove one from navigation, right-click its name and choose Close Notebook. This closes your view of that notebook; it doesn't delete the stored notes.
For notes that already show an offline or sync error, the OneNote saved-offline guide explains the browser comparison and protecting unsent work. Use its Mac-specific menus only on a Mac.
5. Leave the retired Windows 10 app behind
Check the app's name. OneNote for Windows 10 is a separate, retired app, even if you're running it on Windows 11. Its old account menu was Settings > Accounts, which differs from the current desktop account switcher.
Support ended on October 14, 2025, and the app has moved to read-only use. Creating, editing and syncing notes there are no longer supported. A fresh notebook should be created in the current OneNote app for Windows.
Open Microsoft Store, find OneNote from Microsoft, and install or open the current app. Sign in with the accounts that hold your notebooks and open those notebooks. Check recent pages before removing the retired app.
The 2019 thread includes repair advice for an older app layout. Don't follow that old Apps & features path expecting it to restore supported notebook creation in the retired app today. Use the current app and verify the account there.
6. Update or repair the current desktop installation
If the correct account can create notebooks online but the current desktop app still can't, open File > Account > Update Options > Update Now when available. Restart OneNote after the update, then retry the same location and simple name.
For Microsoft 365 OneNote on Windows 11, open Settings > Apps > Installed apps. Find Microsoft 365, use its three-dot menu, then Modify. Start with Quick Repair when offered.
On Windows 10, use Settings > Apps > Apps & features, select Microsoft 365 or your Office edition, then Modify. For a managed PC, have IT arrange the repair.
Owners reported that repair failed despite the accepted answer suggesting it. I'd check sign-in first because changing accounts fixed this for an owner. The accepted label doesn't mean repair will fix every invalid-name error.
Ask for help with the account and location
For a school or company account, give IT the error, OneNote version, storage location and online creation result. Ask IT if you're allowed to create notebooks at the selected OneDrive or SharePoint destination.
For personal OneNote, use Help in the app or Get Help in Windows and request OneNote support. Include whether every simple name fails. Keep passwords and private page contents out of the report.
The Short Version
Match personal or work sign-in to the notebook, then choose its storage in File > New. If creation fails, try that account online. Protect unsynced notes before sign-out. Use current OneNote; the Windows 10 app is retired.
Checked November 16, 2026.