Conditional formatting shouldn't force Excel text to the bottom left or turn off wrapping. When alignment works until a rule applies, try the affected sheet in a new workbook; owners of older Excel files restored alignment this way.
The original case involved an import from Numbers, but another owner saw the same behavior in an existing Excel file. Keep a copy first, because moving a sheet can change its formula links.
In this guide
1. Check whether the rule triggers the position change
Choose one affected cell with enough text to see its alignment. On Home, set Center, Middle Align and Wrap Text. Use a row tall enough to show more than one line, then compare what the cell actually displays.
If the ribbon says centered but the text remains at the bottom left only while its conditional rule is active, that's the fault covered here. The button shows your chosen alignment, but the cell doesn't follow it.
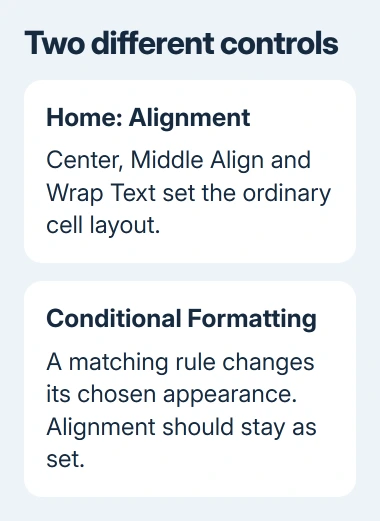
Save a working copy. In desktop Excel, select that cell and open Home > Conditional Formatting > Clear Rules > Clear Rules from Selected Cells. This removes its conditional appearance, so use the copy for this comparison.
Apply the alignment again. If it now works, the conditional formatting in that file is triggering the problem. Continue with the workbook-copy fix rather than repeatedly clicking Center on the same cell.
If the cell still won't wrap or move, skip to the ordinary layout checks. If removing the rule makes no difference, something else is stopping the cell from wrapping or aligning.
Before clearing anything larger, record the rule's formula, Applies to range and appearance in Home > Conditional Formatting > Manage Rules. You'll need those details if you rebuild it later.
2. Copy the sheet into a new workbook
One owner recovered correct alignment by moving the worksheet into another file and saving it. The original asker also stopped seeing the fault in a workbook created directly in Excel.
That makes a new workbook a useful next step, particularly for a file imported from Numbers or another spreadsheet application. Not every imported file has this problem, and the repair can stop working later.
In Excel for Windows, right-click the affected sheet tab and choose Move or Copy. In To book, choose (new book). Select Create a copy, then choose OK to leave the original sheet in place.
In Excel for Mac, select the sheet and choose Edit > Sheet > Move or Copy Sheet. Choose a new book as the destination and select Create a copy before confirming.
Save the new workbook under a different name. Apply the conditional rule to a cell that meets its condition, then check horizontal alignment, vertical alignment and wrapping separately.
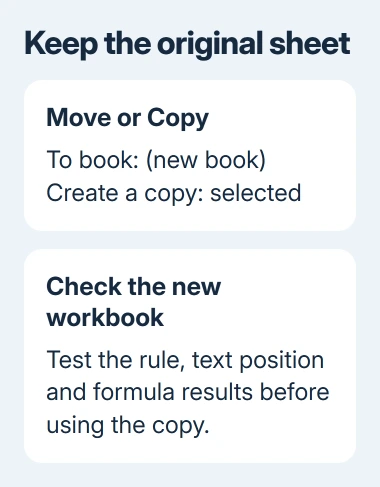
A copied sheet can still refer to sheets in the old workbook. Inspect its formulas and totals before making the new file your working copy. If several sheets depend on one another, check those links too.
The Excel sheet-copy guide covers keeping the source sheet and checking the result. A good-looking cell isn't enough if its totals now depend on the wrong file.
If the copy works, close and reopen it once before you keep editing. If the fault follows the sheet, try rebuilding a small sample in a blank workbook as described next.
3. Rebuild a small sample without the old formatting
Create a blank Excel workbook. Type a short label into a cell, give it the same alignment and Wrap Text setting, then create a simple matching conditional rule. Use text you can recognize without linking to the old file.
For example, enter Done, center it, and make a text rule that changes its fill when the cell contains Done. Check both when the condition matches and when it doesn't. The color can change while the alignment stays centered.
If that works, rebuild the affected range's formatting in the clean file. Copy values when fixed results are all you need, or formulas when the sheet still needs to calculate. Avoid bringing all the old formatting across with the data.
Values-only pasting replaces formulas with their current results. Choose it for an output table, rather than a sheet whose calculations must keep updating. Keep the source workbook until the rebuilt version has been checked.
Set ordinary alignment through Home > Alignment. Then recreate only the necessary conditional rules. Microsoft's conditional-formatting instructions list number, font, border and fill options.
Alignment isn't one of those conditional format options. Don't search for a missing Alignment tab inside that rule dialog or keep adding more rules to force the same center setting.
For a rule based on another column, keep the dollar signs that lock the original formula's cell references. The another-cell formatting guide explains why a shifted reference can color the wrong row after rebuilding.
4. Fix wrapping that fails without any rule
Select the cell and choose Home > Wrap Text. If part of the text still stays hidden, inspect the row height. On Windows, Home > Format > AutoFit Row Height gives the row room for its wrapped contents.
A manually fixed row height can hide lines even when Wrap Text is active. Merged cells also complicate automatic row sizing. For a merged heading, adjust the row height manually and check the whole label.
On a Mac, use Home > Format > Auto-fit Row Height for an ordinary unmerged row. Set a suitable height yourself when the merged layout prevents the automatic fit from showing all the text.
If you can't use the alignment buttons at all, check Review for sheet protection. Have the workbook owner permit cell formatting or adjust the layout in an editable copy.
These are different symptoms from alignment changing when a conditional color appears. Use the visible result to choose the repair, rather than removing every rule from a sheet that only needs a taller row.
When the workbook starts doing it again
A later owner reported that a fresh-file workaround helped for months, then the problem returned. Don't treat a successful move as a permanent cure for every large or heavily edited workbook.
I'd keep the original and the working copy until normal editing and saving no longer bring the fault back. Compare formulas, named ranges and the rows that trigger different rules before sharing it with other people.
If the problem persists in a supported Excel version, send a small failing workbook to your Office administrator or the Microsoft support team. Include the exact version, the rule and whether a newly typed clean sample also fails.
Ask for help with workbook styles and conditional formatting. Leave the workbook's internal XML files alone; support can see this failure without changes to those files.
The Short Version
Test one affected cell in a copy, then copy its sheet into a new workbook if the rule triggers the alignment failure. Rebuild a small clean sample if needed. Check row height when wrapping fails even without conditional formatting.
Checked November 16, 2026.