Some Microsoft accounts no longer offer new phone verification. Check Security > Manage how I sign in for the methods offered. Use a recovery email, Microsoft Authenticator or a passkey if phone verification is missing.
A phone sign-in username has a different job from a number that receives security codes. Check which one you need before removing an old number or changing your account information.
In this guide
Decide whether you need sign-in or verification
A sign-in alias is another username for the same personal Microsoft account. Your mailbox, subscription and OneDrive files stay in that account. A phone number already listed as an alias can identify the account during sign-in.
Security information lets you confirm it's your account when you're asked to verify your identity. This is the area to review if you're replacing a lost phone or trying to add another way to receive a security check.
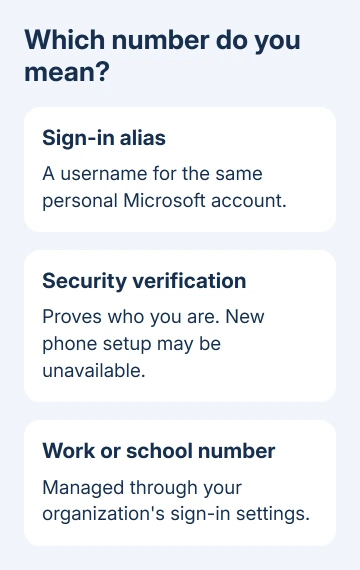
Microsoft says phone verification may be unavailable when adding a method. The alternatives shown can include email, an authenticator app and a passkey.
An employer's Microsoft 365 account has separate security controls. The organization chooses its available methods. Use its security-information page or ask its administrator about a work or school sign-in.
Keep the account you already own. Creating another Microsoft account gives you a separate account; it doesn't update the recovery details attached to your existing purchases, email or files.
Check the methods your personal account offers
Sign in at account.microsoft.com/security using the account you want to update. Check which account you're signed in to, especially if your browser has saved both personal and work sign-ins.
Select Manage how I sign in, then Add a new way to sign in or verify. Complete the identity check if requested. The menu shows which methods you can add to this account now.
If a phone option is offered, follow its prompts to enter and verify the number. Enter the code when requested and complete Next. Don't stop after typing the number; entering the code confirms that you can receive security codes there.
If the choices contain email, an authenticator or a passkey but no phone option, choose an available alternative. Reopening the same page won't create a missing option, and an old set of SMS instructions doesn't change the current menu.
I'd complete the replacement setup before losing access to the old method. Removing your only working method first can turn a routine update into an account-access problem.
Add an email or another available method
For email verification, select the email choice and enter an email address you can access. The address must be allowed for verification; it can't be another username for this same Microsoft account.
Open that inbox, find the security code and enter it in the account prompt. Select Next to finish. Return to the list of sign-in methods and confirm that the new choice appears there.
If you prefer Microsoft Authenticator, select the authenticator option and follow the setup instructions the account displays. An authenticator app provides verification through the app instead of relying on a text to the phone number.
A passkey lets you verify it's you with your face, fingerprint or device PIN, on a supported device or through a passkey service. Choose that option only if you can complete its prompts and know which device or provider will hold it.
Microsoft explains the change in its SMS retirement notice. It is moving personal-account authentication and recovery toward passkeys and verified email.
This change doesn't mean every existing number disappears immediately. Review the methods actually listed on your account and complete the offered setup. Don't delete a working entry just because another account displays different choices.
Check phone-number sign-in separately
For sign-in names, open Your info and the account-information editing page at account.live.com/names/manage. Review the aliases already attached to your account. These are different entries from the verification choices in Security.
The current account-editing instructions list Add email. They don't promise an Add phone number button on every account. If that button isn't present, don't remove your existing alias in an attempt to make it appear.
If an app offers a phone-number setup prompt, complete the checks in that prompt rather than assuming it's adding SMS recovery. Some services ask for a number for their own connection or verification requirements.
An account can have only one mobile number as its sign-in alias. A number already used to identify another account can therefore be rejected. The message matters: an occupied number and a missing phone option aren't the same problem.
For an email username instead, the Microsoft account email-change steps explain adding an alias without creating a separate account. Keep the email you currently use until its replacement is verified.
Follow the prompt for a number used elsewhere
A message that the number is already a Microsoft account can mean you previously created an account with it. If that account is yours, use the offered sign-in route rather than creating another identity with the same number.
For a number already used to sign in elsewhere, Continue may let you proceed without adding another number. Where Transfer number is offered, follow its prompts to link the number to your chosen account.
If the transfer option is missing because the number was recently used on another account, use Change number when offered. For a number newly assigned to you, the support instructions say to try again after 30 days for the transfer option.
That waiting period belongs to the reused-number situation. It isn't a way to restore a phone-verification option missing from Security. Read the error carefully so you follow the instructions for that particular restriction.
Use the account's reused phone-number help for those prompts. Don't ask the previous number owner for their password or security code.
Get help for the step that won't complete
If verification fails, keep the working method listed and note the exact error. Record whether it appeared while adding security information, editing aliases or using a particular app. The restrictions can differ between those screens.
Open Contact Microsoft Support, describe the account problem and select Get Help. Ask about the missing control or number-association error. Support agents can't reset protected account details for you.
For an organization account, show its administrator the failed screen and the method you're trying to add. An administrator can check the organization's sign-in policy; changing your personal account won't change that policy.
The Short Version
Review the available security methods and verify an offered email, authenticator or passkey when phone setup is absent. Check phone aliases separately. Follow number-transfer prompts only for the reused-number problem.
Checked November 15, 2026.
 If you have any business, I can build it online