
To blur a background on iPhone, open a Portrait photo in Photos and adjust Depth Control. If the picture doesn't have the saved depth information Portrait needs, use an editor such as Snapseed to blur it while keeping a chosen area sharp.
Blurring a background and hiding private details need different tools. A soft artistic blur can leave words or faces recognizable, so decide what should stay visible before editing the picture.
Adjust background blur in a Portrait photo
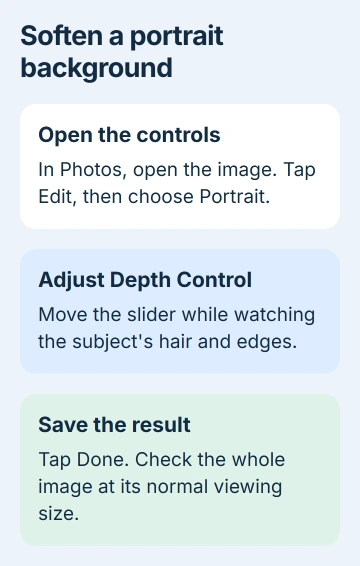
Open Photos, select the picture and tap Edit, shown by the adjustment-sliders button. Choose Portrait in the editing controls, then move the Depth Control slider to change the background softness.
Watch the subject's edges as you move the slider. Hair, glasses and gaps between fingers can look unnatural with a stronger effect. Choose a setting where the subject remains clear and the background is as soft as you need.
Apple's portrait editing instructions describe this control. Depending on the iOS release, you may first need to tap the depth button, marked with an f, to reveal the slider.
Tap Done when the result looks right. Reopen the image at its normal viewing size to check the effect. An edit that looks subtle while zoomed in can feel much stronger when the whole picture is visible.
On iPhone 13 or later, supported portraits also let you change the focus point. While editing Portrait, tap the person or object that should be sharp, then check how the background changes before saving.
Changing focus uses the portrait information saved when you took the picture. It can't bring back detail that was badly out of focus in the original shot.
Check whether a regular photo supports Portrait
Some supported iPhones save depth information in ordinary Photo mode when they detect a person, dog or cat. That lets you use portrait controls later, even if you didn't choose Portrait when taking the picture.
Open the image and look for a Portrait choice or depth control. On iOS versions that offer it in Edit, choose Portrait, enable the effect and then adjust the background blur.
If those controls aren't available for that image, use the editor method in the next section. Having a recent iPhone doesn't give every old picture depth information, especially pictures downloaded or copied from another source.
For a new photo, select Portrait in Camera before shooting. Follow any distance instructions shown on the screen and check that the subject is sharp. The portrait camera controls also let you adjust depth before capture.
Choose Natural Light to check the blur without a dramatic lighting effect. Portrait Lighting changes how your subject looks; Depth Control changes how much the surrounding scene is blurred.
Add blur to an ordinary picture with Snapseed
Find Snapseed by Google in the App Store and install it if needed. Open the app, choose Open Photo and select Photo Library. Pick the image you want to edit.
Tap Tools > Lens Blur. This keeps an area in the center sharp and blurs the surrounding image. It doesn't need the saved depth information that the iPhone's Portrait controls use.
Move the focus area over the subject you want to keep sharp. Pinch to change its size and shape, then choose the circular or linear focus control to suit your picture.
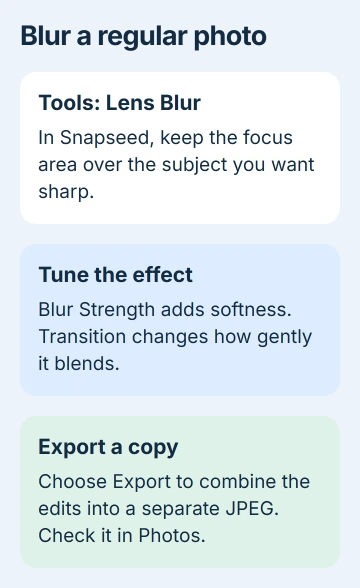
The Lens Blur controls use vertical swipes to choose an adjustment and horizontal swipes to change it. Select Blur Strength, then swipe right for a stronger effect or left for less.
Choose Transition to change how gradually the sharp area blends into the blur. Vignette Strength controls how dark the edges look. Turn it down if you want blur without darker corners.
I'd keep the transition gentle around a person's hair and shoulders. A tiny sharp circle with a sudden blurred edge usually looks like a filter pasted over the picture rather than a natural background.
Tap the checkmark to apply the edit. If it doesn't look right, return to the tool and change the focus area instead of applying more blur over the first edit.
Export the copy that actually contains the effect
In Snapseed, tap Export, then choose Export again. This saves a separate JPEG with your edits built into the picture. Keep the original if you might want a different version later.
The saving options explain that Save and Save a copy keep the edits adjustable. Some other apps may show those images without the expected changes, so choose Export for the copy you'll send.
Open the exported image in Photos and inspect it before sending it. Check the newest copy rather than the unedited original, especially when the two thumbnails look similar at a glance.
If you're also adding a sticker to the photo, finish that edit before making the final copy you plan to share. Check that the blur and sticker both appear in that copy.
Cover private information instead of softening it
A solid cover makes it easier to check that a phone number, address or document detail is hidden. In Photos, open the picture, choose Edit > Markup, then use Add > Add Shape to place a rectangle over the information.
Set a solid fill and full opacity, then resize it to cover the whole detail. Apple's Markup shape controls include fill color and opacity. Zoom in to check the edges before saving.
Don't share an editable original if it contains private information. Make a copy with the edits built in or take a screenshot of the finished image. Check that copy for any private text or detail that could still identify someone.
For documents, converting the picture to PDF is a separate final step. A PDF conversion won't conceal anything that was still visible in the source picture.
If your editor won't open or export, send its support team the file type and app version. If Portrait controls have disappeared from a photo that had them before, tell Apple Support how you transferred the image.
The Short Version
Use Photos' Depth Control for portraits and Snapseed's Lens Blur for ordinary images. Export the finished copy and check it outside the editor. Hide private text with a solid shape instead of relying on soft blur.
Checked November 5, 2026.

Isaac Smith is the founder and editor of PC Glance, a website that covers computers, laptops, and technology. He is a tech enthusiast and a computer geek who loves to share his insights and help his readers make smart choices when buying tech gadgets or laptops. He is always curious and updated about the latest tech trends.