Yes, Windows 10 can calibrate a compatible laptop screen for streaming HDR video. Open Settings > Apps > Video playback, then Windows HD Color settings > Change calibration settings.
This tool is for built-in screens. The separate Windows HDR Calibration app requires Windows 11, so it won't work on your Windows 10 PC. Use the video settings procedure for a compatible laptop panel.
In this guide
Check which screen and content you want to adjust
HDR, or high dynamic range, lets suitable displays show more detail across very bright and dark parts of compatible content. Windows 10's calibration tool lets you balance those details in streaming HDR video.
It requires Windows 10 version 1803 or later and a built-in display capable of playing HDR video. A laptop screen that can't play that content won't gain HDR support from calibration.
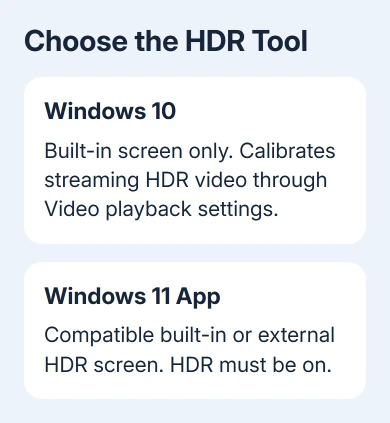
Microsoft's own steps say this calibration tool works only on built-in screens. An external HDR monitor or TV needs a different route.
To check the Windows version, press Windows + R, enter winver, then press Enter. Read the version in the window that opens. Being on Windows 10 doesn't mean the Windows 11 Store app is compatible.
I'd check which screen you're adjusting before moving any sliders. It avoids spending time looking for a laptop-only calibration control while the screen you want to adjust is an external monitor.
Open the Windows 10 video calibration screen
Plug the laptop into power, then open Start > Settings > Apps > Video playback. Under Stream HDR video, select Windows HD Color settings.
Under Choose display, select the laptop's built-in screen. Move the Settings window onto that screen as well. That puts the sample and its controls on the screen you're actually adjusting.
Select Change calibration settings. The HDR video calibration screen should show a sample video and a control for opening it full screen. Select Full screen before making the adjustment.
If the expected controls aren't available, return to the display choice and check whether the selected screen supports HDR video. Missing controls don't necessarily point to a broken Settings app.
An external display can have its own HDR capability while the laptop panel doesn't. Selecting the external screen won't make this built-in-screen tool support it.
Keep the laptop in the lighting conditions where you normally watch video. A setting that looks good in a dark room can look different beside a bright window, so make the comparison where you'll use it.
Balance bright and dark detail with the sample
On Calibrate your display, move the slider at the bottom while watching the sample. Look at the snow on the mountain and the windows in the buildings on the left.
Drag the slider right to bring out more detail in the snow. Drag it left to bring out more detail in the buildings. The goal is a useful balance between the bright scene and its darker areas.
Don't judge only whether the entire picture looks brighter. Watch whether shapes and textures remain visible in the parts you're trying to improve. A brighter view that loses the snow's detail hasn't met that goal.
Move the slider a little, pause and compare the same parts of the sample again. There isn't one published slider position that fits every laptop panel and viewing condition.
When the result looks right, select Exit full screen in the bottom-right corner. Then open a supported video app and watch actual streaming HDR content to judge the change.
If only a normal desktop or non-HDR clip is on screen, you won't be seeing the HDR video this tool adjusts. Use a title and playback service that offer HDR on your device.
Adjust again or restore the original calibration
If bright scenes in the HDR video look washed out, return to the full-screen sample and move the slider right. If dark scenes lose useful detail, move it left.
Compare the same scene after changing it. Unrelated videos have different lighting and contrast, so switching between them makes the adjustment difficult to judge.
To undo the calibration, return to the HDR video calibration screen and select Reset calibration. That's the Windows 10 control for returning to the original calibration settings.
If the display still looks wrong outside streaming HDR video, check the other picture settings separately. The Windows Night light controls address a warmer screen tint, rather than missing detail in HDR video.
For an external screen connected through HDMI, the Windows HDMI settings guide explains where connection and picture options actually live. They aren't all gathered on a single HDMI settings page.
Handle an external monitor or a Windows 11 PC
Windows 10's built-in video tool won't calibrate an external monitor. Use the monitor or TV's own picture controls and its model's manual. Check that HDR is enabled where the display and Windows need it.
If HDR isn't available on an external screen while a laptop duplicates its desktop, try an extended desktop. Press Windows + P and choose Extend. Return to Windows settings to check HDR capability for that display.
On Windows 11, the separate Windows HDR Calibration app supports compatible built-in and external HDR displays. HDR must be enabled, and the app runs full screen on the display being calibrated.
That app uses patterns for the darkest visible detail, brightest visible detail and maximum brightness. Its sliders and color saturation setting work differently from Windows 10's mountain-and-buildings video sample.
For a Windows 11 built-in panel that supports streaming HDR video but not HDR games and apps, use Settings > System > Display > HDR > Display calibration for HDR video instead.
If calibration is still unavailable, tell the laptop maker your model, Windows version and selected screen. Ask whether it supports streaming HDR and which graphics driver it needs. An app can't add HDR support to a screen.
The Short Version
Use Windows 10's Video playback settings for a compatible built-in screen. Balance bright and dark detail and check real HDR playback. Reset calibration undoes the change. The separate HDR Calibration app needs Windows 11.
Checked November 13, 2026.