The ink replacement message on your Brother printer tells you which color to change. Open the ink cover, release that cartridge and lock its replacement into the matching slot. Close the cover and let the printer update the ink reading.
Cartridge preparation varies. Some black cartridges need shaking before installation; older designs have a protective cap. Follow your model's instructions rather than copying the preparation for another cartridge.
In this guide
Check the model and the color before opening a cartridge
Read your printer's model from its front panel or identification label. Use that model and your country when checking replacement cartridges. Similar printer names can use different cartridge numbers in different regions.
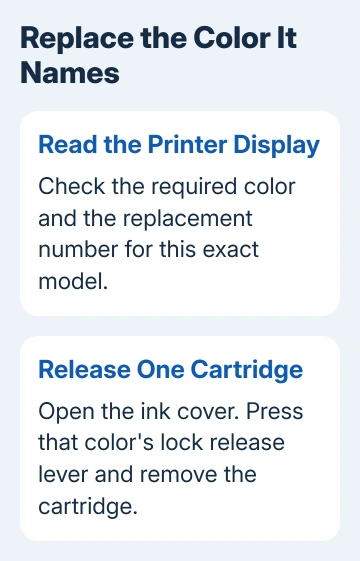
Read the printer's display for the color it needs: Black, Cyan, Magenta or Yellow. Replace the indicated cartridge rather than removing the whole set. The remaining colors can stay installed.
Brother's MFC-J4335DW family instructions explain that some ink remains even when replacement is requested. Don't ignore the message just because you can still see ink inside.
This procedure is for ink cartridges in a Brother inkjet. If your machine uses a toner cartridge and drum, follow the Brother toner replacement guide instead. Toner and liquid ink need different handling.
Leave the replacement sealed while checking the required model and color. An opened cartridge for another family won't become compatible because its color name matches.
1. Release the cartridge named on the screen
Keep the printer ready so you can follow its display prompts. Open the ink cartridge cover, which is the dedicated access door for the cartridges. On the MFC-J4335DW, J4345DW and J4535DW family, this is a front compartment.
Press the lock release lever for the color shown on the display. Pull that cartridge out of its slot. Keep the other cartridges in place while working on the one that needs replacement.
The lever releases the cartridge's latch. If the cartridge resists, check that you've pressed the release for that cartridge rather than pulling harder. The paper tray and scanner lid aren't the ink cartridge release mechanism.
Keep your fingers out of the cartridge insertion slots. Ink can stain your skin, and reaching into the compartment isn't part of the replacement procedure.
Set the removed cartridge somewhere it can't leak onto documents. Check the new cartridge's label one last time before opening its bag. This is the easiest point to catch a wrong color or incompatible cartridge.
2. Prepare the replacement for its own cartridge family
Open the package for the required color. Follow the supplied preparation instructions, including how to remove any protective parts from that cartridge. Don't dismantle the cartridge or try to open its ink outlet yourself.
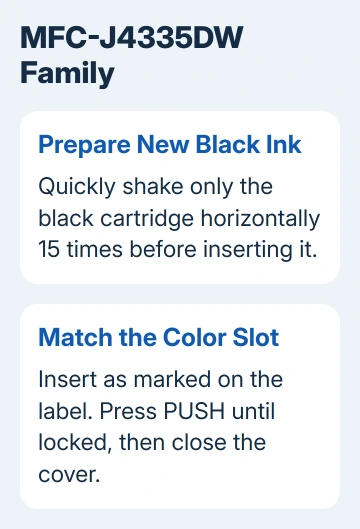
For the MFC-J4335DW, J4345DW and J4535DW, quickly shake only the new black cartridge horizontally 15 times before inserting it. This instruction doesn't tell you to shake all four colors.
Do this before the cartridge goes into the printer. Once installed, leave it in place; shaking an installed cartridge isn't a maintenance step and can make a mess.
Older models can require a different preparation. On the MFC-490CW cartridge, turn the green knob on the yellow protective cap clockwise until it clicks, then remove the cap. That click releases its vacuum seal.
If your cartridge has no cap, skip the cap-removal step. Follow the instructions for its actual design. The cap-release click on the older cartridge is separate from the seating click inside the printer.
I'd match the model before opening the bag, especially when replacing ink for someone else's printer. A familiar-looking cartridge can still have a different preparation or regional supply number.
3. Insert it into the matching color position
Line up the cartridge with the slot for its color and follow its label's insertion direction. The colors have fixed positions, so don't rely on the order in which you unpacked the cartridges.
On the MFC-J4335DW family, gently press the area labeled PUSH until the cartridge locks into place. It should sit securely rather than springing back toward the open cover.
Close the ink cartridge cover. The printer resets its ink dot counter, its estimate of ink use, after the replacement. Let the display return to its ready state, then send a small print job.
If the display names another color that's empty, replace that one next using its own instructions. Follow the order requested on the screen instead of repeatedly removing a cartridge that has already been accepted.
If Wrong Ink Color appears, compare each cartridge label with its slot's color marking. Move any misplaced cartridges into their proper positions. A computer driver reinstall can't correct colors installed in the wrong slots.
If Cannot Detect appears, open the cover and reinstall the affected cartridge slowly until it locks. The Brother ink detection guide covers a warning that remains after a careful installation.
4. Answer any replacement prompt accurately
Some older Brother printers ask whether you changed a particular color. On the MFC-490CW, a Did You Change Black prompt uses 1 (Yes) for a new cartridge and 2 (No) when the existing cartridge was only reinserted.
Follow the choices shown on your own machine. A touchscreen model or a newer cartridge family can handle replacement differently, so a missing yes-or-no question doesn't automatically mean installation failed.
Don't report an old cartridge as new just to clear a low-ink message. That changes the counter's information without adding ink and can leave its estimate out of step with the cartridge you've installed.
You'll know the printer has accepted the ink when the replacement warning clears and the printer returns to its ready screen. Print a small document with both black text and color to check that the requested job can now run.
If a ready printer won't accept the computer's job, use the Windows printing checks. Ink replacement won't repair that connection.
If printing resumes but a color is missing or streaky, use the model's print-quality check from its maintenance menu. Record which color fails before choosing a cleaning step; repeated cartridge removal isn't a substitute for that check.
When the printer still rejects the new ink
Recheck the complete cartridge number, region and affected color. Keep the packaging and receipt. A new cartridge that fits physically can still be the wrong supply for that version of the printer.
If a properly prepared cartridge remains undetected after slow insertion, give Brother support its number and the printer's message. Ask them to assess the cartridge and the parts that detect it.
Ask the seller to replace a defective new cartridge during its return period. If correct replacement cartridges repeatedly fail, request a repair assessment of the printer's cartridge-detection system.
The Short Version
Check the required cartridge, release the old cartridge and prepare its replacement as instructed. Lock it into the matching slot, close the cover and follow the display. Black-ink shaking and protective caps depend on the model.
Checked November 15, 2026.