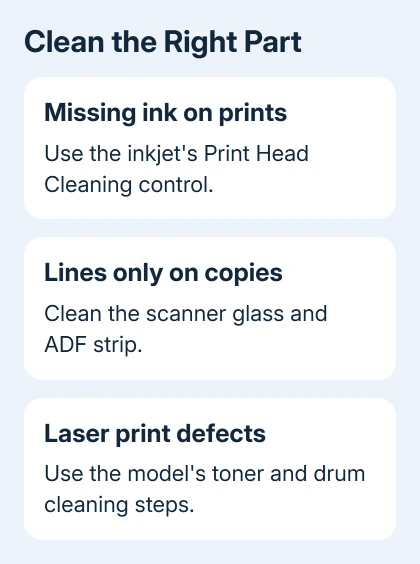
Streaks from a Brother printer need different cleaning depending on where they appear. Missing ink calls for print-head cleaning; lines only on copies point to scanner glass. Laser printers use toner and need their own procedure.
Start with the symptom and the model printed on your machine. Don't put cleaning liquid into a print head or use an inkjet cleaning routine on a laser printer.
In this guide
Match the cleaning to the page that's wrong
Print a small document, then copy a clean original if your machine has a scanner. Compare the two pages. Marks on both suggest a printing problem. If the print is clean but the copy has marks, check the scanner.
For a computer-side check, use a Windows printer test page. Open the printer's properties and choose Print Test Page, then compare it with the copy.
Compare a flatbed copy with one made through the automatic document feeder, called the ADF. A line appearing only through the feeder points to its narrow glass strip, where a small speck can mark the whole page.
An Offline message or an empty queue isn't a cleaning problem. For those symptoms, use the Brother printer troubleshooting steps. Cleaning won't reconnect a printer that never receives the document.
Check whether your model uses ink cartridges or a toner cartridge and drum. The following examples use MFC-J1010DW/J1170DW inkjets and HL-L2350DW-family lasers. Follow your model's manual when its controls or access points differ.
Run the inkjet's print-head cleaning from its controls
Print-head cleaning pushes ink through the nozzles that print the page. It can help with gaps or horizontal blank lines. It uses ink, so choose the affected colors instead of cleaning every color automatically.
On an MFC-J1010DW or MFC-J1012DW, press the Ink button. Use the navigation buttons to select Print Head Cleaning, then press OK. Choose Black only, Color only, or All, and press OK.
Choose Normal, Strong, or Strongest, then press OK. Start with Normal for an initial clean. Press the right navigation button to begin, then let the cycle finish before checking the printed result.
On the touchscreen MFC-J1170DW, tap Ink > Print Head Cleaning. Choose the affected color group, choose the strength, and tap Start. These controls differ from the physical-button model even though the cleaning choices are similar.
Brother's print-head cleaning instructions warn against touching the print head. Leave the head inside the machine and use its cleaning function.
Print another quality check or the same small document. Compare the affected color and gaps with the earlier page. If the output hasn't improved, don't keep sending identical cleaning cycles while the ink level falls.
For these models, the instructions next say to fit a new genuine cartridge for each problem color, then run another clean. If that still doesn't improve the output, contact Brother Customer Service with the model and sample pages.
Clean scanner glass when copies have lines
For an MFC-490CW, lift the document cover. Clean the glass surface and facing white plastic with a soft, lint-free cloth dampened with nonflammable glass cleaner. Use your model's specified cleaner.
On that model, wipe the narrow glass strip and white bar in the ADF area with the same type of cloth and cleaner. Check this strip when a flatbed copy is clean but feeding the original through the top adds a line.
Put the cleaner on the cloth rather than pouring it into the machine. The cloth should clean the glass without leaving liquid running into the edges or controls.
Inspect for remaining dirt or correction fluid. Copy the same original again. If the line disappears, dirt on the scanner glass caused it, rather than an ink cartridge or drum.
If dirt remains, repeat the glass cleaning and make another copy. The scanner instructions allow several attempts when dirt is hard to remove. Wiping the glass again doesn't use ink the way print-head cleaning does.
When the glass looks clean but the line stays in exactly the same place, save a flatbed and an ADF sample for support. The two copies help support see whether the problem affects the flatbed, the feeder, or both.
Clean the laser printer's corona wire correctly
On the HL-L2325DW, HL-L2350DW, HL-L2370DW, and HL-L2379DW family, a print-quality problem or Drum ! message can call for corona-wire cleaning. This wire is inside the drum assembly.
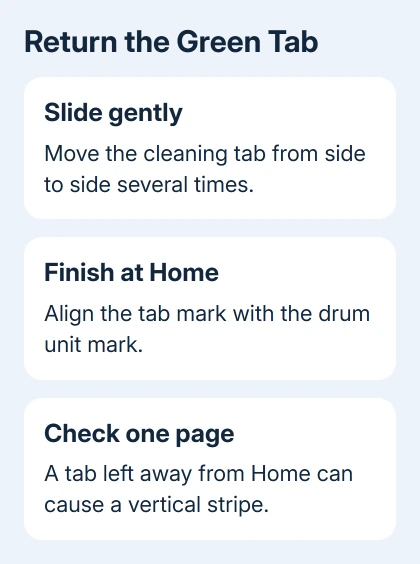
With the front cover open, lift out the assembly containing both toner and drum. Slide the green tab gently along its track, then back again. Repeat that movement several times. Keep the toner and drum together while you do this.
Return the tab to its Home position, aligning the mark on the tab with the mark on the drum unit. A misplaced tab can leave a stripe running down the page.
Reinstall the assembly and close the front cover. Print one page and compare it with the earlier sample. If the stripe appeared after cleaning, check the tab's home position before buying a replacement part.
Use the assembly's grips without touching the exposed drum. If it's worn rather than dirty, the Brother drum replacement guide explains replacement and the counter reset afterward.
I'd keep the first marked page until you've finished cleaning. The two samples show whether cleaning changed the defect, moved it, or left it unchanged.
Clean pickup rollers when paper won't feed properly
On the HL-L2350DW, use the power button to switch off the machine. Remove the entire paper tray. Remove the paper and any loose material from the tray.
Soak a lint-free cloth in lukewarm water and wring it out tightly. Wipe dust from the tray's separator pad, then wipe the two pickup rollers inside the machine as the model's manual shows.
Reload the paper, push the tray all the way in, and turn the printer on. Try a short print job. Paper feeding normally after the clean shows that the rollers can grip the stack again.
If feeding still fails, check the paper loading and tray guides, then ask support about the feed mechanism. More print-head cleaning won't help a roller that can't pick up a sheet.
If the problem remains, give support the exact model, whether it affects prints or copies, and which cleaning changed the result. Ask for the next model-specific maintenance or service step rather than replacing several parts at once.
The Short Version
Match cleaning to the symptom: missing ink, dirty copies, laser streaks, or poor paper feeding. Check a new page after the matching procedure. If the defect remains, give support the model and sample pages.
Checked November 16, 2026.