A timer in PowerPoint can be built from animated shapes without installing an add-in. Use a rectangle that fills over a set duration for a simple activity timer, or stacked numbers that disappear in sequence for a visible countdown.
The timer belongs on the audience's slide. Presenter View's elapsed-time display is for the presenter, so it won't give the room a countdown during a break or exercise.
In this guide
Choose a progress bar or a numbered countdown
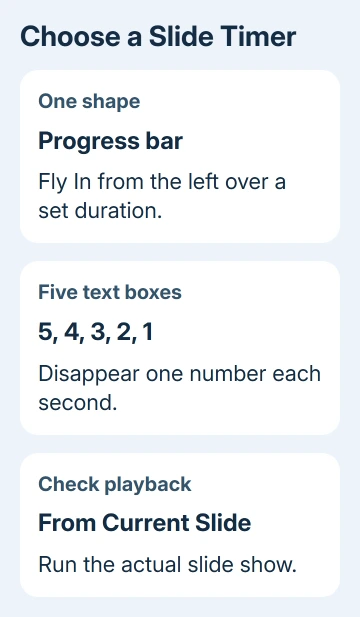
For a classroom activity or short discussion, a progress bar is the simpler choice. One shape and one animation control the whole interval. The audience sees the bar grow until the allotted time is up.
For a short countdown before an activity starts, use numbers. Five text boxes can show 5, 4, 3, 2, 1 in sequence. Longer numeric countdowns need more objects, so choose a bar when keeping an exact number on screen isn't necessary.
The procedure here uses desktop PowerPoint on Windows, including Microsoft 365, PowerPoint 2024 and PowerPoint 2021.
Microsoft lists those editions for its on-screen timer instructions.
Start on a spare slide in your existing deck. Keep the timer away from instructions the audience needs to read. Our PowerPoint setup guide covers slide layouts if you need a blank slide first.
I'd build the progress bar first unless the audience needs to see each second count down. It's easier to change one duration than repair a long animation list immediately before presenting.
Build a bar that runs for 30 seconds
Open Insert > Shapes and select a rectangle. Draw it with its left edge against the slide's left edge. Give it enough height to remain visible from the back of the room without covering your exercise instructions.
Right-click the rectangle and choose Format Shape. Under Shape Options > Fill, choose Solid fill, then pick a color that stands out against the slide. The rectangle's full width represents the completed interval.
Select the rectangle and open Animations. Choose Fly In, then Effect Options > From Left. This moves the shape into its final position from the left, making a bar placed at the slide edge appear to grow into view.
In the animation's Timing controls, set Duration to 30.00 seconds and Start to On Click. Keep Delay at zero if the activity should begin with your click.
Start the show using Slide Show > From Current Slide. Click once to start the bar. It should take 30 seconds to reach its full size, then stop. Press Esc to return to editing.
To change how long the bar takes, enter a different Duration within the values PowerPoint accepts. Don't change a slide transition's Duration instead; that setting controls movement between slides, not the bar's animation.
If the rectangle is already visible before you click, check that it has the Fly In entrance effect. An emphasis effect changes an object that's already on screen, so it won't make the bar enter from the side.
Make a five-second numeric countdown
On another slide, use Insert > Text Box to draw a large box containing 5. Duplicate it four times, changing the copies to 4, 3, 2 and 1. Use the same font, font size and box size for all five.
Arrange the five boxes in the same position, with 5 at the front, then 4, 3, 2 and 1 behind it. A disappearing 5 must reveal 4 rather than another number. Use the shape-order controls if the stacking order is wrong.
Give each box a solid fill matching the slide background so it conceals the numbers behind it. Use Shape Format > Shape Fill, then Bring Forward or Send Backward to put the boxes in the correct order.
Before stacking them, it can be easier to keep the boxes separated while adding their effects. Select the box containing 5 and choose Animations > Add Animation > Exit > Disappear.
Apply the same Disappear effect to the other four boxes individually. Open Animations > Animation Pane, then arrange their exit effects in the order 5, 4, 3, 2, 1.
The pane's numbered badges refer to animation order, which can differ from the number typed in a box. Check which number each box contains as well as where its effect sits in the list, especially if the slide already has other animations.
Select the effect for 5. Leave Start: On Click and set Delay: 1.00 second. For each remaining number, choose Start: After Previous and Delay: 1.00 second.
Leave Disappear set to happen immediately rather than making the exit take longer. The one-second pauses come from Delay. With those settings, your initial click leaves 5 visible for a second, then reveals each following number in turn.
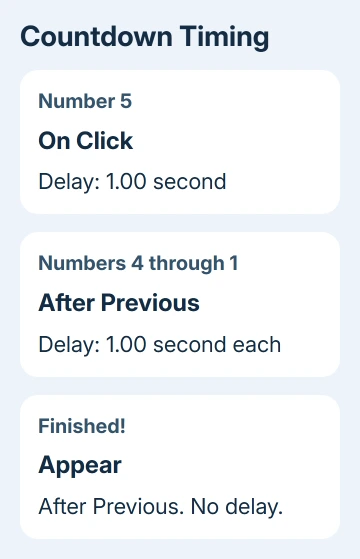
Add a separate Finished! text box if you want a clear endpoint. Give it an Appear entrance animation after the final exit, with Start: After Previous and Delay: 0.00.
Run From Current Slide and click once. The sequence should continue without another click. If it stops at a number, check that effect's Start setting. If it's accidentally set to On Click, PowerPoint waits for another click.
Keep animation timing separate from slide timing
Duration is how long an effect takes. Delay is the wait before it starts. After Previous connects an effect to the end of the preceding one. Those controls do different jobs even when their values all look like seconds.
The animation timing controls describe those differences.
In a numbered countdown, each number disappears immediately after a one-second wait. A bar needs to keep moving for the full interval instead.
Check Transitions > Advance Slide too. An automatic advance can move the presentation away from your activity slide when you intended to leave it displayed. Decide separately whether the next slide needs a click.
For an unattended display, our PowerPoint looping guide explains the separate loop and automatic-advance settings. A timer animation alone doesn't make the entire presentation repeat.
Check the finished timer on the presentation computer
Save the presentation, reopen it on the computer you'll use, and run the slide show. Compare the timer with a separate clock through one complete pass. That checks the sequence and its appearance on the actual display.
Editing view shows the objects, not the finished animation. If several numbers appear there, run the show before changing them. If several stay visible during the show, check which box sits in front and the order of their exit effects.
A timer on one slide also needs a separate plan if you want to change slides during the activity. These shapes belong to their slide; this procedure doesn't create a floating clock that follows the whole presentation.
If the effects won't run even in a fresh test slide, send a small sample file and your PowerPoint version to Microsoft Support or the IT team at work. Use a small example containing just the timer, without any private material.
The Short Version
Animate a rectangle with Fly In from the left and a set duration for a simple bar. For numbers, stack 5 through 1 and make them disappear with one-second delays, starting the later effects After Previous. Test in slide show view.
Checked November 13, 2026.
 If you have any business, I can build it online