A Teams desktop app that's stuck reconnecting often needs a full quit and restart. A Sign in banner means you need to verify your account again; missing chats and a microphone that won't work need different checks.
Read the message on screen before resetting Teams. If it's stuck reconnecting, quit and reopen it. If several colleagues have the same problem, ask your administrator to check service health before changing your computer.
In this guide
1. Finish a sign-in request before changing settings
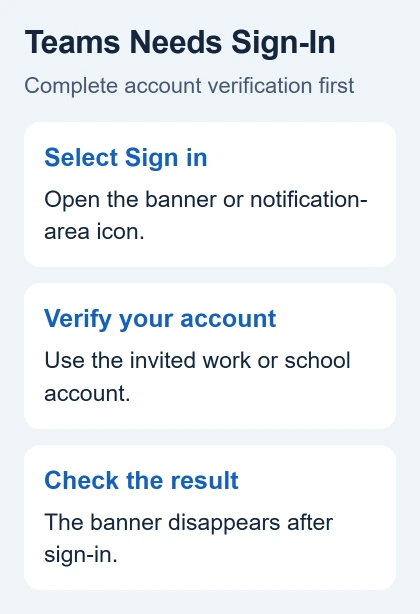
A Sign in banner means Teams needs to verify your access again. Chats, calls and access to meetings can be interrupted until you finish signing in. Select the banner or Sign in button and complete the account prompts.
Use the work or school address invited to that organization. Approve any verification request you started, such as a code or an authenticator prompt.
A personal account with a similar address doesn't automatically belong to your employer's Teams organization.
If the sign-in window doesn't appear on Windows, check the Teams icon in the notification area near the clock. A badge can indicate a pending sign-in. Select it to open the request, or quit Teams there and reopen it.
Microsoft's access-restoration steps explain why the banner can follow a required network change or a security check. If your organization requires a VPN, connect to it first.
After verification, the banner should disappear. If it immediately returns, send IT the exact wording and whether you're on the required network. Repeatedly resetting the app won't change an account access policy.
2. Quit the app and check whether the connection works
Close the Teams window, then quit the app itself. On Windows, right-click its icon in the notification area and choose Quit. On a Mac, select Teams and press Command+Q, or use Quit from its Dock icon.
Open Teams again and repeat the failed task. A restored connection and a message that sends successfully tell you the restart helped. If the app is still reconnecting, open a normal website in your browser.
If websites also fail, work on the internet connection first. If sites load but Teams alone fails, keep the repair focused on Teams. Check whether another person on the same network can use it before restarting shared network equipment.
On a managed connection, ask IT whether Teams is allowed through the network. Don't disable your company's firewall or security software as a trial. Give the administrator the time the failure began and any visible error code.
3. Compare the app with Teams in a browser
Open Teams on the web using a supported browser, then enter the account used in the app. Try the same chat or meeting rather than comparing unrelated accounts or organizations.
If the browser works, use it to continue your work while repairing the desktop client. Check that app and its saved settings next. If both versions fail, an account, network or service problem still needs attention.
Sign in to the web app before comparing it with the desktop app. Reaching the public landing page isn't enough. Check that you're in the same organization and account, then try the chat or meeting that failed.
For a web-only failure, try temporarily disabling your browser's ad blocker for Teams, then reload it. Re-enable it if that makes no difference. A desktop-app reset won't repair a browser extension that is interfering with the site.
I'd use the working browser version for an urgent meeting before doing a deeper repair. That lets you join the meeting and leave the app repair until afterward.
4. Treat missing messages and call devices separately
Missing chats, unloaded history, a missing team and incorrect unread counts aren't good reasons to empty the cache. Clearing it won't fix those cases, and it removes logs that support may need to work out what went wrong.
For messages that aren't loading, select Refresh if Teams offers that link. Otherwise, restart Teams, check the connection and compare that chat in the browser. Note whether the whole conversation is missing or just recent messages.
If a team is missing in both places, check the account and organization you're viewing. Have the team owner or your administrator confirm membership rather than reinstalling Teams repeatedly.
They can confirm team access that a repair on your computer can't change.
A meeting that joins successfully but has no sound needs the Teams microphone and device checks. They identify which microphone Teams selected and whether Windows permits access.
For a black preview or unavailable camera, use the separate Teams camera checks. Clearing chat data won't give Teams camera access if it's blocked in system settings.
5. Reset the Windows app only for a local client problem
Use a reset when the desktop client itself remains broken after the simpler checks, especially when the web version works. The current cache instructions distinguish new Teams from classic Teams.
On Windows 11, open Settings > Apps > Installed apps. Find Microsoft Teams, open its three-dot menu and choose Advanced options. In the Reset section, select Reset, then reopen Teams.
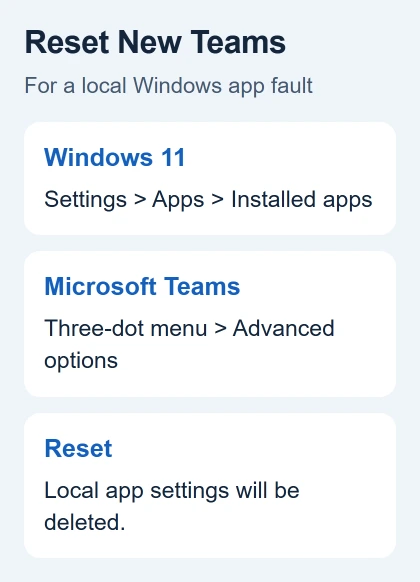
On Windows 10, find Teams under Settings > Apps > Apps & features, select it and open Advanced options when available. Use Reset there. If that app entry has no advanced controls, follow the file method next.
A reset deletes the app data saved on your computer, including personalization settings. Have your sign-in details and verification method ready first. Afterward, the first launch may take longer while Teams rebuilds its local files.
For new Teams on Windows, the alternative is to quit Teams, press Windows+R, and open this folder:
%userprofile%\appdata\local\Packages\MSTeams_8wekyb3d8bbwe\LocalCache\Microsoft\MSTeamsDelete the contents of that specific folder, then restart Teams. Don't substitute the older %appdata%\Microsoft\Teams folder, which belongs to classic Teams.
If the new folder isn't present, check the installed client before deleting anything.
6. Keep a Mac repair specific to the installed client
New Teams on macOS stores its local data differently from classic Teams. Quit the app before using a cache procedure. An old instruction for Library/Application Support/Microsoft/Teams applies to the classic client.
For new Teams, quit the app, open Finder > Applications > Utilities > Terminal, then run each command separately and press Return:
rm -rf ~/Library/Group\ Containers/UBF8T346G9.com.microsoft.teams
rm -rf ~/Library/Containers/com.microsoft.teams2
These folders belong to new Teams in the cache instructions. Keep the paths exactly as written; the commands remove those local app containers. Reopen Teams and allow extra time for it to rebuild its data.
If you need administrator help on a work Mac, tell IT your app version and whether Teams works in the browser. Ask them to repair or reinstall the approved Teams client.
When Teams still won't work
Send your help desk the error text or sign-in status code, app version, operating system, time of failure and whether Teams web works with the same account. For widespread failures, ask them to check Microsoft 365 service health.
For personal Teams, use Help in the app or Microsoft Support's Teams troubleshooting pages. Describe whether sign-in, connection, one conversation or a meeting device is failing.
Support can use that description to pick a repair; Teams is broken leaves them guessing.
The Short Version
Complete sign-in, quit and reopen Teams, then compare that account in Teams web. Handle sound and camera failures separately. Save a new-Teams reset for a local client fault; missing chats and unread counts need their own checks.
Checked November 10, 2026.