Microsoft Word add-ins install through Home > Add-ins or File > Get Add-ins in current Word for Windows. Check the entry's publisher and terms, then select Add. Reopen installed items from My Add-ins.
This procedure uses Word on Windows. One company can offer a browser extension, desktop writing assistant, and Office add-in with different installation methods. Check which product you're installing before changing Word's settings.
In this guide
Find the add-in through Word's own controls
Open Word and a document you can use for a small trial. Select Home > Add-ins. File > Get Add-ins is another route in current versions, so look there if the Home ribbon doesn't show the button.
Select More Add-ins to explore the available entries. The Office Add-ins dialog can contain a Store tab for browsing and a My Add-ins tab for items already linked to your account.

Older layouts can put My Add-ins on the Insert tab. Use the label in the version you're running instead of repeatedly searching Home for an absent button. The goal is to reach your Office add-in list.
On a managed computer, ask its administrator whether self-installation is allowed. The organization's settings can make the store unavailable, even with Word otherwise working normally.
Check the publisher, then install one add-in
Open the entry you want and read its details. Check who published it rather than relying on its name, then review the supported apps, permissions, and any separate account or subscription requirement.
Select Add and follow that entry's prompts. Installing the add-in doesn't necessarily create an account with its developer or pay for a separate service. Check those parts of setup separately.
Microsoft's Office add-in instructions describe the Home and File routes. I'd check one add-in's result before installing several together. That keeps its controls and any new behavior easy to recognize.
Use a short sample rather than confidential client material for the first trial. Some add-ins send content to their own service to perform their job. The publisher's permissions and privacy terms should match what you're willing to share.
For a writing tool that changed its delivery method, the Grammarly Word replacement guide explains that specific transition. Repeatedly reinstalling an old Office component won't turn it into its developer's newer desktop product.
Reopen an installed add-in and check its account
Return to Home > Add-ins > More Add-ins > My Add-ins. Select the item to open it. On a layout with Insert > My Add-ins, open that list and double-click the intended entry instead.
If the item is missing, use Refresh in the Office Add-ins dialog. Also check that the account you're signed into in Word has access to it. A work account and personal account can have different available add-ins.
Once its pane opens, follow the developer's sign-in or setup prompts. If you see a sign-in request, Word has opened the add-in successfully. The next step is to finish setting up your account with its developer.
Try one feature on the sample document and inspect the result. If it inserts text, adds a citation, or changes formatting, check the actual document as well as the pane's success message. Save the useful result before closing Word.
When the pane reports a service or subscription problem, use the developer's support link in the add-in's details. Include the exact message and Word version. I'd check that account before reinstalling Word.
Remove a store add-in without deleting the document
Open My Add-ins using the same route. Right-click the unwanted item and choose Remove. Check that you've selected the add-in, rather than a document or an unrelated installed application.
Reopen the list to confirm that the entry is gone. Removing it takes it out of your available Office add-ins. Don't assume it also removes content that the add-in previously inserted into your document; inspect that content separately.
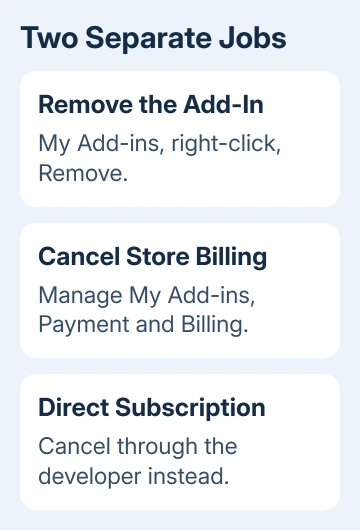
If the add-in has a paid subscription, review its billing as a separate task. For subscriptions bought through the Microsoft 365 Store, open My Add-ins, select the app, then choose Manage My Add-ins.
Under Payment and Billing, select Cancel Subscription and follow OK, then Continue. Confirm the cancellation message. For a subscription bought directly from the developer, use that developer's billing controls instead.
Don't treat a vanished ribbon button as evidence that payment has stopped. Keep the cancellation confirmation with your account records so you can check the next charge against the actual cancellation date.
Check a desktop add-in that isn't in My Add-ins
Some older desktop integrations use a different kind of add-in, such as a COM add-in or a template. COM lets desktop software work with Windows apps. Those components don't necessarily appear beside Office Store entries.
Open File > Options > Add-ins in Windows Word. Note the item's name, publisher, location, and category. An inactive entry is present but not loaded; a disabled entry needs a different check.
Word can disable a component after crashes. Look for a newer version before another attempt. For an Acrobat startup error on Mac, the Word run-time error 53 guide addresses that separate integration.
Security controls use File > Options > Trust Center > Trust Center Settings > Add-ins. Your organization can control them. Leave its protection enabled and ask IT to review a blocked component by name.
If you need help, send the developer the add-in name, Word version, operating system, and exact failure. Say whether the item is missing, disabled, unable to sign in, or crashing Word. Those cases need different repairs.
The Short Version
Install a verified entry through Word, then open it from My Add-ins. Refresh a missing list and check the account. Removing the component doesn't cancel its subscription. Older desktop integrations can use another add-in type.
Checked November 16, 2026.