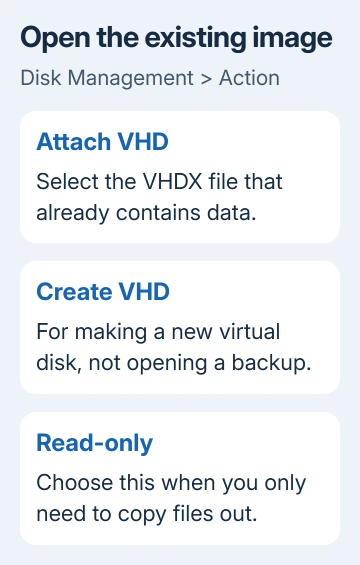
Attach an existing VHDX file in Windows 10 through Disk Management > Action > Attach VHD. Its storage areas, called volumes, can appear in File Explorer if Windows can read them. Create VHD makes a new disk.
If Windows asks to initialize or format a disk that should contain files, stop there. Attaching the image and creating a new usable disk are different jobs.
In this guide
Choose the existing image and protect its contents
Find the .vhdx file in File Explorer and confirm its location and name. A VHDX is a file containing a virtual disk, often used by a virtual machine or backup tool. Mounting makes its disk contents accessible to Windows.
Close the virtual machine or program using that disk so two programs won't change it at once. For an image that's your only backup, make a separate copy before doing anything that could change its contents.
The steps apply to existing .vhd files as well as .vhdx files. They also apply in Windows 11's Disk Management. What matters is what's inside the file and whether it's usable, not just how the file is named.
A disk from Linux or another system may use a filesystem Windows can't read. The filesystem determines how files are organized. Attaching that disk won't necessarily let you browse it in File Explorer. Don't format it to gain access.
Attach the VHDX through Disk Management
Use an account with administrator access. Open Disk Management from Start's right-click menu, then approve an administrator prompt if Windows asks. Another route is Windows + R, type diskmgmt.msc, and press Enter.
Open Action > Attach VHD. Choose Browse, select the existing .vhdx file, and confirm. Back in the Attach Virtual Hard Disk dialog, check that the path is the file you intended to open.
Choose Read-only if you only need to inspect or copy files out of the image. Confirm with OK. Windows won't be able to change the disk through this connection. This setting doesn't repair the image.
Read-only access is the choice I'd make for recovering a few documents from an old Windows disk image. It lets you copy what you need without changing the files inside the image.
The virtual disk instructions describe the attachment process. When it's attached, Disk Management lists the virtual disk alongside the computer's physical disks.
Find its volume in File Explorer
Look at the newly attached disk in Disk Management. Check that its size and volumes match the image you chose. An existing readable volume with a drive letter should be available through File Explorer > This PC.
Open that drive and check for the folders you expected. A Windows system image can have several partitions, including small system partitions that aren't the place to look for personal documents.
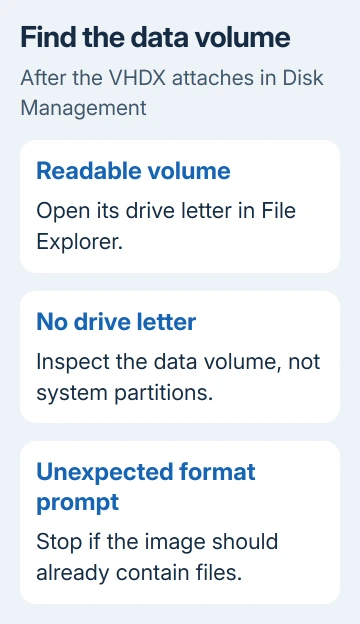
If that data volume has no letter, right-click that volume and look for Change Drive Letter and Paths. When available, select Add, pick a free letter from the list, then confirm. Use the data volume, not a recovery or system partition.
For help reading the layout, the Disk Management guide explains how disks and volumes are shown. If the letter control is unavailable, keep the volume's status and error for the next check.
Copy the files you want into a destination folder outside the mounted image. Open a copied file from that destination to confirm it works. Leaving a document inside the mounted image doesn't give you a separate saved copy.
Use DiskPart if the graphical attachment fails
For a known existing image, DiskPart offers another attachment route without requiring the Hyper-V PowerShell module. Open Command Prompt as administrator, then enter these commands, replacing the example path with your actual file:
diskpart
select vdisk file="C:\Images\Backup.vhdx"
attach vdisk readonly
exit
The select vdisk command chooses the image file. attach vdisk readonly makes its disk available without allowing changes to it. The path needs quotation marks, particularly when a folder or filename contains spaces.
Read the result after each command. If selection fails, check the path and access to that file before continuing. Save the exact attachment error. A file that's already in use isn't the same problem as an image Windows can't read.
These commands attach an existing disk. They don't create a partition, format a filesystem or unlock encrypted data. If the result still has no readable volume, attaching it again won't make Windows able to read that filesystem.
Recognize cases that need the original program
A backup may need its original application's restore tool. Check that tool's recovery instructions when the mounted image lacks the ordinary files you expected. The VHDX filename alone won't tell you how the whole backup is put together.
If Windows reports RAW, Unallocated or Not Initialized for an image that should hold data, don't choose the new-disk setup options. Check the original backup, image copy and creation software before making changes.
A Linux virtual disk, including a WSL disk, needs a way to open it that supports Linux filesystems. If a WSL disk or installation is missing, use the WSL disk-error guide before altering its image.
Unlock an encrypted volume normally, using a key you're authorized to use. Attaching the image doesn't remove the encryption. If a required parent disk or backup component is missing, ask the image's creator for the complete set.
Detach the disk when the copy is finished
Close files and applications using the mounted disk. Return to Disk Management, right-click the virtual disk's label area on the left, and choose Detach VHD. Check that you've selected that virtual disk, then confirm.
Detaching removes its mounted drives from Windows. It doesn't erase the VHDX file or its contents. Keep the image until you've verified your copied files and decided how the backup should be stored.
Send repeated attachment errors to the backup vendor or IT, with the image's origin and size. If the damaged image is your only copy of valuable files, ask a data-recovery service to assess it before attempting a repair.
The Short Version
Attach the existing VHDX, using read-only access for copying. Open its data volume and save wanted files elsewhere. Stop at a format or initialization prompt for an image that should hold files. Detach it when finished.
Checked November 12, 2026.