
Chrome website notifications stop when you block the website that's sending them. Open Chrome's Notifications settings, block that site, then change the default if you also want websites to stop asking for access.
These controls apply to Chrome on Windows and Mac. A notification banner, a permission request inside Chrome and a new pop-up window use different settings. Match what you're seeing to the right control first.
Block the website that's already sending alerts
Open Chrome's three-dot menu and choose Settings > Privacy and security > Site settings > Notifications. The address chrome://settings/content/notifications opens that settings page directly when entered in Chrome's address bar.
Look under Allowed to send notifications for the website shown on the unwanted alert. Open its menu and choose Block. That changes the website's permission without turning off reminders from every other site you use.
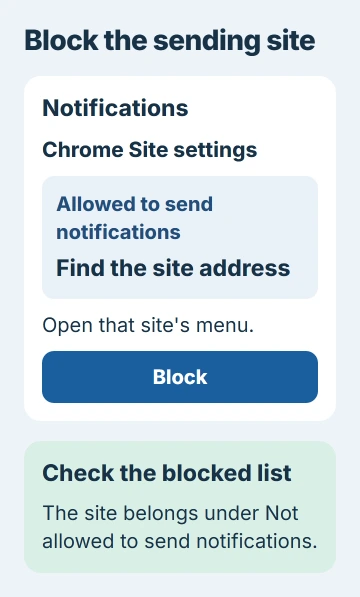
Google explains the allowed and blocked lists in its desktop notification controls. You can also use Add beside Not allowed to send notifications and enter the site's address.
Check the website address on the notification, rather than trusting the company name in its message. A banner can claim to be a security warning even when an unrelated website sent it.
Don't use the alert's download or repair button. Open Chrome's settings yourself, change the permission, then dismiss the old notification and watch for new alerts from that address.
If you have several Chrome profiles, check the profile that received the alert. A site's permission in one browsing profile doesn't tell you what another profile has allowed.
Stop new websites asking for permission
On the same Notifications page, find Default behavior. Select Don't allow sites to send notifications when you don't want new websites asking to notify you.
Review the sites you've already allowed as a separate step from changing the default. Look for unwanted sites you approved earlier.
If you still want occasional website reminders, keep requests allowed and choose Use quieter messaging where offered. That reduces the interruption from permission requests, but it doesn't mean every notification is blocked.
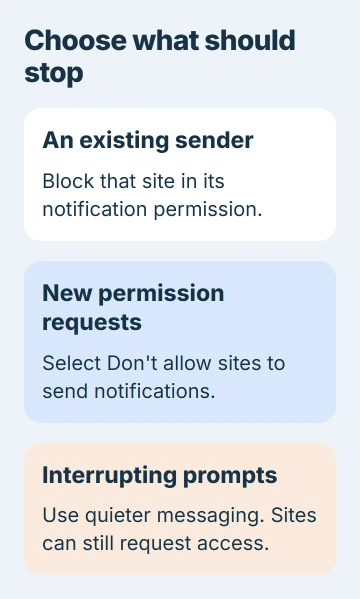
With quieter messaging, you may see a small permission indicator instead of an interrupting request. Choose the full blocking option if you want to stop requests, rather than just make them less prominent.
I'd block individual senders first if you depend on calendar or email alerts. It's easier to keep useful reminders that way than to silence everything and later work out which ones you need back.
Silence Chrome at the Windows notification setting
To silence every Chrome alert on your computer, use Windows' app notification controls. That affects the browser's notifications more broadly than blocking one website in Chrome.
In Windows 11, open Settings > System > Notifications. Find Google Chrome in the app list and turn its notifications off. If more than one relevant Chrome entry appears, check which one belongs to the alerts you're receiving.
Windows 10 keeps these controls under Settings > System > Notifications & actions. Look through Get notifications from these senders for Chrome and switch it off there.
The Windows notification settings also let you change banners and sounds separately. Use those choices when you want silent notifications to remain available in Notification Center.
Do Not Disturb suits a temporary quiet period. Turning off the app's notification switch is the more direct choice when Chrome should stay silent during normal use too.
If Chrome isn't in the Windows list, work through its website permission lists first. Don't turn off unrelated app entries simply because they happen to sit near the browser's name.
Turn off the browser's notifications on a Mac
Open System Settings > Notifications, select the relevant Chrome entry and disable Allow notifications. The exact application names shown depend on what has requested notification access on that Mac.
This changes how your Mac shows those alerts. Check Chrome's site permissions too if the problem began after you let an unfamiliar website send notifications.
For quiet time across several apps, the Mac notification guide explains the app switches and Focus options. Decide whether you want to silence one app or the whole computer.
If an unfamiliar site appears as its own Mac notification sender, use the unknown website notification checks to identify its source. Safari web apps have a different removal route from Chrome permissions.
Check whether the interruption is a pop-up window
If a website opens a separate tab or window, check Pop-ups and redirects. Open Settings > Privacy and security > Site settings > Pop-ups and redirects and review its allowed websites.
For a site you previously allowed, use its menu to block that exception. The Chrome pop-up permission guide explains how these window permissions work and how to reverse a site exception.
An ad inside the page is different again. Turning off desktop notifications won't remove an open website's content. Close the tab if you don't want to keep using it.
Don't reinstall Chrome just because one unwanted site keeps sending alerts. Check the sender and its permission first so you can deal with that site without discarding your browser setup.
When an alert survives the changes
Check the sender on a fresh alert; an old one may still be stored in Notification Center. See whether it names Chrome, another browser or a separate app, then change that sender's settings.
If a setting is locked and marked as managed, ask the organization that manages Chrome for help. Share the sender address, Chrome profile and the exact setting you can't change. Remove private message contents first.
The Short Version
Block the site in Chrome's Notifications settings and review the default for new requests. Windows or Mac controls can silence the browser broadly. New tabs and pop-up windows need their separate permission page.
Checked November 5, 2026.

Isaac Smith is the founder and editor of PC Glance, a website that covers computers, laptops, and technology. He is a tech enthusiast and a computer geek who loves to share his insights and help his readers make smart choices when buying tech gadgets or laptops. He is always curious and updated about the latest tech trends.