

Download Zoom Workplace for Mac from Zoom's Download Center and choose the installer for your Mac's chip. Then open the downloaded .pkg file and finish the installer; saving the file alone doesn't install Zoom.
Before downloading, check your Mac's chip and macOS version. Once Zoom opens, check camera and microphone access too, so those permissions are ready before your meeting.
Identify your Mac before downloading
Open Apple menu > About This Mac and check Chip or Processor, along with the macOS version. That label tells you which Mac installer to choose.
For an Apple M-series chip, choose the Apple Silicon download. For an Intel processor, choose Intel. Apple's Mac chip identification page explains the labels in About This Mac.
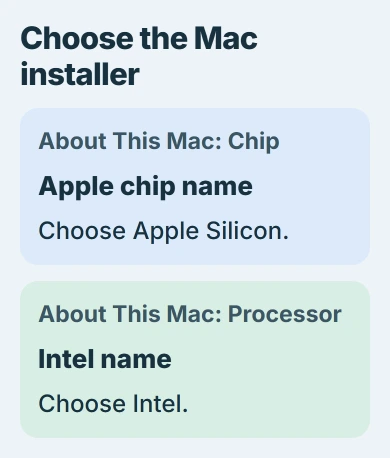
Don't choose by the year or the MacBook name alone. Models from a transition year can have different processors. Use the label on the Mac that needs Zoom.
The current desktop system requirements list macOS 10.15 or later. Older macOS 10.13 and 10.14 systems lost support with the Zoom Workplace 7.0.0 release.
If your macOS version is older, check whether your Mac supports an upgrade before continuing. Choosing a different chip download won't change that requirement. On a managed Mac, ask your administrator about the upgrade.
Choose Zoom Workplace in the Download Center
Open the official Mac download page in your browser. Find Zoom Workplace for Mac, then choose the Apple Silicon or Intel download that matches About This Mac.
This is the desktop app you use for meetings. Zoom Rooms is a separate conference-room product, and the Outlook add-in doesn't replace the Mac meeting app.
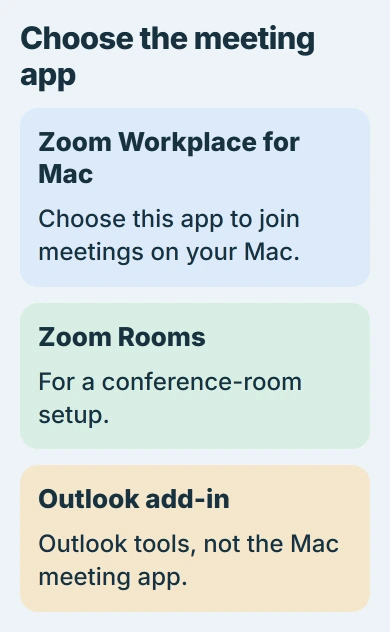
Let the download complete before opening its package. If your browser asks whether it may download the file, approve that request on this official page. A partly downloaded file isn't ready to open.
For a Windows computer instead, follow the Windows Zoom download choices. Its x64 and ARM64 options use different names from the Mac choices.
I'd go straight to the official page before a call. It puts the product and chip choices together, so you don't have to work out which package a download mirror has given you.
Open the package and finish the installer
Open your browser's downloads list and select the completed Zoom installer. The Mac package is named zoomusInstallerFull.pkg. It normally lands in Downloads unless you chose another location.
Follow the Mac installation instructions in macOS Installer:
- Open the package and choose Continue.
- Choose Install for all users of this computer or Install only for me when the destination choices appear.
- Select Continue, then Install. Use Change Install Location first to choose a different available destination.
- Enter the administrator credentials if requested, choose Install Software, and wait for completion.
- Choose Close, then open Zoom Workplace from Applications.
Installing for all users needs administrator credentials. On your employer's or school's Mac, follow its software approval process if you don't have those details. Another download won't give you permission to install it.
If Installer requests access to Downloads, allow it to read the package you just chose. That lets Installer read the saved file; it doesn't give Zoom access to your camera or microphone.
Chrome uses a different Mac installation method, so don't look for an app to drag out of this package. The Chrome installation steps use a disk image; Zoom's package runs through Installer.
Grant the camera and microphone access you need
Start Zoom Workplace. For a managed account, use your organization's usual sign-in. When you first use the camera or microphone, allow the requested access if you want those features in your meeting.
If you previously denied access, open System Settings > Privacy & Security > Camera and enable Zoom. Return to Privacy & Security > Microphone and do the same for your microphone.
The Mac permissions reference lists each feature separately. If you're asked to quit and reopen Zoom after a change, do that so the new permission takes effect.
For screen sharing, check Screen & System Audio Recording, whose wording can vary by macOS version. That permission lets the app share screen content; camera permission by itself doesn't grant screen sharing.
Grant access for the features you plan to use. You don't need remote control for ordinary video and audio; it has a separate Accessibility permission.
On older macOS, these controls are inside System Preferences > Security & Privacy > Privacy. Choose the relevant category there rather than looking for the newer System Settings sidebar.
When your meeting moves to an iPhone, review its mobile app and participant protections separately from these Mac permissions.
Test audio in the installed app
After signing in, click your profile picture, select Settings, then Audio. Under Speaker, choose Test speaker. Select the output you'll use for the meeting and check that you hear the test tone.
Under Microphone, choose Test microphone, speak briefly, then listen to the replay. The audio test instructions explain switching devices when the selected microphone or speaker isn't the one you want.
Test with the headset you'll use in the meeting. Hearing the test through your Mac's speakers doesn't check that headset, and allowing microphone access won't unmute you in a meeting.
Open the invitation when it's time to join and allow the browser to open the installed app if prompted. Check that the meeting name and organizer match the invitation before entering the call.
When setup stops before the app opens
Write down the message exactly and note when it appears: during the download, package installation or Zoom's first launch. Send support those details, your chip and your macOS version.
For a security prompt, confirm the package came from the official page and use the approval options offered in Privacy & Security. Leave broader security controls in place rather than turning off protection to force an installer through.
On a managed Mac, ask IT to approve or install the supported package. If your macOS version isn't supported, join the meeting from a supported device while you arrange an upgrade.
The Short Version
Check About This Mac, choose the matching Zoom Workplace Mac download, then run the package to completion. Open the installed app, grant the needed permissions and test your selected microphone and speakers.
Checked November 5, 2026.

Isaac Smith is the founder and editor of PC Glance, a website that covers computers, laptops, and technology. He is a tech enthusiast and a computer geek who loves to share his insights and help his readers make smart choices when buying tech gadgets or laptops. He is always curious and updated about the latest tech trends.