Error 0x8007370d means Windows Update tripped over a damaged label in the component store, the record Windows keeps of each system file and update.
DISM and SFC, the two repair commands built into Windows, didn't clear it for the owners who reported it. Give them one run anyway, then go to a repair install, which leaves your programs and documents where they are.
If that fails too, the damage sits in a single registry file called COMPONENTS, and someone has to fix it by hand, starting from your PC's own copy. The steps get more involved as you go.
In this guide
What is 0x8007370d pointing at?
Microsoft's own table of update errors lists 0x8007370D as ERROR_SXS_IDENTITY_PARSE_ERROR: an identity string is malformed. That string is the label Windows gives each component, spelling out its version, language and processor type.
The labels live in C:\Windows\System32\config\COMPONENTS, a registry file Windows reads whenever it installs updates or repairs itself. One owner's scan shows how small the damage can be.
In a keyboard component's label, the word neutral had become neut2al, and that one wrong character was enough to stop the PC from updating.
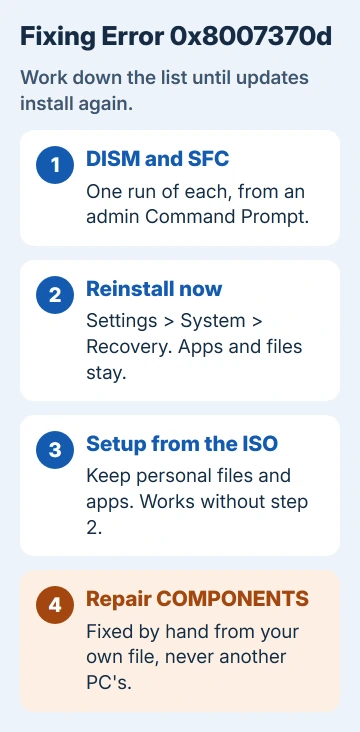
DISM checks this registry data too and may replace a bad entry, which is why it gets the first go. It didn't help the owner behind the long forum thread on this code, though, and what finally worked for them comes later in this list.
1. Give DISM and SFC one run
Type Command Prompt in Start, then right-click it in the search results and choose Run as administrator. Run these two commands in turn, and start the second only after the first has finished:
DISM.exe /Online /Cleanup-image /Restorehealth
sfc /scannow
DISM downloads clean copies of damaged files from Windows Update, so keep the PC connected until it's done. Expect each command to run for several minutes; DISM keeps a log of what it did in C:\Windows\Logs\CBS\CBS.log.
When DISM reports "The restore operation completed successfully" and SFC has finished, restart and run the update again. If you get 0x8007370d again, or DISM stops at 0x800f081f because it couldn't find the files it needed, go to step 2.
This code is a cousin of the component store errors these two commands often clear, so a few minutes spent on them can save you a repair install.
2. Reinstall Windows 11 from Settings
Open Settings > System > Recovery, find the Fix problems using Windows Update item and select Reinstall now. In the window that opens, choose whether Windows may restart on its own 15 minutes after the install, then select OK.
Windows Update then fetches a fresh copy of the release you're running and lays it over the top. Your programs, documents and settings stay put, so just leave the PC switched on, with Wi-Fi or Ethernet connected, until it's finished.
The same repair gets past other stubborn codes such as error 0x800f0983, because it mends system files and components in a single pass.
You might not see the option on a computer your employer or school manages, or on one that never got the February 2024 optional update. Step 3 does the same job without it.
If the reinstall rolls back, or the same update still fails afterward, I'd give step 3 one try before you move on to step 4.
That's where the thread's asker ended up: an earlier repair install of theirs had trouble reinstalling the current update, and only the hand repair got updates moving again.
3. Run Setup from the Windows 11 download
The Windows 11 download page gives you a full copy of Windows to install over your current one, and it works when Reinstall now is missing.
On that page, the section you want is Download Windows 11 Disk Image (ISO): choose Windows 11 (multi-edition ISO for x64 devices) from the menu, select Confirm, pick your language, confirm again and take the 64-bit download.
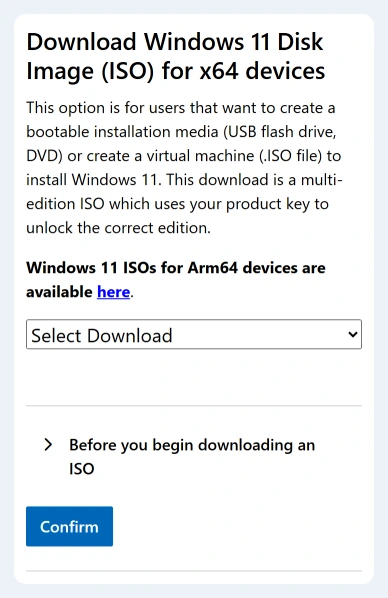
Right-click the ISO you downloaded and choose Mount. A new drive appears in File Explorer; open it and start setup.exe.
When setup asks, select Change what to keep, pick Keep personal files and apps, then select Install. Expect several restarts before you're back at the desktop.
Two owners in that thread got up to date this way. One used the ISO after step 4's hand repair; the other ran the Installation Assistant from the same page once TPM, the security feature Windows 11 needs, was switched on in the BIOS.
The Installation Assistant needs 9 GB of free space, Windows 10 version 2004 or newer already installed, and an x64 processor, not Arm.
Windows 10 has no Reinstall now button, so on Windows 10 this is your repair: run the same Setup steps from Windows 10 installation media.
4. Have your COMPONENTS file repaired
When no repair install will finish, the file itself needs fixing. Sysnative's free ComponentsScanner reads C:\Windows\System32\config\COMPONENTS and lists what's broken, like that neut2al entry.
In its report, anything listed under Corrupt Key Names or Corrupt Value Data is damage. If the Repair Log ends with No possible repairs, the scanner can't fix it itself, and someone has to rebuild those entries by hand.
That's what fixed it for the asker and a second owner on Microsoft's Q&A forum. Each one zipped and shared their own COMPONENTS file, a volunteer corrected the broken entries, and they swapped the repaired copy in.
To swap it, rename the old file in C:\Windows\System32\config to COMPONENTS.OLD, copy the repaired COMPONENTS file into that folder and restart. The asker later reported that every waiting update installed, and DISM worked as well.
Never use a COMPONENTS file made for another PC; each repair starts from that PC's own copy. When a later visitor asked for the same download, the volunteer's answer was "You need to share your COMPONENTS file first."
After the swap, install every waiting update before you decide whether DISM is fixed. Right after the repair, the asker's DISM still stopped at 0x800f081f; once the updates were in, it ran cleanly.
To get a repair made, post a new question in the Windows Update section of Microsoft Q&A with your ComponentsScanner report, and say that DISM and a repair install both fail with 0x8007370d.
If nothing repairs it
The next step is Reset this PC. It sits on the same Recovery page, and with Keep my files your documents stay while your apps and settings go, so copy anything you can't replace to an external drive or OneDrive first.
For hands-on help, the Get Help app connects you with a Microsoft support agent. Give them the code, say that DISM and a repair install both fail, and mention what ComponentsScanner found, so the call skips the basic checks.
The Short Version
0x8007370d is a damaged label in the COMPONENTS file Windows Update depends on. Run DISM and SFC once, then try Reinstall now under Settings > System > Recovery, or run Setup from a mounted Windows 11 ISO, keeping your files and apps.
If none of that finishes, have your own COMPONENTS file repaired by hand, never someone else's, then install the waiting updates and run DISM again.
Checked November 19, 2026.