Windows Update error 0x800f081f means Windows couldn't find a file or package source it needed. Repair the Windows component store with DISM /Online /Cleanup-Image /RestoreHealth first, then run System File Checker after DISM succeeds.
The code can also appear inside DISM or while adding .NET Framework 3.5. An update failure needs a Windows repair; a DISM failure needs a usable repair source. Repeating the update won't supply that missing content.
In this guide
1. Record where the error appears
Check Settings > Windows Update > Update history on Windows 11. On Windows 10, open Settings > Update & Security > Windows Update > View update history. Write down both the complete error and the update's KB identifier.
To record your build and Windows version, open Run with Windows+R, enter winver, then press Enter. Save those version details alongside the error message. The same code can appear for different updates.
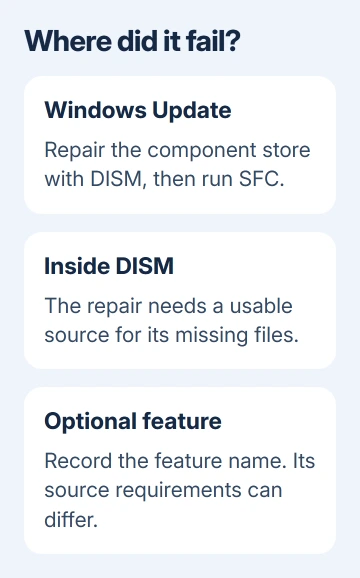
Microsoft lists the code as a missing package or file source in its Windows Update error reference. The repair needs to address that missing content, not just dismiss the update notification.
If the error occurs only when enabling an optional feature, note the feature's name. The Windows feature-source guide covers the separate source and policy questions involved in adding .NET 3.5.
For an employer-managed or school-managed computer, give IT the KB number, build and error location before changing update policies. A managed repair source may need files or permissions that only the administrator can supply.
2. Repair the component store before checking system files
The component store holds files Windows uses to maintain and repair itself. DISM repairs that store; System File Checker examines Windows' protected system files. Run them in that order so the second tool has a repaired source to use.
On Windows 11, find Terminal in Start's search results. Its right-click menu offers Run as administrator. On Windows 10, search for Command Prompt, then select Run as administrator. Approve the permission prompt.
Enter this command:
DISM.exe /Online /Cleanup-Image /RestoreHealthLeave your internet connection active until DISM finishes repairing Windows. Without a custom source in the command, DISM normally uses the PC's configured repair source. Windows Update is the default.
If DISM reports that the operation completed successfully, run:
sfc /scannowWait for the verification to finish. The System File Checker procedure places it after successful DISM repair. Record whether it repaired files or found no integrity violations.
After restarting Windows, retry that failed update. If it installs and Update history records a successful installation, the original update problem is resolved. If DISM returned 0x800f081f instead, follow the next section before retrying.
3. When DISM also can't find its source
A DISM failure with this code means the repair couldn't get the files it needed. The command running to completion isn't enough; check its final result rather than treating the percentage reaching the end as success.
Confirm that the PC can reach its configured update source. On a managed PC, ask IT whether repairs are directed to an internal source and whether that source has the required files for this Windows build.
A custom repair source must contain the right Windows files. Its updates and language files must match what the repair needs. A folder can exist but still lack the newer files or language content Windows requires.
The repair-source requirements explain those conditions. A random Windows folder or an older installation image isn't a dependable substitute.
For an administrator who already has a matching Windows image with the required updates mounted at C:\RepairSource, this command points DISM to its Windows folder:
DISM /Online /Cleanup-Image /RestoreHealth /Source:C:\RepairSource\WindowsThat path is an example, not a folder Windows creates for you. Replace it with the actual mounted image's Windows folder. Simply mounting an ISO as a drive doesn't create this example path.
Don't add /LimitAccess casually. That switch prevents DISM from using Windows Update as a repair source, so DISM can't turn to that online source for the missing files.
I'd use Windows 11's repair-reinstall option next on a personal PC rather than keep guessing at image paths. For an organization's image, give the administrator DISM's final error and the source details.
4. Reinstall the current Windows 11 version for repair
Save a backup of important work before repairing Windows. Then open Settings > System > Recovery and find Fix problems using Windows Update. Select Reinstall now and confirm the repair.
The repair reinstalls your current Windows version, replacing Windows components while keeping your files, apps and settings. Leave the charger connected and maintain internet access until it finishes.
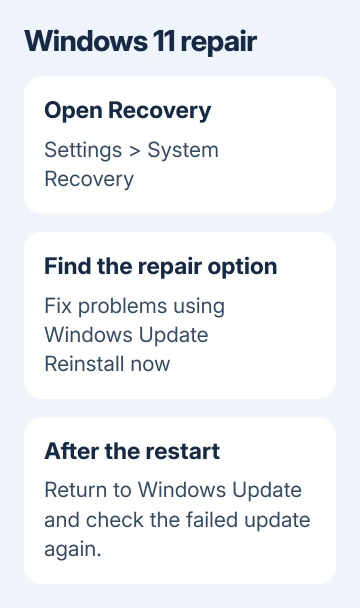
Complete the installation, then restart when asked. Back at the desktop, open Windows Update for a fresh check. Read the result in Update history; repairing Windows doesn't apply every pending update automatically.
Managed PCs may hide this option, and Windows 10 lacks it. Windows 11 requires the 2022 annual release or newer, updated at least through the optional release from February 2024.
5. Use a repair installation or send the logs
When the Settings repair isn't available, use matching Windows installation media from Microsoft. Start setup.exe from inside running Windows for an in-place repair, rather than booting from the USB drive.
At Change what to keep, select Keep personal files and apps. If that choice isn't available, stop and check that the media matches your Windows installation. A clean installation is a different job with different consequences.
For a continuing failure, collect C:\Windows\Logs\DISM\dism.log and C:\Windows\Logs\CBS\CBS.log, the KB number and the build from winver. Ask Microsoft Support or IT to check the missing repair files named in the logs.
If the retry produces another code, use the Windows Update code guide for that result. Check that new code's meaning before repeating the source-missing repair.
The Short Version
Repair with DISM, run SFC after success, then retry the update. If DISM reports missing sources, check the source or use Windows 11's repair reinstall. Keep the KB number, Windows build and logs if repair fails.
Checked November 15, 2026.