An AirPods case lid that won't close can be blocked by an outer cover, misplaced earbuds, or debris. Remove the cover and check the fit first. A cracked lid, bent hinge, or detached lid needs to be checked for damage.
A little movement when the lid is open and a lid that no longer closes are different problems. Check what has actually changed: the way it sits, a new gap, visible damage, or a problem that appeared immediately after a drop.
In this guide
1. Remove the outer cover and check the earbuds
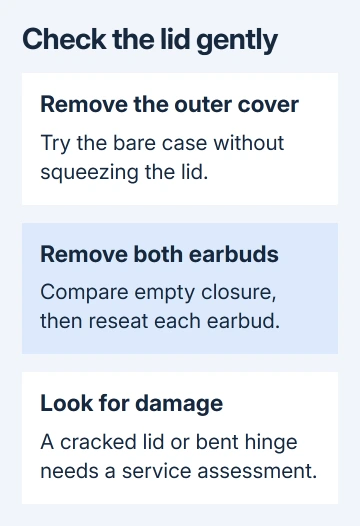
Take off any silicone shell, decorative cover, or separate lid cap. Open and gently close the bare case without squeezing it. A cover sitting out of position can obstruct the lid even when the original case closes normally.
Remove both AirPods and try the empty case. If it closes empty, put each earbud back into its matching well and check whether it sits properly. Check the ear tips on AirPods Pro for anything stopping them from sitting properly.
If it closes correctly without the outer cover, refit that accessory and compare again. A cover that repeatedly blocks closure needs replacing or leaving off. Forcing the lid against it only adds pressure to the hinge.
If one earbud won't settle into its well, remove it and look for an obstruction. Don't assume a charging problem means the hinge is faulty. The separate AirPod charging checks help when one bud stays empty but the case closes normally.
I'd do this bare-case check before considering replacement. It separates an accessory fit problem from damage to the actual charging case without taking it apart.
2. Clean accessible dirt without digging into the hinge
Look around the lid's meeting surfaces and the top of the case for loose dirt. Use a soft, dry, lint-free cloth to wipe surfaces you can reach. Keep cleaning gentle and check whether the lid now closes without pressure.
For the case exterior, a cloth can be slightly dampened with isopropyl alcohol when needed, then let the case dry. Keep liquid out of the ports and openings. The case-cleaning advice isn't a direction to soak the hinge.
Apple describes case cleaning separately from earbud-mesh washing in its AirPods cleaning instructions. Don't transfer mesh-cleaning liquids or scrubbing steps to a case hinge.
If a piece of dirt won't come away with gently cleaning the areas you can reach, stop rather than scraping inside with a pin. A lid still obstructed after the easy checks needs inspection, particularly if the case was crushed or dropped.
3. Treat a cracked lid or bent hinge as damage
Check the closed case from the front and sides. Note whether the lid sits unevenly, a crack opens as it moves, or the hinge has shifted. Photograph that condition for the service request without repeatedly flexing the damaged part.
A Bluetooth reset can't straighten a hinge or reconnect a broken lid. Re-pairing is useful for connection faults, but it isn't the next step when the plastic or metal is visibly damaged.
Don't pry the case open, push a tool through the hinge, or try to bend it back by force. The case contains a battery, and a mechanical repair that damages the enclosure can turn a lid problem into a larger failure.
Ask whether the case needs replacement before trying glue on the broken area. Keep the earbuds: a case fault doesn't automatically require buying a whole new pair.
A damaged case should remain unused until it has been assessed. Report heat, swelling, liquid exposure, or charging damage as well as the lid condition so the service team checks the whole case.
4. Match the replacement case to the AirPods model
For connected AirPods, open Settings > Bluetooth and select their information button. Check the model entry. The model numbers printed on the earbuds and case are useful when the phone can't show them.
Similar-looking cases aren't automatically interchangeable. Identify the AirPods generation and case type before ordering. Standard AirPods 4 and the version with Active Noise Cancellation (ANC) need different cases.
Use the AirPods service page to request an assessment or replacement. Describe a damaged lid or hinge, rather than reporting the case as lost. The case's condition and your coverage affect the service options.
Ask for the case-only estimate, any applicable AppleCare service fee, and the correct replacement for both earbuds. The final price depends on inspection; a listed battery-service price doesn't necessarily apply to accidental hinge damage.
For a missing case rather than a damaged one, our guide to charging AirPods without their case explains the replacement route. The earbuds still need a compatible charging case.
5. Set up the replacement with the correct case controls
Once the compatible replacement arrives, put both earbuds in it, connect it to power, close the lid, and wait 20 minutes. Open it and check whether the status light flashes white. That is the light needed for setup.
For AirPods 1, 2, 3, Pro 1, or Pro 2, if the light isn't flashing white, keep the lid open. Hold its rear setup button for 15 seconds. Look for amber flashes followed by white flashes.
With AirPods 4 or 5, or AirPods Pro 3, tap the case front. Make the first double-tap while the light is on. Make the second during white flashing, then a final double-tap during the faster flashing. Wait for amber, then white.
With the light flashing white, close the lid. On iPhone or iPad, open Settings > Bluetooth. If the AirPods are listed, select their information button and Forget This Device, then confirm; skip this step if they aren't listed.
Open the lid near the iPhone or iPad's Home Screen and use Connect, then Done in the setup animation. If the light never reaches white or the replacement won't pair, return to the service provider with the model details.
The Short Version
Check the bare, empty case, reseat the earbuds, and clean accessible dirt gently. A cracked lid or bent hinge needs service. Match a replacement to the AirPods model, then follow its rear-button or front-tap setup procedure.
Checked November 16, 2026.