Excel can print a colored spreadsheet in black and white because the worksheet has its own print settings. Clear Black and white and Draft quality in Page Setup first. The printer's color setting doesn't replace those choices.
When the print preview has color but the paper doesn't, check the color mode for the selected printer. Use the preview to decide which settings need attention before spending ink on another full report.
In this guide
1. Clear the worksheet's black-and-white print setting
In Excel for Windows, open the problem file and click the sheet tab that loses its colors. These steps use desktop Excel for Microsoft 365, Excel 2024 and Excel 2021. The browser's print window doesn't contain this dialog.
Select Page Layout. Find the Page Setup group and click its small corner launcher. In Page Setup, open the Sheet tab and look under Print.
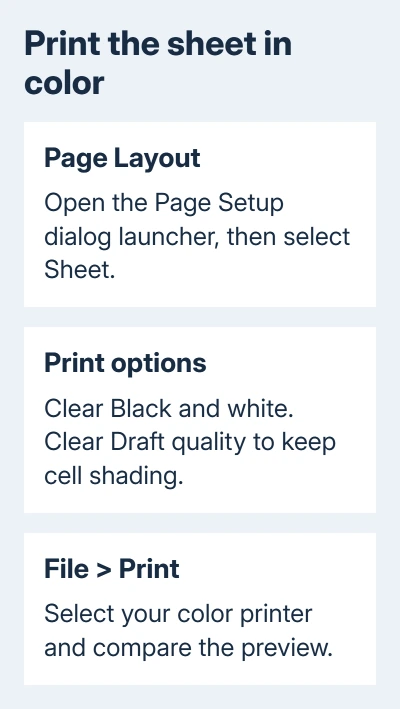
Clear Black and white, then select OK. Open File > Print and compare a cell with a strong fill color and another with colored text. Both should keep their colors when the selected printer supports color output.
An owner confirmed the worksheet fix in a Microsoft forum discussion. Their printer already used color. I'd check the worksheet setting before reinstalling a driver because it changes only that sheet's printing.
Save the workbook after correcting the setting. Close and reopen its print preview to check the result. If shading is still missing, check Draft quality next; if the whole page remains gray, continue to the printer selection.
2. Turn off Draft quality when filled cells disappear
Return to Page Layout > Page Setup > Sheet and clear Draft quality under Print. Confirm with OK, then inspect the same colored cells in File > Print.
Draft quality is useful for a rough printout, but it can remove the shading that carries your spreadsheet's meaning. A report can therefore lose colored bands even though the values remain readable and the printer itself works.
The cell-shading print instructions cover both checkboxes. Complex sheets and charts may cause draft mode to turn on automatically, so check whether it's selected even if you don't remember turning it on.
Look at a cell you've given a fill color, rather than the faint grid between ordinary cells. Those gridlines have a separate print option. For that different symptom, use the printed gridline and border controls.
If only one tab has the problem, compare that tab's Page Setup with a working tab. Check each affected sheet before printing the entire workbook. Each tab needs its own preview check before you print the workbook.
3. Select the color printer and check its properties
Press Ctrl+P and read the name under Printer. Select the color-capable printer you intend to use. A PDF entry, a monochrome printer or a second installation of the same device can have different available options.
Open Printer Properties. Find the driver's color setting and choose color rather than grayscale or black-and-white output. The tab and wording depend on your driver; check the printer model's instructions if the choice isn't obvious.
If cell fills print in color but text stays black, look for Print all text in black or Print Text as Black in the driver's options. Disable it if present. This text setting can stay on even with Color selected.
Confirm the properties and return to the preview. Changing the printer can change the preview and page layout, so recheck both the colors and the number of pages before sending the job.
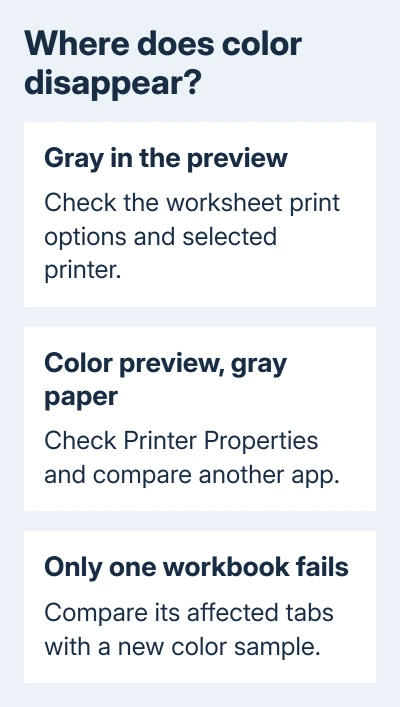
Print one page that shows the problem. Use a page with both colored text and a filled cell, rather than a page whose only color is a small logo. The sample should make missing text color easy to distinguish from missing shading.
If that page prints correctly, use the same printer entry for the full job. If the preview stays gray, check the sheet settings and whether the selected device supports color. A colored preview with gray paper needs another app comparison.
4. Compare another file before changing the printer setup
Create a small temporary workbook with a few words, one colored word and one filled cell. Print a single page through the same printer entry. You'll see whether color fails in every workbook or just the original.
If the new workbook prints correctly, go back to the old file's sheet settings. Check the workbook's settings before removing Excel or buying replacement ink. Check the affected tabs and save their corrected print options.
If the new workbook also loses color, print a simple color document from another application. Keep the printer entry and paper choice unchanged when comparing the apps.
If color works in another app, check Excel's print choices. Color missing across applications needs the printer's color mode, driver or supplies checked. For an HP printer, the color diagnostic and ink checks explain that next branch.
Don't start cartridge cleaning just because one workbook prints gray. Follow your model's manual to produce a color report instead. Workbook settings won't fix missing colors in a report produced by the printer itself.
5. Compare print quality on an older printer setup
If both worksheet checkboxes are cleared and the driver uses color, open Page Setup > Page and inspect Print quality. The resolution is measured in dpi, meaning dots per inch. Available choices depend on the selected printer.
Try 600 dpi if it's offered, then print the same sample page. Several owners in the later replies restored color after changing from 300 to 600 dpi.
Another person already using 600 dpi still had the problem, so don't keep increasing resolution when that comparison fails. Return to the earlier value and give the printer maker your preview result and the two quality settings compared.
When the worksheet itself has lost color
Check the worksheet on screen too. If colors aren't visible there either, high contrast mode may be involved. Don't repaint every cell to compensate for a display setting when the workbook needs its original formatting.
Use the Excel fill and font color checks to compare the Windows theme with a blank workbook before altering existing cells.
For Excel in a browser, use File > Print inside Excel and inspect its preview. The installed Windows app provides the Sheet-tab controls used here. A workbook you're signed into has different print controls from a public web page.
If another app prints color but Excel still fails, use Help > Contact Support, when available. Include your Excel version, file type, affected sheet and whether the preview has color. Attach a short sample with confidential details removed.
For color missing across apps, ask the printer maker about the model's color-mode setting and diagnostic report. Include the exact printer entry selected in Excel and whether the printer's own report contains all its colors.
The Short Version
Clear Black and white and Draft quality on Excel's Sheet tab, then check the selected printer's color mode. Check one printed page against its preview. Separate a single-workbook failure from color missing across apps.
Checked November 17, 2026.
 If you have any business, I can build it online